Free Shipping on Domestic Orders $75+

Dell Streak 7 GSM Module Replacement

Views: 598

View statistics:

Past 24 Hours:
1
Past 7 Days:
11
Past 30 Days:
84
All Time:
598
Comments: 0

No one has left comments on this guide. Will you be first?

Go to guide comments
Completed: 0

No one has marked this guide "completed." Will you be the first?

Favorites: 0

No one has favorited (and subscribed to) this guide. Will you be the first?

Time Required: 30 minutes
Difficulty: Moderate
Dell Streak 7 GSM Module Replacement

Introduction

Go to step 1 ↓

Use this guide to replace the GSM module on your Dell Streak 7. This guide will show you how to remove the old GSM module.

What you need

Tools

    1. Dell Streak 7 GSM Module Replacement, Front Panel Assembly: step 1, image 1 of 1
      • Insert the spudger under the capacitive button panel, and slide the spudger all the way around.

      • You will want to heat up the screen edges with the iOpener to help facilitate removal.

      Ask FixBot

      Add Comment

    2. Dell Streak 7 GSM Module Replacement: step 2, image 1 of 1
      • Remove the button cover by lifting the cover away from the tablet.

      Ask FixBot

      Add Comment

    3. Dell Streak 7 GSM Module Replacement: step 3, image 1 of 1
      • Using the Torx screwdriver, remove the 4mm screws.

      Ask FixBot

      Add Comment

    4. Dell Streak 7 GSM Module Replacement: step 4, image 1 of 1
      • With the Torx screwdriver, remove the two 5mm screws.

      Ask FixBot

      Add Comment

    5. Dell Streak 7 GSM Module Replacement: step 5, image 1 of 2 Dell Streak 7 GSM Module Replacement: step 5, image 2 of 2
      • Using the spudger, insert it under the black side panel. Slide the spudger all the way around until the cover piece comes off.

      • With the Torx screwdriver, remove the two 4mm screws.

      Ask FixBot

      Add Comment

    6. Dell Streak 7 GSM Module Replacement: step 6, image 1 of 1
      • Use the spudger to go along the edges of the device and pop out the latches securing the display to the case.

      Ask FixBot

      Add Comment

    7. Dell Streak 7 GSM Module Replacement: step 7, image 1 of 2 Dell Streak 7 GSM Module Replacement: step 7, image 2 of 2
      • Ribbon cables are very sensitive and prone to breaking

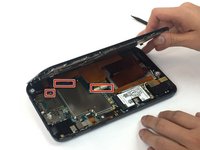
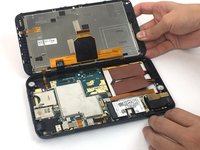
      • Disconnect the ribbon cables by unlocking the connector and pulling the cable out slowly.

      • Make sure all the cables are unplugged before opening the device completely. Failure to do so might lead to broken or torn cables.

      Ask FixBot

      Add Comment

    1. Dell Streak 7 GSM Module Replacement, GSM Module: step 8, image 1 of 2 Dell Streak 7 GSM Module Replacement, GSM Module: step 8, image 2 of 2
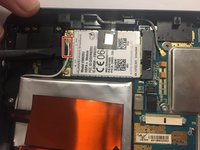
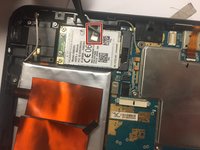
      • With the spudger, disconnect the antenna cable located on the module.

      Ask FixBot

      Add Comment

    2. Dell Streak 7 GSM Module Replacement: step 9, image 1 of 2 Dell Streak 7 GSM Module Replacement: step 9, image 2 of 2
      Tool used on this step:
      Tweezers
      $4.99
      Buy
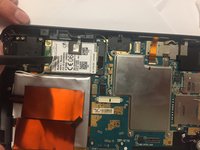
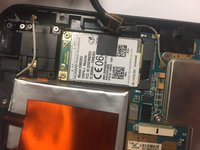
      • Using tweezers, remove the tape connected to the GSM module.

      Ask FixBot

      Add Comment

    3. Dell Streak 7 GSM Module Replacement: step 10, image 1 of 2 Dell Streak 7 GSM Module Replacement: step 10, image 2 of 2
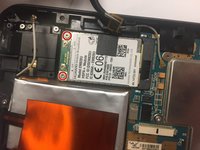
      • Remove the two 3mm screws securing the GSM module. Use the Torx screwdriver.

      Ask FixBot

      Add Comment

    4. Dell Streak 7 GSM Module Replacement: step 11, image 1 of 1
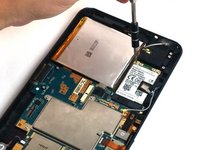
      • Disconnect the GSM module by lifting the module up, out of the case.

      Ask FixBot

      Add Comment

Conclusion

To reassemble your device, follow these instructions in reverse order.

Cancel: I did not complete this guide.

Ali Benjelloun

Member since: 10/02/16

385 Reputation

3 Guides authored

Team

USF Tampa, Team 4-6, Passmore Fall 2016 Member of USF Tampa, Team 4-6, Passmore Fall 2016

USFT-PASSMORE-F16S4G6

3 Members

72 Guides authored

0 Guide Comments

Add Comment

View Statistics:

Past 24 Hours: 1

Past 7 Days: 11

Past 30 Days: 84

All Time: 598