Free Shipping on Domestic Orders $75+

Dell Precision 5510 Keyboard Replacement

What you need

    1. Dell Precision 5510 Keyboard Replacement, Base Cover: step 1, image 1 of 1
      • Open the system badge flap over to reveal the screws underneath (marked 1 on the image).

      • Remove the 12 screws that secure the base cover to the computer.

      Ask FixBot

      Add Comment

    2. Dell Precision 5510 Keyboard Replacement: step 2, image 1 of 1
      • Pry the edges base cover and lift it to remove it from computer.

      Ask FixBot

      Add Comment

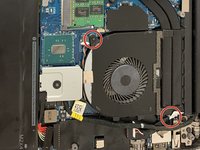
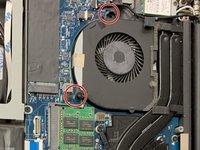
    1. Dell Precision 5510 Keyboard Replacement, Fans: step 3, image 1 of 2 Dell Precision 5510 Keyboard Replacement, Fans: step 3, image 2 of 2
      • There are two screws on each fan circled in the images shown. Use a Phillips #0 screwdriver to remove all four screws.

      • Each fan has one 3.7mm screw and one 4.65mm screw.

      Ask FixBot

      Add Comment

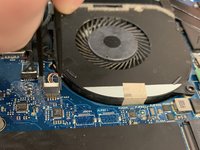
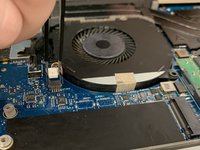
    2. Dell Precision 5510 Keyboard Replacement: step 4, image 1 of 2 Dell Precision 5510 Keyboard Replacement: step 4, image 2 of 2
      Tool used on this step:
      Tweezers
      $4.99
      Buy
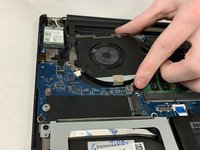
      • Each of the fans are plugged into the motherboard. Use tweezers to pull the plug out.

      • Do not grab by the wires, grab by the white rectangular region.

      Ask FixBot

      Add Comment

    3. Dell Precision 5510 Keyboard Replacement: step 5, image 1 of 2 Dell Precision 5510 Keyboard Replacement: step 5, image 2 of 2
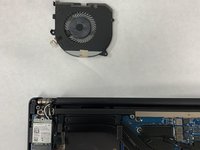
      • Carefully extract the fan from its housing bed. It should remove easily if all parts have been disconnected.

      Ask FixBot

      Add Comment

    1. Dell Precision 5510 Keyboard Replacement, Battery: step 6, image 1 of 2 Dell Precision 5510 Keyboard Replacement, Battery: step 6, image 2 of 2
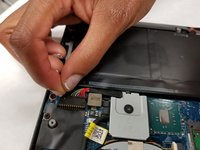
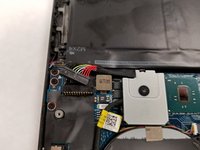
      • Unplug the connection that links the battery to the computer.

      Ask FixBot

      Add Comment

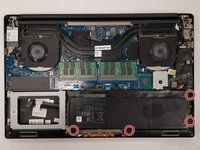
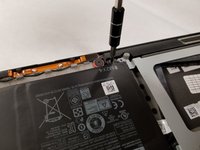
    2. Dell Precision 5510 Keyboard Replacement: step 7, image 1 of 2 Dell Precision 5510 Keyboard Replacement: step 7, image 2 of 2
      • Remove the four 4.0 mm JIS #0 screws surrounding the battery.

      Ask FixBot

      Add Comment

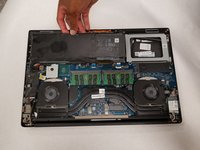
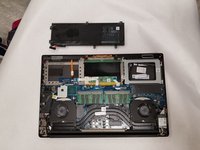
    3. Dell Precision 5510 Keyboard Replacement: step 8, image 1 of 2 Dell Precision 5510 Keyboard Replacement: step 8, image 2 of 2
      • Carefully remove the battery from the computer.

      Ask FixBot

      Add Comment

    1. Dell Precision 5510 Keyboard Replacement, Keyboard: step 9, image 1 of 1
      • Remove 6 screws to take off the heat sink.

      Ask FixBot

      Add Comment

    2. Dell Precision 5510 Keyboard Replacement: step 10, image 1 of 1
      • Remove all standalone motherboard screws.

      • 8 screws with lengths of either 3.7mm or 4.65mm

      Ask FixBot

      Add Comment

    3. Dell Precision 5510 Keyboard Replacement: step 11, image 1 of 1
      • Remove the motherboard.

      Ask FixBot

      Add Comment

    4. Dell Precision 5510 Keyboard Replacement: step 12, image 1 of 1
      • Remove nine screws from the back of the keyboard.

      • Screws are 1.9mm in length

      Ask FixBot

      Add Comment

    5. Dell Precision 5510 Keyboard Replacement: step 13, image 1 of 1
      • Pull keyboard out and replace.

      Ask FixBot

      Add Comment

Conclusion

To reassemble your device, follow these instructions in reverse order.

Cancel: I did not complete this guide.

Colin Hunter

Member since: 03/31/22

121 Reputation

1 Guide authored

Team

IUPUI, Team 2-1, Harley Spring 2022 Member of IUPUI, Team 2-1, Harley Spring 2022

IUPUI-HARLEY-S22S2G1

4 Members

36 Guides authored

1 Guide Comment

Do you need to remove the heatsink? I don't see why it cant be left on.

Alexandru - Reply Share

Add Comment

View Statistics:

Past 24 Hours: 1

Past 7 Days: 9

Past 30 Days: 41

All Time: 3,131