
Dell Latitude E7270 Fan Replacement

Jacob Clement and 2 other contributors
Last updated on Apr 27, 2020
Views: 2K
View statistics:
- Past 24 Hours:
- 4
- Past 7 Days:
- 25
- Past 30 Days:
- 84
- All Time:
- 1,987
Comments: 4
4 comments on steps.
Completed: 1 2
1 person has marked this guide "completed." Will you be next?
2 people have marked this guide "completed." Including you — great job!
Favorites: 0 1
No one has favorited (and subscribed to) this guide. Will you be the first?
1 person has favorited (and subscribed to) this guide — and that's you!
Introduction
Go to step 1 ↓Use this guide to replace a broken cooling fan on your Dell Latitude E7270. You also need this guide as a prerequisite to remove the motherboard.
The cooling fan is the first defense in protecting components from over heating inside your laptop. It works by using a series of cooling tubes in a bracket that transfer heat from the processor to the fan where cool air lowers the temperature. Because we cannot prevent electricity from heating up the internals during use, the motor inside the fan is constantly under load in order to cool them and eventually fails after so many hours. If the cooling fan fails, it can result in automatic shut off to prevent further damage to critical components.
Before using this guide, check out the troubleshooting page to see if your symptoms match any that represent a bad cooling fan.
This replacement requires a #00 Phillips head screwdriver.
NOTE: This guide requires removal of the back panel and battery. The extra prerequisite guide steps are included in this guide.
What you need
Tools

-
-
-
Place the device top down in front of you so that the vents are visible and are furthest from the user.
 Ask FixBot
-
-
-
-
-
Remove the three M2.5 X 5MM screws, located above the battery, with a Phillips #00 screwdriver.
-
-
-
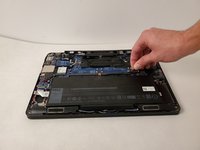
Disconnect the battery wire by using your fingers to pull diagonally left on the tab.
-
-
-
Remove the battery completely by grabbing an edge and pulling up on the battery.
-
-
-
-
-
-
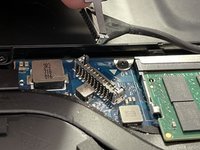
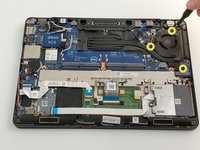
Remove the 4 pin fan power connector from the motherboard by using your finger and pulling up.
-
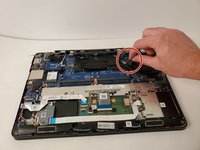
Remove the four M2.5 X 5MM screws that hold on the rectangular bracket located towards the center of the motherboard using a Phillips #00 screwdriver.
-
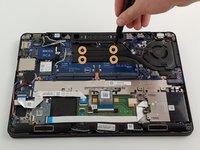
Remove the three M2.5 X 5MM screws that hold down the circular fan bracket using a Phillips #00 screwdriver.
-
-
-
Before replacing fan, make sure to place a small amount of thermal paste to ensure proper heat dissipation and long term life.
-
-






To reassemble your device, follow these instructions in reverse order.
Cancel: I did not complete this guide.
One other person completed this guide.

Team

Embry-Riddle Aeronautical University, Team S16-G5, Branham Spring 2020 Member of Embry-Riddle Aeronautical University, Team S16-G5, Branham Spring 2020
ERAU-BRANHAM-S20S16G5
3 Members
72 Guides authored
