
Dell Latitude E7240 Ultrabook CMOS Replacement

Jordon Dozier and 2 other contributors
Last updated on Aug 6, 2024
Views: 1.2K
View statistics:
- Past 24 Hours:
- 1
- Past 7 Days:
- 22
- Past 30 Days:
- 99
- All Time:
- 1,160
Comments: 0
No one has left comments on this guide. Will you be first?
Go to guide commentsCompleted: 0 1
No one has marked this guide "completed." Will you be the first?
1 person has marked this guide "completed." It's you — great job!
Favorites: 0 1
No one has favorited (and subscribed to) this guide. Will you be the first?
1 person has favorited (and subscribed to) this guide — and that's you!
Grammar Police
Embrace your inner English teacher and help improve this guide's grammar!
Needs Better Images
Better photos will improve this guide. Help out by taking, editing, or uploading new ones!
Needs More Images
A few more images would make this guide's procedures crystal clear.
Community-Contributed Guide
An awesome member of our community made this guide. It was not created by iFixit staff.
Better Introduction
Improve this guide by completing or revising its introduction.
-
-
-
Using a plastic scribe, pry the keyboard trim to release it from the computer. Lift up to remove the keyboard trim from the computer.
 Ask FixBot
-
-
-
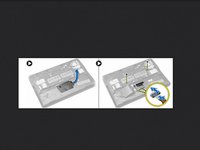
Lift the battery bay and remove the screw that secures the keyboard to the computer.
-
Perform the following steps as shown in the illustration:a.Lift the latch that secure the keyboard cable to the computer [1].b.Disconnect the keyboard cable the computer [2]
-
Flip the computer and remove the screws that secure the keyboard to the computer
-
Perform the following steps as shown in the illustration:a.Slide the keyboard from the computer [1].b.Lift the keyboard from the computer [2].
-
-
-
-
Remove the screws that secure the palmrest assembly and flip the computer.
-
Perform the following steps as shown in the illustration:a.Disconnect the cable from the computer.b.Lift the latch that secures the keyboard cable to the computer [1].c.Disconnect the keyboard cable [2].d.Disconnect the touch cable from the computer [3].e.Unroute the cables from the slot [4].
-
Remove the screws that secure the palmrest assembly to the front of the computer. Pry the edges and lift the palmrest assembly from the computer
-
-



To reassemble your device, follow these instructions in reverse order.


