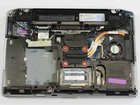
Dell Latitude E6420 CPU Replacement

Sam Towe and 5 other contributors
Last updated on Dec 21, 2022
Views: 5K
View statistics:
- Past 24 Hours:
- 2
- Past 7 Days:
- 27
- Past 30 Days:
- 126
- All Time:
- 4,986
Comments: 0
No one has left comments on this guide. Will you be first?
Go to guide commentsCompleted: 7 8
7 people have marked this guide "completed." Will you be next?
8 people have marked this guide "completed." Including you — great job!
Favorites: 0 1
No one has favorited (and subscribed to) this guide. Will you be the first?
1 person has favorited (and subscribed to) this guide — and that's you!
Incorrect Tools
Help make this guide better by using the correct tools in images and/or text.
Needs Better Images
Better photos will improve this guide. Help out by taking, editing, or uploading new ones!
Introduction
Go to step 1 ↓The replacement of your Dell Latitude E6420 laptop’s CPU may be needed in certain circumstances. This may include simply upgrading to a newer model when your current model has become obsolete or a failure of the current CPU. A common sign that your CPU may need to be replaced is the freezing of your laptop. Freezing of the laptop and the unresponsiveness may indicate that your CPU will need to be replaced. Another issue may be that the laptop will not boot up and the screen may even be blank even though your device is being powered. Convenience may also be a reason to upgrade your CPU. An upgrade will increase processing power and improving performance, making applications and programs load faster. The newer CPU may be more compatible with newer software and hardware. It may also be more energy efficient extending battery life for your device. For this replacement, no special skills are needed.
What you need
Tools
-
Spudger4.9


-
-
-
Remove the eight screws holding down the rear panel using a Phillips #0 Screwdriver. Carefully remove base cover by hand.
 Ask FixBot
-
-
-
-
-
Remove the battery by pushing the tabs outward, then removing the battery from the device.
-
-
-
Remove the four screws securing the heatsink using the Phillips #0 screwdriver.
-
Remove the heatsink and fan assembly.
-
-
-
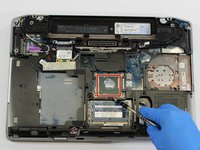
Use the flat end of a spudger to rotate the lock 180 degrees counterclockwise to unlock the CPU.
-
-
-


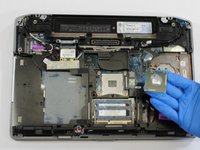
To reassemble your device, follow these instructions in reverse order.
Cancel: I did not complete this guide.
7 other people completed this guide.

