Free Shipping on Domestic Orders $75+

Dell Latitude D620 Display Replacement

What you need

    1. Dell Latitude D620 Display Replacement, Keyboard: step 1, image 1 of 1
      • Power down the laptop and remove the battery.

      • Open the laptop cover all of the way.

      Ask FixBot

      Add Comment

    2. Dell Latitude D620 Display Replacement: step 2, image 1 of 3 Dell Latitude D620 Display Replacement: step 2, image 2 of 3 Dell Latitude D620 Display Replacement: step 2, image 3 of 3
      • Locate the notch under the cover at the top of the keyboard

      • Using the spudger as a lever, lift the plastic covering

      • Carefully remove the rest of the covering from right to left

      Ask FixBot

      Add Comment

    3. Dell Latitude D620 Display Replacement: step 3, image 1 of 1
      • Unscrew the top portion of the keyboard using a #00 screwdriver

      Ask FixBot

      Add Comment

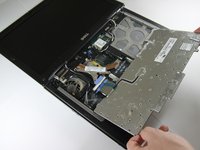
    4. Dell Latitude D620 Display Replacement: step 4, image 1 of 1
      • Hold keyboard from the top and gently pull towards the LCD screen to remove the keyboard from the case

      • Don't pull on the keyboard too forcefully because it is attached to the motherboard with a short, thin ribbon cable

      Ask FixBot

      Add Comment

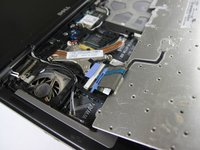
    5. Dell Latitude D620 Display Replacement: step 5, image 1 of 2 Dell Latitude D620 Display Replacement: step 5, image 2 of 2
      • Once keyboard is out of the case, lay it face-down on the track pad

      Ask FixBot

      Add Comment

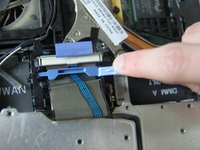
    6. Dell Latitude D620 Display Replacement: step 6, image 1 of 2 Dell Latitude D620 Display Replacement: step 6, image 2 of 2
      • Using a small spudger, pull back on the black bar to release the blue lever

      Ask FixBot

      Add Comment

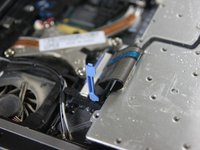
    7. Dell Latitude D620 Display Replacement: step 7, image 1 of 1
      • Pull up on the metal bar connected to the socket to detach the ribbon cable

      Ask FixBot

      Add Comment

    1. Dell Latitude D620 Display Replacement, Display: step 8, image 1 of 1
      • Detach cables that connect the display to the body of the laptop

      Ask FixBot

      Add Comment

    2. Dell Latitude D620 Display Replacement: step 9, image 1 of 1
      • Disconnect the black cable attached to the motherboard

      Ask FixBot

      Add Comment

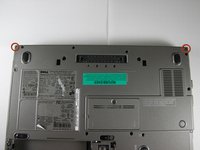
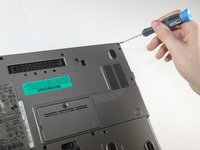
    3. Dell Latitude D620 Display Replacement: step 10, image 1 of 2 Dell Latitude D620 Display Replacement: step 10, image 2 of 2
      • Close the laptop lid

      • Turn the laptop over onto its backside

      • Unscrew the two screws shown in the picture using a #00 screwdriver

      Ask FixBot

      Add Comment

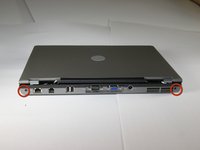
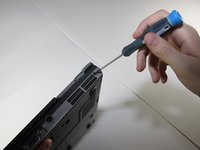
    4. Dell Latitude D620 Display Replacement: step 11, image 1 of 2 Dell Latitude D620 Display Replacement: step 11, image 2 of 2
      • Face the laptop's back ports towards you

      • Unscrew the two screws labeled in the picture using a #00 screwdriver

      Ask FixBot

      Add Comment

    5. Dell Latitude D620 Display Replacement: step 12, image 1 of 1
      • Turn the laptop over again so it's right-side up

      • Open the display, and pull the display up and out of the laptop's body

      Ask FixBot

      Add Comment

    6. Dell Latitude D620 Display Replacement: step 13, image 1 of 1
      • Remove the circular rubber pads as outlined in the picture using a spudger

      Ask FixBot

      Add Comment

    7. Dell Latitude D620 Display Replacement: step 14, image 1 of 1
      • Unscrew the screws that were under the rubber circles using the #00 screwdriver

      Ask FixBot

      Add Comment

    8. Dell Latitude D620 Display Replacement: step 15, image 1 of 1
      • Carefully use a spudger to work around the edge of the screen to lift off the plastic cover

      • Be very careful while doing this as the plastic snaps easily

      Ask FixBot

      Add Comment

    9. Dell Latitude D620 Display Replacement: step 16, image 1 of 1
      • Remove the screws outlined in the picture

      Ask FixBot

      Add Comment

    10. Dell Latitude D620 Display Replacement: step 17, image 1 of 1
      • Carefully lift the LCD screen out of its casing

      Ask FixBot

      Add Comment

Conclusion

To reassemble your device, follow these instructions in reverse order.

Cancel: I did not complete this guide.

19 other people completed this guide.

Miguel Wong

Member since: 04/15/10

565 Reputation

3 Guides authored

Team

Cal Poly, Team 24-35, Regan Spring 2010 Member of Cal Poly, Team 24-35, Regan Spring 2010

CPSU-REGAN-S10S24G35

4 Members

48 Guides authored

1 Guide Comment

Check out this replacement screen at a great price on bcdelectrostore.com

http://www.bcdelectrostore.com/magento/l...

bob harris - Reply Share

Add Comment

View Statistics:

Past 24 Hours: 0

Past 7 Days: 10

Past 30 Days: 58

All Time: 33,998