Introduction
If your display has been cracked or shattered, or you're having issues with your device's display, you may choose to replace it.
Before taking apart your device to replace the display, look through the troubleshooting guides on the Dell Latitude 5500 device page to ensure there isn't an easier solution to your problem.
Removing the display from your device is a somewhat involved process that requires removing the display from the bezel and then disconnecting it from the laptop.
Warning: The screen is fragile, and prone to being scratched. Handle it with care, and place it on a soft surface after removing it.
What you need
-
-
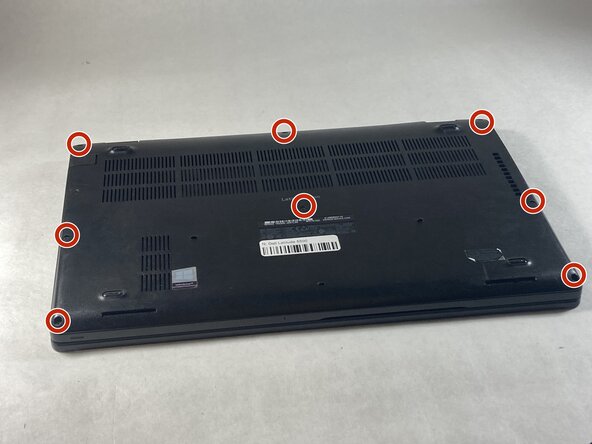
Use a Phillips #0 screwdriver to loosen the eight captive screws on the back panel.
 Ask FixBot
-
-
-
Use a Phillips #0 screwdriver to remove the single 6 mm screw on the right side of the battery.
-
-
-
-
Using hands or plastic prying tools, remove the flat-topped (low-profile) connector at the top of the battery.
-
Remove the battery.
-
-
-
With your device right-side up, fully lift up the lid.
-
Using an opening pick, loosen the double-sided tape connecting the bezel to the display.
-
Using hands or an opening tool, remove the bezel from your device.
-
-
-
Using a Phillips #0 screwdriver, remove four 4mm screws connecting the display to the laptop.
-
Remove the display and gently lay it upon your device's keyboard. If possible, place something soft on your keyboard like a blanket or cloth to prevent scratching.
-
-
-
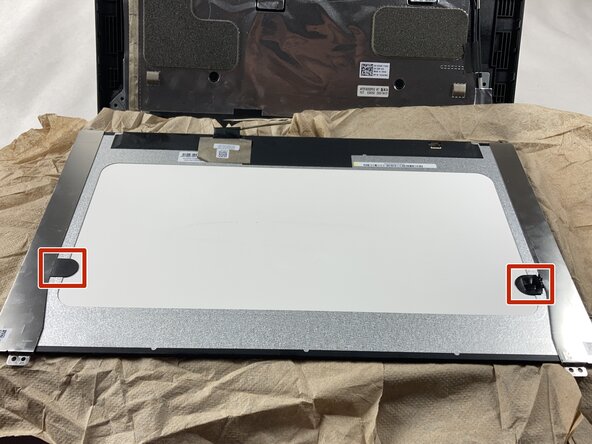
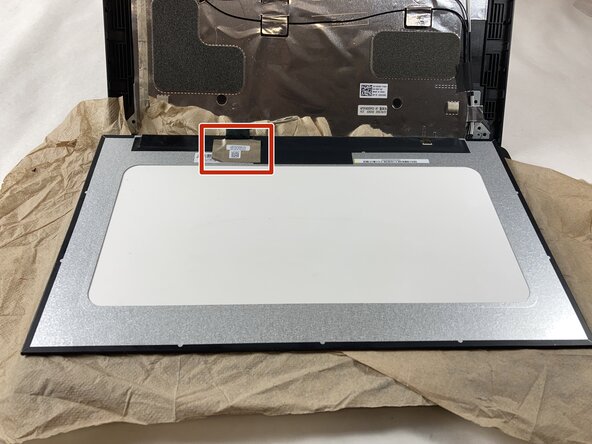
Pull out the black adhesive using the tabs to remove the metal connectors from the display.
-


To reassemble your device, follow these instructions in reverse order.

Team

UMass Dartmouth, Team 6-6, Botvin Spring 2026 Member of UMass Dartmouth, Team 6-6, Botvin Spring 2026
UMASSD-BOTVIN-S26S6G6
3 Members
6 Guides authored