
Dell Latitude 5480 Fan Replacement

Valencia Vidrine and 3 other contributors
Last updated on Jun 18, 2024
Views: 784
View statistics:
- Past 24 Hours:
- 2
- Past 7 Days:
- 22
- Past 30 Days:
- 83
- All Time:
- 784
Comments: 0
No one has left comments on this guide. Will you be first?
Go to guide commentsCompleted: 0 1
No one has marked this guide "completed." Will you be the first?
1 person has marked this guide "completed." It's you — great job!
Favorites: 0 1
No one has favorited (and subscribed to) this guide. Will you be the first?
1 person has favorited (and subscribed to) this guide — and that's you!
Introduction
Go to step 1 ↓This guide provides steps users will have to take to replace the fan on their Dell Latitude 5480. Fans cool off the CPU, as well as other components in the computer, preventing them from overheating. If the fan is not working properly, or the computer frequently overheats, the fan will need to be replaced.
What you need


-
-
-
Use a Phillips screwdriver to remove the eight 5.6 mm screws that secure the lower case.
 Ask FixBot
-
-
-
Insert an opening tool into the seam between the lower case and chassis.
-
Pry up around the perimeter of the device until the lower case fully releases.
-
Lift off the lower case.
-
-
-
-
-
Grip the black battery cable connector loop and pull it directly up to disconnect the battery.
-
-
-
-
-
-
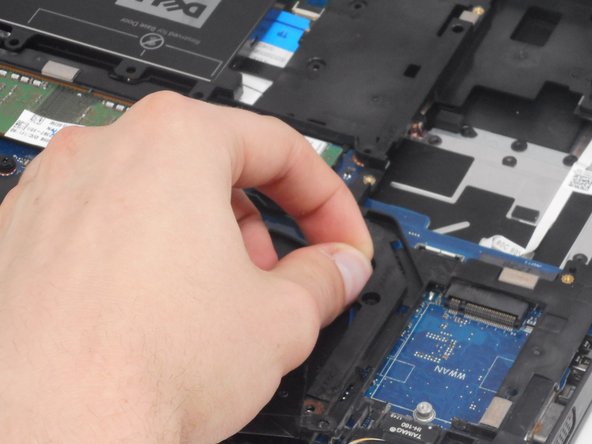
Grip the fan connector and pull it directly out of its motherboard port.
-
Lift the fan up and out of the chassis.
-




To reassemble your device, follow these instructions in reverse order.

Team

University of Memphis, Team 2-2, Sneed Spring 2024 Member of University of Memphis, Team 2-2, Sneed Spring 2024
UM-SNEED-S24S2G2
4 Members
84 Guides authored
