
Dell Inspiron Mini 10 Hard Drive Replacement

Bariso Shuba and 4 other contributors
Last updated on Nov 15, 2022
Views: 8.8K
View statistics:
- Past 24 Hours:
- 2
- Past 7 Days:
- 32
- Past 30 Days:
- 149
- All Time:
- 8,784
Comments: 3
2 comments on steps, 1 guide comment.
Go to guide commentsCompleted: 3 4
3 people have marked this guide "completed." Will you be next?
4 people have marked this guide "completed." Including you — great job!
Favorites: 2 3
2 people have favorited (and subscribed to) this guide. Will you be next?
3 people have favorited (and subscribed to) this guide — including you!
Introduction
Go to step 1 ↓This guide will take you through accessing and removing the hard drive. The hard drive is an important component because it stores operating system software and your files. Keep it away from magnets as they may demagnetize the part, causing loss of information.
What you need
Fix Kit
This kit contains all the parts and tools needed to complete this guide.

Parts


Tools
-
Spudger4.9


-
-
-
Slide the release latches out toward the edges to unlock the battery.
 Ask FixBot
-
-
-
-
-
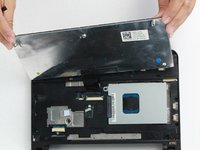
Using a prying tool, gently pry the palm rest off of the palm rest bracket. Start prying from one side and slowly work your way around.
-
-
-
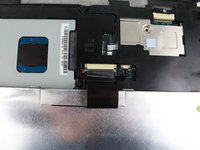
Gently pull the touchpad cable off the palm rest bracket.
-
Lift the rest of the palm rest off the computer base.
-
-
-
-
-
-
Turn over the device and open the display.
-
Gently pry open the keyboard with the plastic opening tool, working under the edges to release the clips.
-
-
-
Push the clips out on either side of the ribbon cable to release it.
-
Gently disconnect the ribbon cable by pulling on the clear tab.
-
Remove the keyboard.
-
-
-
-
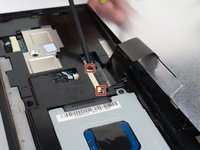
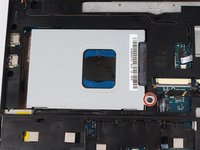
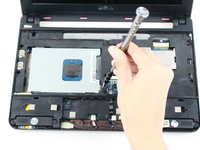
Remove the single 8mm screw attaching the hard-drive cage to the body of the device.
-
-
-
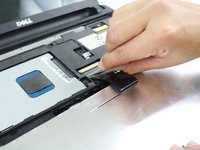
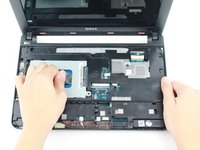
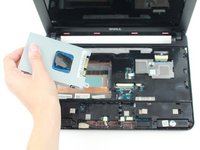
Pull on the black tab and slide the hard-drive cage toward the USB port until is comes free.
-
-
-
Unscrew the four 3mm screws, two on each side of the drive, and slide the drive free from the cage.
-
-









To reassemble your device, follow these instructions in reverse order.
Cancel: I did not complete this guide.
3 other people completed this guide.

Team

UW Tacoma, Team 1-4, Rose Fall 2016 Member of UW Tacoma, Team 1-4, Rose Fall 2016
UWT-ROSE-F16S1G4
4 Members
120 Guides authored
1 Guide Comment
On at least one Dell Inspiron 10 (mine), the hard drive is also secured by adhesive foam backing to the back cover of the laptop. This makes it impossible to remove by the method in this guide (and the service manual) without first either A) heating the back cover with a heat pad, or B) removing the palm rest bracket covering the mainboard, disengaging the clips that prevent the hard drive from being pulled upward, then prising the drive gently away from the backing. This also requires you to bend the hard drive screw bracket, but being aluminum, it can be bent back at least once. I used method B.
