Free Shipping on Domestic Orders $75+

Dell Inspiron M531R-5535 Fan Replacement

What you need

    1. Dell Inspiron M531R-5535 Fan Replacement, Fan: step 1, image 1 of 3 Dell Inspiron M531R-5535 Fan Replacement, Fan: step 1, image 2 of 3 Dell Inspiron M531R-5535 Fan Replacement, Fan: step 1, image 3 of 3
      • Flip the laptop over and unlock the battery.

      • Lift up to remove the battery.

      Ask FixBot

      Add Comment

    2. Dell Inspiron M531R-5535 Fan Replacement: step 2, image 1 of 2 Dell Inspiron M531R-5535 Fan Replacement: step 2, image 2 of 2
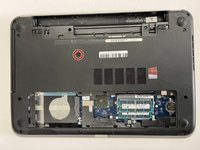
      • Loosen the two Phillips #1 screws to remove the tray.

      • The screws stay in the tray.

      Ask FixBot

      Add Comment

    3. Dell Inspiron M531R-5535 Fan Replacement: step 3, image 1 of 2 Dell Inspiron M531R-5535 Fan Replacement: step 3, image 2 of 2
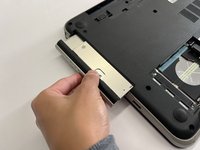
      • Unscrew the 3.6mm Phillips #1 screw.

      • Slide the CD Drive out.

      Ask FixBot

      Add Comment

    4. Dell Inspiron M531R-5535 Fan Replacement: step 4, image 1 of 2 Dell Inspiron M531R-5535 Fan Replacement: step 4, image 2 of 2
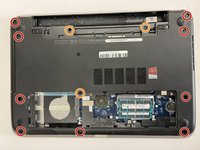
      • Unscrew nine 5.7mm Phillips #1 screws.

      • Unscrew three 5.6mm Phillips #1 screws

      • The three 5.6mm Phillips #1 screws are thinner.

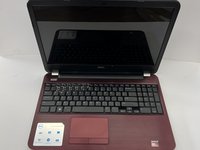
      • Then flip the laptop and open it to see the keyboard.

      Ask FixBot

      Add Comment

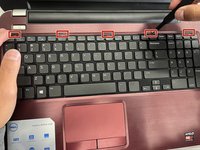
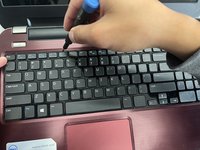
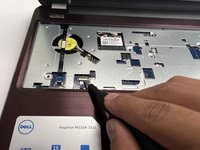
    5. Dell Inspiron M531R-5535 Fan Replacement: step 5, image 1 of 2 Dell Inspiron M531R-5535 Fan Replacement: step 5, image 2 of 2
      • Use a nylon spudger or plastic opening tool to press into the highlighted keyboard latches.

      Ask FixBot

      Add Comment

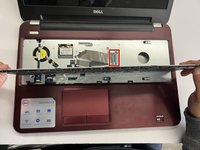
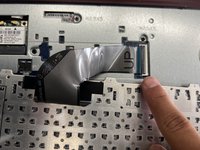
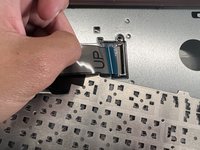
    6. Dell Inspiron M531R-5535 Fan Replacement: step 6, image 1 of 3 Dell Inspiron M531R-5535 Fan Replacement: step 6, image 2 of 3 Dell Inspiron M531R-5535 Fan Replacement: step 6, image 3 of 3
      • Lift up the keyboard.

      • Lift up on the black ZIF tab and pull the keyboard ribbon cable free.

      Ask FixBot

      Add Comment

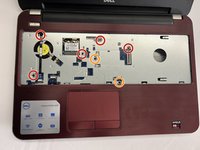
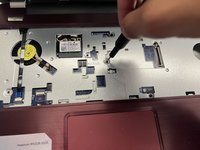
    7. Dell Inspiron M531R-5535 Fan Replacement: step 7, image 1 of 2 Dell Inspiron M531R-5535 Fan Replacement: step 7, image 2 of 2
      • Unscrew the five 5.6mm Phillips #1 screws.

      • Unscrew the two 3.6mm Phillips #1 screws.

      Ask FixBot

      Add Comment

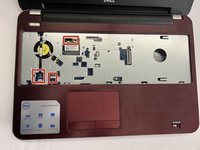
    8. Dell Inspiron M531R-5535 Fan Replacement: step 8, image 1 of 2 Dell Inspiron M531R-5535 Fan Replacement: step 8, image 2 of 2
      • Disconnect all highlighted cables.

      Ask FixBot

      Add Comment

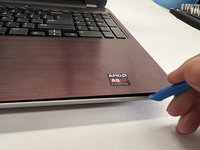
    9. Dell Inspiron M531R-5535 Fan Replacement: step 9, image 1 of 2 Dell Inspiron M531R-5535 Fan Replacement: step 9, image 2 of 2
      • Using an opening tool, carefully pry open the case from the side.

      Ask FixBot

      Add Comment

    10. Dell Inspiron M531R-5535 Fan Replacement: step 10, image 1 of 1
      • Unscrew the Phillips #1 screw.

      • Pull the white connector out to disconnect the cables from the motherboard.

      • Pull up on gold connectors (MHF4) to disconnect the cables connecting the WLAN card.

      • Pull up on the white flap and pull out the strip to disconnect the strip from the motherboard.

      Ask FixBot

      Add Comment

    11. Dell Inspiron M531R-5535 Fan Replacement: step 11, image 1 of 1
      • Flip the motherboard over.

      • Pull the white connector out to disconnect the fan.

      • Lift the fan to remove it from the motherboard.

      Ask FixBot

      Add Comment

Conclusion

To reassemble your device, follow these instructions in reverse order.

Cancel: I did not complete this guide.

2 other people completed this guide.

Tony Chen

Member since: 09/26/22

313 Reputation

2 Guides authored

Team

CSU Los Angeles, Team 6-5, Adachi Fall 2022 Member of CSU Los Angeles, Team 6-5, Adachi Fall 2022

CSULA-ADACHI-F22S6G5

3 Members

59 Guides authored

0 Guide Comments

Add Comment

View Statistics:

Past 24 Hours: 2

Past 7 Days: 9

Past 30 Days: 33

All Time: 492