
Dell Inspiron M5110 Optical Drive Replacement

Cody Flynn and 2 other contributors
Last updated on Dec 22, 2016
Views: 618
View statistics:
- Past 24 Hours:
- 4
- Past 7 Days:
- 23
- Past 30 Days:
- 96
- All Time:
- 618
Comments: 0
No one has left comments on this guide. Will you be first?
Go to guide commentsCompleted: 0 1
No one has marked this guide "completed." Will you be the first?
1 person has marked this guide "completed." It's you — great job!
Favorites: 0 1
No one has favorited (and subscribed to) this guide. Will you be the first?
1 person has favorited (and subscribed to) this guide — and that's you!
Introduction
Go to step 1 ↓The instructions in this guide will cover the process to remove the Optical Drive for a Dell Inspiron M5110. This is necessary to replace the drive, which should be done when the computer can no longer read DVD or CD discs.
What you need
Tools

-
-
-
Slide both of the battery release latches on the bottom of the device in towards the center of the computer.
-
-
-
-
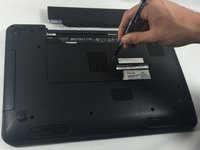
Remove the module cover pressing in the release tabs and pulling the cover up and away from the base of the device.
-
-
-
-
-
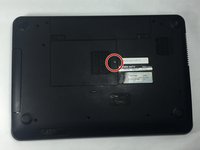
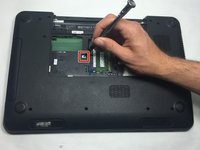
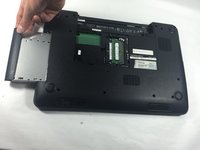
Insert a small screwdriver into the hole and slide the optical drive away from the center of the device. This will slide the optical assembly out from the side of the device.
-
-

 Ask FixBot





To reassemble your device, follow these instructions in reverse order.

Team

UMass Dartmouth, Team 4-3, Catania Fall 2016 Member of UMass Dartmouth, Team 4-3, Catania Fall 2016
UMASSD-CATANIA-F16S4G3
3 Members
96 Guides authored
