Free Shipping on Domestic Orders $75+

Dell Inspiron 8600 LCD Replacement

What you need

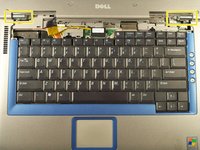
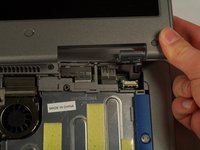
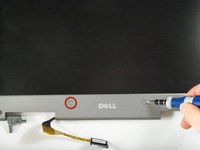
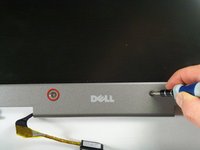
    1. Dell Inspiron 8600 LCD Replacement, Hinge Cover: step 1, image 1 of 3 Dell Inspiron 8600 LCD Replacement, Hinge Cover: step 1, image 2 of 3 Dell Inspiron 8600 LCD Replacement, Hinge Cover: step 1, image 3 of 3
      • Insert a spudger into the notch at the far left side of the top blue panel and pry the hinge cover off.

      • You may need to pry the other side off as well. You can do this by inserting the spudger between the hinge and the top cover.

      • Be careful of the wire attached to the underside of the hinge cover.

      Ask FixBot

      Add Comment

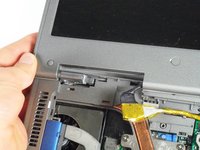
    2. Dell Inspiron 8600 LCD Replacement: step 2, image 1 of 1
      • Pull the small black tab on the right hand side of the laptop.

      • You have now removed the hinge cover.

      Ask FixBot

      Add Comment

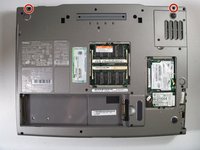
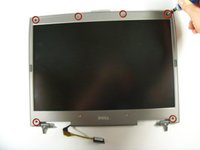
    1. Dell Inspiron 8600 LCD Replacement, Display Module: step 3, image 1 of 2 Dell Inspiron 8600 LCD Replacement, Display Module: step 3, image 2 of 2
      • Flip the laptop over and remove the indicated screws.

      • Flip the laptop back over.

      • Find the two places where the display module is attached to the base of the computer.

      Ask FixBot

      Add Comment

    2. Dell Inspiron 8600 LCD Replacement: step 4, image 1 of 1
      • Disconnect the video card from the display module by gently lifting upwards on the black tab.

      Ask FixBot

      Add Comment

    3. Dell Inspiron 8600 LCD Replacement: step 5, image 1 of 2 Dell Inspiron 8600 LCD Replacement: step 5, image 2 of 2
      • Lift the display module directly upwards from the base of the computer.

      Ask FixBot

      Add Comment

    4. Dell Inspiron 8600 LCD Replacement: step 6, image 1 of 1
      • Now remove the display module.

      Ask FixBot

      Add Comment

    1. Dell Inspiron 8600 LCD Replacement, LCD: step 7, image 1 of 3 Dell Inspiron 8600 LCD Replacement, LCD: step 7, image 2 of 3 Dell Inspiron 8600 LCD Replacement, LCD: step 7, image 3 of 3
      • First, remove the plastic tabs that are covering the interior screws.

      • After removing the tabs, remove the interior screws using a #1 Philips Screwdriver.

      • Note there are 8 tabs and 8 screws in total.

      Ask FixBot

      Add Comment

    2. Dell Inspiron 8600 LCD Replacement: step 8, image 1 of 1
      • Now that the screws are removed, press the plastic casing inward to loosen the case. Then remove the plastic case from the monitor unit.

      Ask FixBot

      Add Comment

    3. Dell Inspiron 8600 LCD Replacement: step 9, image 1 of 1
      • Using a Philips #1 screwdriver remove the screws holding the LCD in place.

      • Note there are 8 screws in total for this step, 4 on each side of the unit.

      Ask FixBot

      Add Comment

    4. Dell Inspiron 8600 LCD Replacement: step 10, image 1 of 1
      • Remove the broken LCD unit, and replace with new unit.

      Ask FixBot

      Add Comment

Conclusion

To reassemble your device, follow these instructions in reverse order.

Cancel: I did not complete this guide.

2 other people completed this guide.

Perry

Member since: 04/12/11

251 Reputation

4 Guides authored

Team

Cal Poly, Team 18-22, Garner Spring 2011 Member of Cal Poly, Team 18-22, Garner Spring 2011

CPSU-GARNER-S11S18G22

4 Members

179 Guides authored

1 Guide Comment

which controller board do i have to use for this model ?

bcdoor - Reply Share

Add Comment

View Statistics:

Past 24 Hours: 1

Past 7 Days: 5

Past 30 Days: 29

All Time: 5,049