
Dell Inspiron 7568 Hard-Drive Replacement

Elijah Basile and 3 other contributors
Last updated on Dec 20, 2019
Views: 743
View statistics:
- Past 24 Hours:
- 2
- Past 7 Days:
- 20
- Past 30 Days:
- 61
- All Time:
- 743
Comments: 1
1 guide comment.
Go to guide commentsCompleted: 0 1
No one has marked this guide "completed." Will you be the first?
1 person has marked this guide "completed." It's you — great job!
Favorites: 0 1
No one has favorited (and subscribed to) this guide. Will you be the first?
1 person has favorited (and subscribed to) this guide — and that's you!
Introduction
Go to step 1 ↓When removing or replacing the hard drive of the Dell Inspiron 7568 it is important to make sure the laptop it is unplugged and completely turned off. User should also remember to be careful when unplugging and removing the battery. It is recommended that users keep different screw types separated to keep assembly easier. Make sure to uses a Phillips head #1 screw driver.
What you need
Tools

-
-
-
Remove the ten 7mm Phillips #1 screws on the bottom cover.
-
Remove the bottom cover.
 Ask FixBot
-
-
-
Remove the four 3mm Phillips #1 screws holding the battery.
-
Unhinge the connector cable to the battery.
-
Remove the battery.
-
-
-
-
-
Remove the three 3mm Phillips #1 screws connecting the hard drive to the laptop.
-
-
-
-
Remove the four 3mm Phillips #1 screws of the hard drive. Both sides look identical.
-
-


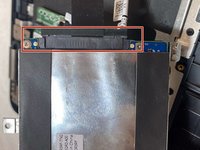
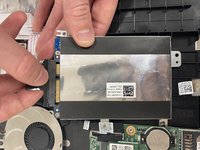


To reassemble your device, follow these instructions in reverse order.

Team

IUPUI, Team S1-G4, Stella Fall 2019 Member of IUPUI, Team S1-G4, Stella Fall 2019
IUPUI-STELLA-F19S1G4
4 Members
48 Guides authored
1 Guide Comment
Will a 9mm 2.5” SSD fit in these? or can it be forced in? p16 of the spec sheet says “7mm” but I’m not sure if that’s just saying stock configuration just comes with a 7mm drive? or that it only supports up to 7mm?: https://dl.dell.com/manuals/all-products... Any clarification appreciated, thanks!
