
Dell Inspiron 3148 Fan Replacement

Christopher Gravelle and 2 other contributors
Last updated on May 7, 2024
Views: 532
View statistics:
- Past 24 Hours:
- 1
- Past 7 Days:
- 12
- Past 30 Days:
- 61
- All Time:
- 532
Comments: 0
No one has left comments on this guide. Will you be first?
Go to guide commentsCompleted: 0 1
No one has marked this guide "completed." Will you be the first?
1 person has marked this guide "completed." It's you — great job!
Favorites: 0 1
No one has favorited (and subscribed to) this guide. Will you be the first?
1 person has favorited (and subscribed to) this guide — and that's you!
Action Shots
Be an action hero! This guide needs images that better demonstrate how to perform specific actions.
Introduction
Go to step 1 ↓Is your computer heating up easily or getting louder? Consider using this guide to replace the fan in your device.
What you need
Tools


-
-
-
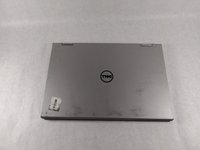
Ensure the device is powered off and unplugged. Close the device and orient it face up, with the hinges further away from you.
-
Flip the device over so the backside is facing you.
 Ask FixBot
-
-
-
Using the plastic opening tool, pull the back panel upward. Move the opening tool along the edge of the device and lift the panel off of your device.
-
-
-
-
-
-
If there is tape on your fan, remove the tape.
-
Remove the two 2mm screws on the fan enclosure using the Phillips #00 screwdriver.
-
-
-
Unscrew the three 4mm screws holding down the heat sink of the fan using the Phillips #00 screwdriver.
-
-
Tool used on this step:Tweezers$4.99
-
Use the tweezers to gently pull the power supply cable from its port.
-
-




To reassemble your device, follow these instructions in reverse order.

Team

UMass Dartmouth, Team S1-G2, Simcock Fall 2018 Member of UMass Dartmouth, Team S1-G2, Simcock Fall 2018
UMASSD-SIMCOCK-F18S1G2
3 Members
84 Guides authored
