Free Shipping on Domestic Orders $75+

Dell Inspiron 20 3043 Hard Drive Replacement

What you need

    1. Dell Inspiron 20 3043 Hard Drive Replacement, Remove the hard drive cover and connector: step 1, image 1 of 2 Dell Inspiron 20 3043 Hard Drive Replacement, Remove the hard drive cover and connector: step 1, image 2 of 2
      • Remove the hard drive cover using a spudger or your fingernail.

      • Remove the hard drive connector by pulling straight up on the plastic tab.

      • When reassembling, ensure the connector is fully lined up to its port and press straight down on the connector. Uneven pressure or not inserting the connector straight can damage the connector and/or port.

      Ask FixBot

      Add Comment

    2. Dell Inspiron 20 3043 Hard Drive Replacement, Remove the hard drive: step 2, image 1 of 2 Dell Inspiron 20 3043 Hard Drive Replacement, Remove the hard drive: step 2, image 2 of 2
      • Remove the four Phillips #0 screws securing the hard drive to the body.

      • Lift and remove the hard drive from the PC.

      Ask FixBot

      Add Comment

    3. Dell Inspiron 20 3043 Hard Drive Replacement, Remove the hard drive bracket: step 3, image 1 of 2 Dell Inspiron 20 3043 Hard Drive Replacement, Remove the hard drive bracket: step 3, image 2 of 2
      • Remove the four Phillips #0 screws, two on each side.

      Ask FixBot

      Add Comment

    4. Dell Inspiron 20 3043 Hard Drive Replacement, Remove the hard drive connector board: step 4, image 1 of 3 Dell Inspiron 20 3043 Hard Drive Replacement, Remove the hard drive connector board: step 4, image 2 of 3 Dell Inspiron 20 3043 Hard Drive Replacement, Remove the hard drive connector board: step 4, image 3 of 3
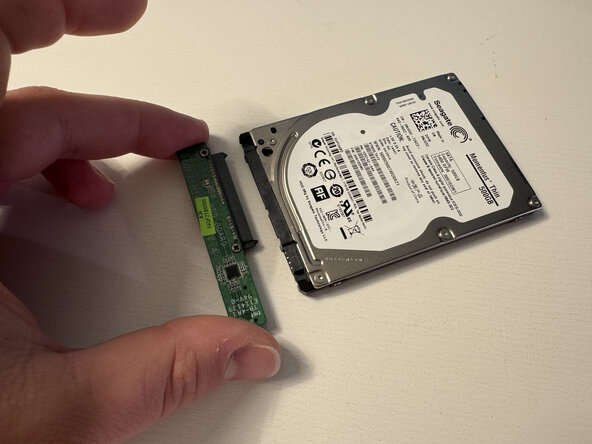
      • Peel the gaffer tape securing the hard drive connector board to the hard drive.

      • Pull the hard drive connector board straight off the hard drive.

      Ask FixBot

      Add Comment

    5. Dell Inspiron 20 3043 Hard Drive Replacement, Finish: step 5, image 1 of 1
      • Be mindful of the direction everything was facing: the plastic backing to the bracket should be on the PCB side of the hard drive, and the board should be facing with the connector port up when placed back inside the PC.

      Ask FixBot

      Add Comment

Conclusion

To reassemble your device, follow these instructions in reverse order.

Cancel: I did not complete this guide.

PumaGator

Member since: 06/21/22

364 Reputation

2 Guides authored

0 Guide Comments

Add Comment

View Statistics:

Past 24 Hours: 3

Past 7 Days: 12

Past 30 Days: 44

All Time: 101