Free Shipping on Domestic Orders $75+

Dell Inspiron 15R 5537 Display Assembly Replacement

Views: 1.7K

View statistics:

Past 24 Hours:
3
Past 7 Days:
13
Past 30 Days:
67
All Time:
1,687
Comments: 4

3 comments on steps, 1 guide comment.

Go to guide comments
Completed: 1

1 person has marked this guide "completed." Will you be next?

Favorites: 0

No one has favorited (and subscribed to) this guide. Will you be the first?

Time Required: 20 - 25 minutes
Difficulty: Moderate
Community-Contributed Guide

An awesome member of our community made this guide. It was not created by iFixit staff.

Better Introduction

Improve this guide by completing or revising its introduction.

Dell Inspiron 15R 5537 Display Assembly Replacement

What you need

Tools

    1. Dell Inspiron 15R 5537 Display Assembly Replacement, Battery: step 1, image 1 of 1
      • Before working inside your computer, read the safety information that shipped with your computer.

      • Close the display and turn over the computer to see the battery locking tabs.

      Ask FixBot

      Add Comment

    2. Dell Inspiron 15R 5537 Display Assembly Replacement: step 2, image 1 of 3 Dell Inspiron 15R 5537 Display Assembly Replacement: step 2, image 2 of 3 Dell Inspiron 15R 5537 Display Assembly Replacement: step 2, image 3 of 3
      • Pull both of the locking tabs outwards until they both click to release the battery.

      • Pull the battery out by lifting it from the top and sliding it forward.

      Ask FixBot

      Add Comment

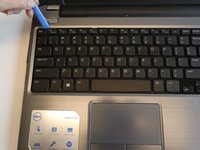
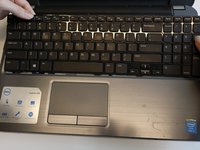
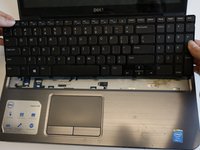
    1. Dell Inspiron 15R 5537 Display Assembly Replacement, Keyboard: step 3, image 1 of 3 Dell Inspiron 15R 5537 Display Assembly Replacement, Keyboard: step 3, image 2 of 3 Dell Inspiron 15R 5537 Display Assembly Replacement, Keyboard: step 3, image 3 of 3
      • Turn the laptop over so that the keyboard is facing up.

      • Use an opening tool to pry the keyboard from the base of the laptop.

      • Once the top of the keyboard is released, slide the keyboard upwards.

      • Be sure not to pull the keyboard straight up; this could damage the keyboard ribbon cable.

      Ask FixBot

      Add Comment

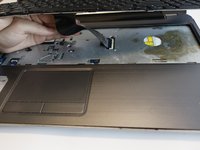
    2. Dell Inspiron 15R 5537 Display Assembly Replacement: step 4, image 1 of 3 Dell Inspiron 15R 5537 Display Assembly Replacement: step 4, image 2 of 3 Dell Inspiron 15R 5537 Display Assembly Replacement: step 4, image 3 of 3
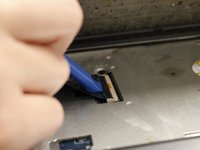
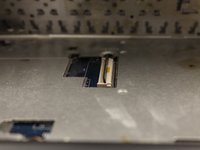
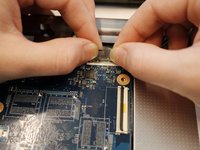
      • Use an opening tool to remove the keyboard ribbon from the latch by lifting the tab on top.

      • Once lifted, disconnect the ribbon and replace with a new keyboard.

      Ask FixBot

      Add Comment

    1. Dell Inspiron 15R 5537 Display Assembly Replacement, Wi-Fi Module: step 5, image 1 of 1
      • Once the keyboard is removed, the Wi-Fi module will be accessible.

      Ask FixBot

      Add Comment

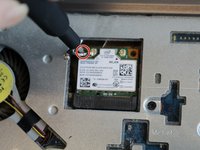
    2. Dell Inspiron 15R 5537 Display Assembly Replacement: step 6, image 1 of 2 Dell Inspiron 15R 5537 Display Assembly Replacement: step 6, image 2 of 2
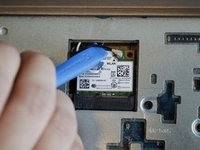
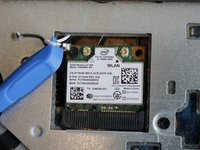
      • Use the opening tool to lift both antenna cables upward from the Wi-Fi module.

      Ask FixBot

      Add Comment

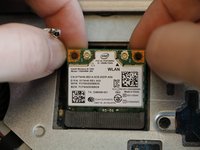
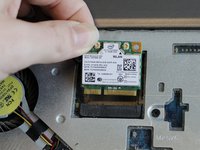
    3. Dell Inspiron 15R 5537 Display Assembly Replacement: step 7, image 1 of 3 Dell Inspiron 15R 5537 Display Assembly Replacement: step 7, image 2 of 3 Dell Inspiron 15R 5537 Display Assembly Replacement: step 7, image 3 of 3
      • Remove the 3mm Phillips #000 screw securing the Wi-Fi module.

      • Lift the Wi-Fi module up and out of the laptop.

      Ask FixBot

      Add Comment

      • WARNING: Before working inside your computer, read the safety information that shipped with your computer and follow the steps in "Before You Begin". After working inside your computer, follow the instructions in "After Working Inside Your Computer".

      • CAUTION: To avoid data loss, do not remove the hard drive while the computer is in Sleep or On state.

      • CAUTION: Hard drives are extremely fragile. Exercise care when handling the hard drive.

      Ask FixBot

      Add Comment

    1. Dell Inspiron 15R 5537 Display Assembly Replacement, Remove the Screws: step 9, image 1 of 1
      • Remove the screws that secure the hard-drive assembly to the computer base.

      Ask FixBot

      Add Comment

    2. Dell Inspiron 15R 5537 Display Assembly Replacement, Sliding the Hard Drive Assembly: step 10, image 1 of 1
      • Slide the hard-drive assembly forward to disconnect the hard-drive assembly from the system board.

      Ask FixBot

      Add Comment

    3. Dell Inspiron 15R 5537 Display Assembly Replacement, Lifting the Hard Drive Assembly: step 11, image 1 of 1
      • Using the pull-tab, lift the hard-drive assembly out of the computer base.

      Ask FixBot

      Add Comment

    4. Dell Inspiron 15R 5537 Display Assembly Replacement, Remove the Screws: step 12, image 1 of 1
      • Remove the screws that secure the hard-drive bracket to the hard drive.

      Ask FixBot

      Add Comment

    5. Dell Inspiron 15R 5537 Display Assembly Replacement, Lifting the Hard-Drive Bracket: step 13, image 1 of 1
      • Lift the hard-drive bracket off the hard drive.

      Ask FixBot

      Add Comment

    6. Dell Inspiron 15R 5537 Display Assembly Replacement, Align the Screw Holes: step 14, image 1 of 1
      • Align the screw holes on the hard-drive bracket with the screw holes on the NEW hard drive.

      Ask FixBot

      Add Comment

    7. Dell Inspiron 15R 5537 Display Assembly Replacement, Replace the Screws: step 15, image 1 of 1
      • Replace the screws that secure the hard-drive bracket to the hard drive.

      Ask FixBot

      Add Comment

    8. Dell Inspiron 15R 5537 Display Assembly Replacement, Placing the Hard Drive Assembly: step 16, image 1 of 1
      • Slide and place the hard-drive assembly in the hard-drive bay.

      Ask FixBot

      Add Comment

    9. Dell Inspiron 15R 5537 Display Assembly Replacement, Sliding the Hard-Drive Assembly: step 17, image 1 of 1
      • Slide the hard-drive assembly backward to connect the hard-drive assembly to the system board.

      Ask FixBot

      Add Comment

    10. Dell Inspiron 15R 5537 Display Assembly Replacement, Replace the Screws: step 18, image 1 of 1
      • Replace the screws that secure the hard-drive assembly to the computer base.

      Ask FixBot

      Add Comment

    1. Dell Inspiron 15R 5537 Display Assembly Replacement, Palm Rest: step 19, image 1 of 1
      • Remove thirteen 5mm Phillips #000 screws from the back cover of the laptop.

      Ask FixBot

      Add Comment

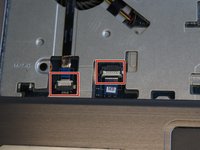
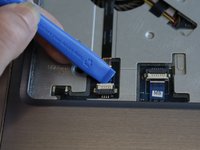
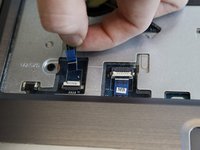
    2. Dell Inspiron 15R 5537 Display Assembly Replacement: step 20, image 1 of 3 Dell Inspiron 15R 5537 Display Assembly Replacement: step 20, image 2 of 3 Dell Inspiron 15R 5537 Display Assembly Replacement: step 20, image 3 of 3
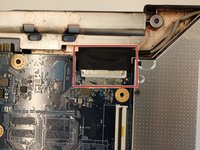
      • Use the opening tool to unplug the palm rest cables and slide the cables out.

      Ask FixBot

      Add Comment

    3. Dell Inspiron 15R 5537 Display Assembly Replacement: step 21, image 1 of 1
      • Remove seven 5mm Phillips #000 screws from the midframe.

      Ask FixBot

      Add Comment

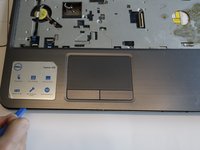
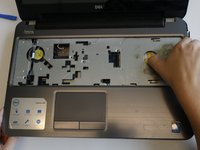
    4. Dell Inspiron 15R 5537 Display Assembly Replacement: step 22, image 1 of 3 Dell Inspiron 15R 5537 Display Assembly Replacement: step 22, image 2 of 3 Dell Inspiron 15R 5537 Display Assembly Replacement: step 22, image 3 of 3
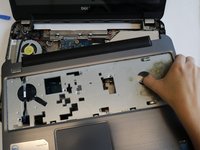
      • Use the opening tool to lift the edges of the palm rest. Once all of the sides are lifted, pull the palm rest off.

      Ask FixBot

      Add Comment

    1. Dell Inspiron 15R 5537 Display Assembly Replacement, Display Assembly: step 23, image 1 of 2 Dell Inspiron 15R 5537 Display Assembly Replacement, Display Assembly: step 23, image 2 of 2
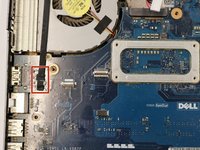
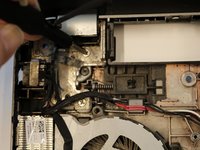
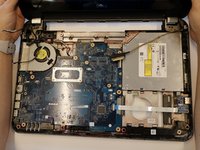
      • Unplug the DC jack to the right of the fan.

      Ask FixBot

      Add Comment

    2. Dell Inspiron 15R 5537 Display Assembly Replacement: step 24, image 1 of 3 Dell Inspiron 15R 5537 Display Assembly Replacement: step 24, image 2 of 3 Dell Inspiron 15R 5537 Display Assembly Replacement: step 24, image 3 of 3
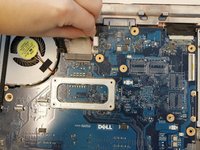
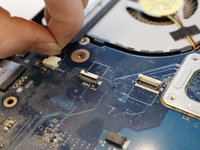
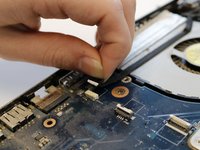
      • Unplug the display cable below the fan by pulling the cable straight back.

      Ask FixBot

      Add Comment

    3. Dell Inspiron 15R 5537 Display Assembly Replacement: step 25, image 1 of 3 Dell Inspiron 15R 5537 Display Assembly Replacement: step 25, image 2 of 3 Dell Inspiron 15R 5537 Display Assembly Replacement: step 25, image 3 of 3
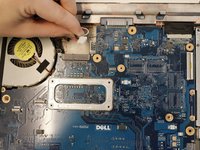
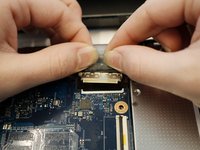
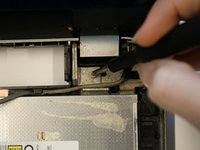
      • Unplug the display cable located near the right display hinge by lifting the tape and pulling back.

      Ask FixBot

      Add Comment

    4. Dell Inspiron 15R 5537 Display Assembly Replacement: step 26, image 1 of 3 Dell Inspiron 15R 5537 Display Assembly Replacement: step 26, image 2 of 3 Dell Inspiron 15R 5537 Display Assembly Replacement: step 26, image 3 of 3
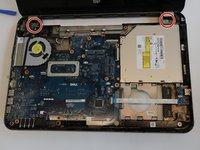
      • Remove the two 5mm Phillips #000 screws from the left and right hinges.

      Ask FixBot

      Add Comment

    5. Dell Inspiron 15R 5537 Display Assembly Replacement: step 27, image 1 of 2 Dell Inspiron 15R 5537 Display Assembly Replacement: step 27, image 2 of 2
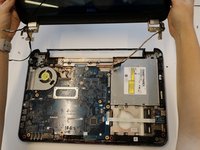
      • Remove the display assembly by lifting the display from the hinges.

      • It is important to ensure the display cables are fully disconnected before removing the assembly.

      Ask FixBot

      Add Comment

Conclusion

To reassemble your device, follow these instructions in reverse order.

Cancel: I did not complete this guide.

One other person completed this guide.

Kristen Gismondi

Member since: 11/12/14

109,567 Reputation

271 Guides authored

Team

iFixit Member of iFixit

Staff

121 Members

72,885 Guides authored

1 Guide Comment

Thanks for showing it all. Do you know where are the touchscreen and camera cables? I suspect mine are loose because the screen does not respond to touches anymore and lately the camera has stoped working albeit still being recognized. Thanks and best regards, Fábio.

Fábio de Salles - Reply Share

Add Comment

View Statistics:

Past 24 Hours: 3

Past 7 Days: 13

Past 30 Days: 67

All Time: 1,687