Dell Inspiron 1546 Hard Drive Replacement

Terrence15 and one other contributor
Last updated on Jul 27, 2018
Views: 503
View statistics:
- Past 24 Hours:
- 0
- Past 7 Days:
- 13
- Past 30 Days:
- 57
- All Time:
- 503
Comments: 0
No one has left comments on this guide. Will you be first?
Go to guide commentsCompleted: 0 1
No one has marked this guide "completed." Will you be the first?
1 person has marked this guide "completed." It's you — great job!
Favorites: 0 1
No one has favorited (and subscribed to) this guide. Will you be the first?
1 person has favorited (and subscribed to) this guide — and that's you!
Community-Contributed Guide
An awesome member of our community made this guide. It was not created by iFixit staff.
Introduction
Go to step 1 ↓In this guide, we will be showing you how to remove and replace the Hard Drive.
What you need
Tools

-
-
-
Remove the two screws that secure the hard drive assembly to the computer base.
 Ask FixBot
-
-
-
Slide the hard drive assembly out of the hard drive compartment.
-
-
-
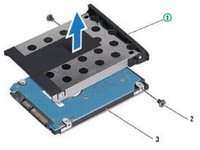
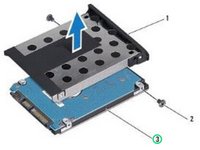
Remove the two screws that secure the hard drive bezel to the hard drive.
-
-
-
Align the screw holes on the hard drive bezel with the holes on the NEW hard drive.
-
-
-
Replace the two screws that secure the hard drive bezel to the hard drive.
-
-
-
-
Slide the hard drive assembly into the hard drive compartment until it is fully seated.
-
-
-
Replace the two screws that secure the hard drive assembly to the computer base.
-
-