Free Shipping on Domestic Orders $75+

Dell Inspiron 1545 Thermal Fan Replacement

What you need

  1. Dell Inspiron 1545 Thermal Fan Replacement, Battery: step 1, image 1 of 1
    • Before attempting to remove the battery ensure that the laptop is disconnected from all power sources and turned off.

    • Turn the laptop over to its back.

    Ask FixBot
  2. Dell Inspiron 1545 Thermal Fan Replacement: step 2, image 1 of 1
    • Slide the release latch while simultaneously pulling backwards on the battery.

    Ask FixBot
  3. Dell Inspiron 1545 Thermal Fan Replacement: step 3, image 1 of 1
    • Slide the battery out of the battery bay.

    Ask FixBot
  4. Dell Inspiron 1545 Thermal Fan Replacement, Optical Disk Drive: step 4, image 1 of 1
    • Flip the laptop to its back side.

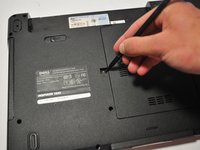
    • Remove the screw (5mm Phillips #1) that secures the Optical Disk Drive on the back of the laptop.

    Ask FixBot
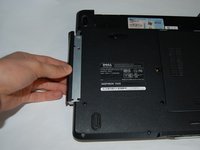
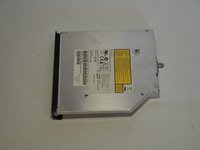
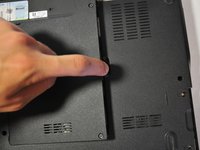
  5. Dell Inspiron 1545 Thermal Fan Replacement: step 5, image 1 of 3 Dell Inspiron 1545 Thermal Fan Replacement: step 5, image 2 of 3 Dell Inspiron 1545 Thermal Fan Replacement: step 5, image 3 of 3
    • Push the Optical Disk Drive out using a spudger tool as shown and pull from the front cover of the Optical Disk Drive.

    Ask FixBot
  6. Dell Inspiron 1545 Thermal Fan Replacement, Base Cover: step 6, image 1 of 1
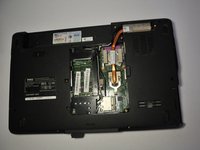
    • Unscrew the four screws (3mm Phillips #1) that hold the base cover in place.

    • The top 3 screws are "captive" (held in by a retaining ring) and will not come out.

    Ask FixBot
  7. Dell Inspiron 1545 Thermal Fan Replacement: step 7, image 1 of 2 Dell Inspiron 1545 Thermal Fan Replacement: step 7, image 2 of 2
    • Carefully lift the base cover vertically away from the laptop.

    Ask FixBot
  8. Dell Inspiron 1545 Thermal Fan Replacement, CPU Heat Sink: step 8, image 1 of 1
    • Loosen the 5 screws (4mm, Phillips #1) that secure the CPU Heat Sink to the motherboard.

    • These screws are held in place by a washer so you should not be able to completely remove the screws.

    Ask FixBot
  9. Dell Inspiron 1545 Thermal Fan Replacement: step 9, image 1 of 1
    • Pull up on the Heat Sink unit to remove it.

    Ask FixBot
  10. Dell Inspiron 1545 Thermal Fan Replacement, Center Control Cover: step 10, image 1 of 1
    • After removing the battery, remove the two screws (3mm Phillips #1) beneath it. These screws hold the Center Control Cover in place.

    Ask FixBot
  11. Dell Inspiron 1545 Thermal Fan Replacement: step 11, image 1 of 1
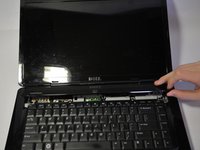
    • Flip the laptop over to the front and open the display as far as possible.

    Ask FixBot
  12. Dell Inspiron 1545 Thermal Fan Replacement: step 12, image 1 of 3 Dell Inspiron 1545 Thermal Fan Replacement: step 12, image 2 of 3 Dell Inspiron 1545 Thermal Fan Replacement: step 12, image 3 of 3
    • The Center Control Cover is VERY fragile, be careful when using prying tools.

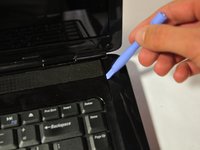
    • Pry the Center Control Cover from the laptop. On the right there is a small divot, it is advised that you start removing the panel from here.

    • Carefully lift the Center Control Cover away from the laptop.

    Ask FixBot
  13. Dell Inspiron 1545 Thermal Fan Replacement, Keyboard: step 13, image 1 of 1
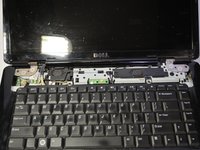
    • Remove the two screws (5mm Phillips #1) at the top of the keyboard.

    Ask FixBot
  14. Dell Inspiron 1545 Thermal Fan Replacement: step 14, image 1 of 1
    • Slide the keyboard out and away from the laptop and lift it up to access the keyboard connector.

    • Do not pull hard on the keyboard while removing it, you may damage the keyboard or the keyboard connector.

    Ask FixBot
  15. Dell Inspiron 1545 Thermal Fan Replacement: step 15, image 1 of 1
    • Lift the connector latch that secures the keyboard cable to the connector on the motherboard and remove the cable.

    Ask FixBot
  16. Dell Inspiron 1545 Thermal Fan Replacement: step 16, image 1 of 1
    • Lift the keyboard up and away from the laptop.

    Ask FixBot
  17. Dell Inspiron 1545 Thermal Fan Replacement, Palm Rest: step 17, image 1 of 1
    • Remove the 11 screws (5mm Phillips #1) from the back of the laptop as marked. One screw is in the middle, by the RAM.

    Ask FixBot
  18. Dell Inspiron 1545 Thermal Fan Replacement: step 18, image 1 of 1
    • Remove black and white wires from the WLAN that lead to the display by pulling straight up.

    • Unwind the wires from the routing guides.

    Ask FixBot
  19. Dell Inspiron 1545 Thermal Fan Replacement: step 19, image 1 of 1
    • Turn the laptop back over to its normal resting position and pull the black and white wires previously connected to the WLAN through the hole.

    • Remove the 4 smaller screws (5mm Phillips #1) and one screw on the top left (3mm Phillips #1) from the palm rest.

    Ask FixBot
  20. Dell Inspiron 1545 Thermal Fan Replacement: step 20, image 1 of 1
    • Disconnect the Bluetooth card cable, Wed cable, Camera1 cable, power cable, and touchpad cable from the respective Motherboard connectors as marked. For the Bluetooth cable and Camera1 cable, pull the plugs towards the screen. For the touchpad and power cable, lift the black tab and then pull them out. For the Wed cable, pull the blue tab up.

    • Unsecure the wires from the routing guides so they are loose.

    • Pull on the plastic tabs for each connector to help prevent causing damage to the connectors.

    Ask FixBot
  21. Dell Inspiron 1545 Thermal Fan Replacement: step 21, image 1 of 1
    • To separate the palm rest from the rest of the computer, use a plastic opening tool to lift up the plastic. It is best to start at one point and work your way around.

    Ask FixBot
  22. Dell Inspiron 1545 Thermal Fan Replacement, Daughter Board: step 22, image 1 of 1
    • Remove the 3 screws (3mm Phillips #1) that secure the daughter board to the motherboard.

    • Lift the daughter board away from the laptop.

    Ask FixBot
  23. Dell Inspiron 1545 Thermal Fan Replacement, Motherboard: step 23, image 1 of 1
    • Remove the two screws (3mm, Phillips #1) on the left and the two screws (5mm, Phillips #1) on the right that secure the Motherboard to the laptop.

    Ask FixBot
  24. Dell Inspiron 1545 Thermal Fan Replacement: step 24, image 1 of 1
    • Disconnect the Thermal Fan cable, Speaker cable, and USB Board cable from their connectors.

    Ask FixBot
  25. Dell Inspiron 1545 Thermal Fan Replacement: step 25, image 1 of 1
    • To remove the Motherboard, pull away and up from the base of the laptop.

    • Along with removing the Motherboard if you haven’t already done so, the auxiliary port cover on the front will come off with it as well.

    Ask FixBot
  26. Dell Inspiron 1545 Thermal Fan Replacement, Thermal Fan: step 26, image 1 of 1
    • Remove the two screws (5mm, Phillips #1) that secure the thermal fan to the laptop.

    • Lift the thermal fan up and away from the computer.

    Ask FixBot
Conclusion

To reassemble your device, follow these instructions in reverse order.

13 other people completed this guide.

Nathan Lemay

Member since: 04/16/14

3,160 Reputation

15 Guides authored

Team

Cal Poly, Team 9-14, Regan Spring 2014 Member of Cal Poly, Team 9-14, Regan Spring 2014

CPSU-REGAN-S14S9G14

4 Members

15 Guides authored

0 Guide Comments

Add Comment

View Statistics:

Past 24 Hours: 7

Past 7 Days: 18

Past 30 Days: 81

All Time: 5,230