Free Shipping on Domestic Orders $75+

Dell Inspiron 1545 Power Button Board Replacement

What you need

    1. Dell Inspiron 1545 Power Button Board Replacement, Power Button Board: step 1, image 1 of 1
      • Turn the laptop off and disconnect it from all power sources.

      • Turn the laptop over so that the bottom is facing upwards.

      Ask FixBot

      Add Comment

    2. Dell Inspiron 1545 Power Button Board Replacement: step 2, image 1 of 1
      • Slide the release latch while simultaneously pulling the battery outwards.

      Ask FixBot

      Add Comment

    3. Dell Inspiron 1545 Power Button Board Replacement: step 3, image 1 of 1
      • Slide the battery completely out of the bay.

      Ask FixBot

      Add Comment

    4. Dell Inspiron 1545 Power Button Board Replacement: step 4, image 1 of 1
      • Once the battery has been removed, take out the two screws (3mm Phillips #1) beneath it. These screws hold the center control cover in place.

      Ask FixBot

      Add Comment

    5. Dell Inspiron 1545 Power Button Board Replacement: step 5, image 1 of 1
      • Flip the laptop back over to the front and push the screen open as far as possible.

      Ask FixBot

      Add Comment

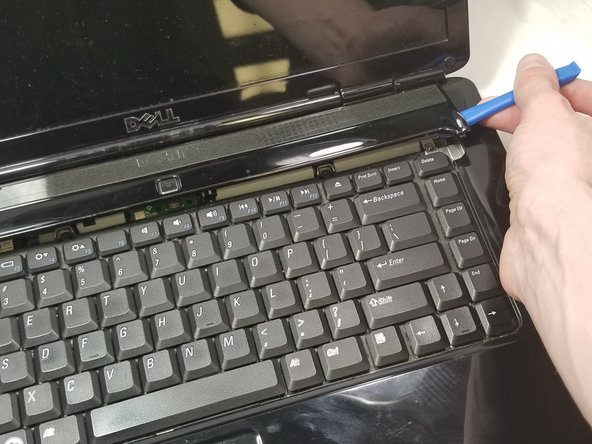
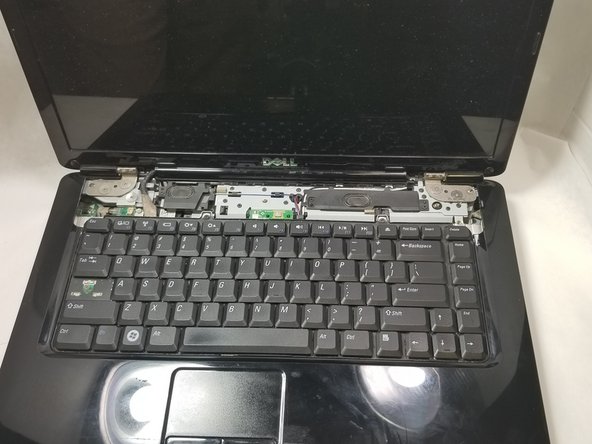
    6. Dell Inspiron 1545 Power Button Board Replacement: step 6, image 1 of 3 Dell Inspiron 1545 Power Button Board Replacement: step 6, image 2 of 3 Dell Inspiron 1545 Power Button Board Replacement: step 6, image 3 of 3
      • The center control cover is very fragile; be careful when prying it off.

      • Pry the center control cover off of the laptop using a plastic opening tool. On the right side of the cover, there is a small divot to help you start removing the cover.

      • Carefully lift the central control cover away from the laptop.

      Ask FixBot

      Add Comment

    7. Dell Inspiron 1545 Power Button Board Replacement: step 7, image 1 of 1
      • Remove the two screws (5mm Phillips #1) at the top of the keyboard.

      Ask FixBot

      Add Comment

    8. Dell Inspiron 1545 Power Button Board Replacement: step 8, image 1 of 1
      • Be careful when pulling the keyboard away from the laptop, you may damage the connector holding it to the motherboard.

      • Using your hands, push the keyboard out and away from the laptop.

      Ask FixBot

      Add Comment

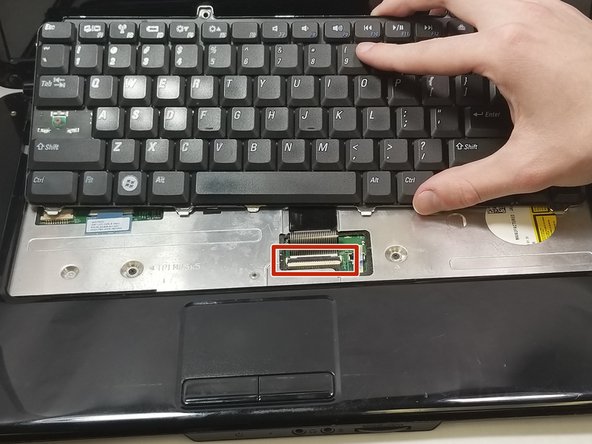
    9. Dell Inspiron 1545 Power Button Board Replacement: step 9, image 1 of 2 Dell Inspiron 1545 Power Button Board Replacement: step 9, image 2 of 2
      • Lift the connector latch to remove the keyboard cable from the motherboard.

      • Lift the keyboard away from the laptop.

      Ask FixBot

      Add Comment

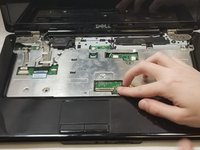
    10. Dell Inspiron 1545 Power Button Board Replacement: step 10, image 1 of 1
      • Lift the connector latch to remove the power button board from the motherboard.

      • Pull on the blue plastic tab to help prevent causing any damage to the connector.

      Ask FixBot

      Add Comment

    11. Dell Inspiron 1545 Power Button Board Replacement: step 11, image 1 of 1
      • Pry the power button board out with your finger.

      • Pull the power button board away from the laptop.

      Ask FixBot

      Add Comment

Conclusion

To reassemble your device, follow these instructions in reverse order.

Cancel: I did not complete this guide.

Michael Hill

Member since: 02/28/18

193 Reputation

1 Guide authored

0 Guide Comments

Add Comment

View Statistics:

Past 24 Hours: 1

Past 7 Days: 5

Past 30 Days: 22

All Time: 2,767