Free Shipping on Domestic Orders $75+

Dell Inspiron 15-7559 Hard Drive Replacement

What you need

    1. Dell Inspiron 15-7559 Hard Drive Replacement, Back Panel: step 1, image 1 of 1
      • Turn off the computer.

      • Disconnect the charging cable from the computer.

      • Failure to turn off the device and disconnect the cable could lead to personal injury or device damage.

      • Flip the computer upside down.

      Ask FixBot

      Add Comment

    2. Dell Inspiron 15-7559 Hard Drive Replacement: step 2, image 1 of 3 Dell Inspiron 15-7559 Hard Drive Replacement: step 2, image 2 of 3 Dell Inspiron 15-7559 Hard Drive Replacement: step 2, image 3 of 3
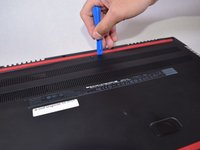
      • Remove the captive screw located on the top section of the back panel, using a Philips #1 screwdriver.

      • Keep in mind that the screw cannot be fully removed from the panel, even when fully loosened.

      Ask FixBot

      Add Comment

    3. Dell Inspiron 15-7559 Hard Drive Replacement: step 3, image 1 of 3 Dell Inspiron 15-7559 Hard Drive Replacement: step 3, image 2 of 3 Dell Inspiron 15-7559 Hard Drive Replacement: step 3, image 3 of 3
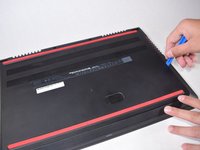
      • Use the blue, plastic opening tool to gently pry a section of the back panel open.

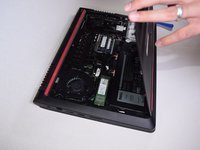
      • Next slide the opening tool around the back panel to disconnect the clips holding the panel in place.

      • After the clips have been disconnected, the back panel can then be easily lifted off the computer.

      Ask FixBot

      Add Comment

    1. Dell Inspiron 15-7559 Hard Drive Replacement, Hard Drive: step 4, image 1 of 1
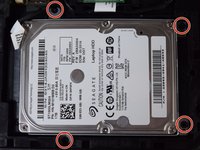
      • Locate the hard drive on the bottom right side of the laptop.

      Ask FixBot

      Add Comment

    2. Dell Inspiron 15-7559 Hard Drive Replacement: step 5, image 1 of 2 Dell Inspiron 15-7559 Hard Drive Replacement: step 5, image 2 of 2
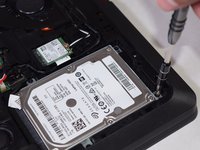
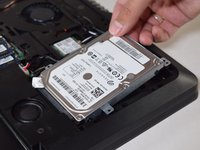
      • Unscrew the 4 x 2.5mm x 5mm screws, using the Philips #1 screwdriver.

      Ask FixBot

      Add Comment

    3. Dell Inspiron 15-7559 Hard Drive Replacement: step 6, image 1 of 3 Dell Inspiron 15-7559 Hard Drive Replacement: step 6, image 2 of 3 Dell Inspiron 15-7559 Hard Drive Replacement: step 6, image 3 of 3
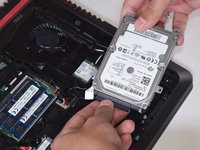
      • Using your hands, raise the hard drive far enough to disconnect the cables attached to it.

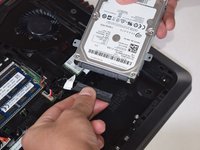
      • Using your hand grab the black portion connecting the cables to the battery and disconnect it.

      • Do not pull on the cables directly. This would risk damaging them or tearing them from the device.

      Ask FixBot

      Add Comment

Conclusion

To reassemble your device, follow these instructions in reverse order.

Cancel: I did not complete this guide.

3 other people completed this guide.

Trenton Greevebiester

Member since: 10/19/17

1,614 Reputation

6 Guides authored

Team

UW Tacoma, Team S3-G2, Liner Fall 2017 Member of UW Tacoma, Team S3-G2, Liner Fall 2017

UWT-LINER-F17S3G2

5 Members

84 Guides authored

2 Guide Comments

Is there a step related to removing the hard drive mount? I believe that you’ll need the mount in order to screw a new drive into the system.

David Trang - Reply Share

Are there other options beside the same seagate hard drive? I’m reading on forums that this hard drive is not very reliable. And since mine just completely died after less than 4 years I’m skeptable replacing it with the same exact hard drive?

Tee Rivera - Reply Share

Add Comment

View Statistics:

Past 24 Hours: 3

Past 7 Days: 11

Past 30 Days: 39

All Time: 9,651