Free Shipping on Domestic Orders $75+

Dell Inspiron 15-7548 Fan Replacement

What you need

    1. Dell Inspiron 15-7548 Fan Replacement, Back Panel: step 1, image 1 of 2 Dell Inspiron 15-7548 Fan Replacement, Back Panel: step 1, image 2 of 2
      • Remove the six 6 mm screws from the back panel with a Phillips #1 screwdriver.

      • Loosen the four captive screws at the bottom using a Phillips #1 screwdriver.

      • The four screws on the bottom are captive screws and cannot be removed.

      Ask FixBot

      Add Comment

    2. Dell Inspiron 15-7548 Fan Replacement: step 2, image 1 of 2 Dell Inspiron 15-7548 Fan Replacement: step 2, image 2 of 2
      • Pry out the back panel using the flat head side of the spudger.

      • Do not insert the spudger more than half an inch when separating the bottom and right side of the back panel.

      Ask FixBot

      Add Comment

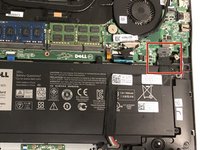
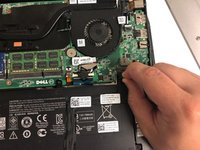
    1. Dell Inspiron 15-7548 Fan Replacement, Battery: step 3, image 1 of 2 Dell Inspiron 15-7548 Fan Replacement, Battery: step 3, image 2 of 2
      • Disconnect the battery from the motherboard by pulling the black tab attached to the cable.

      Ask FixBot

      Add Comment

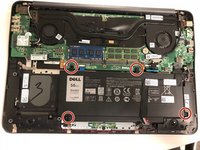
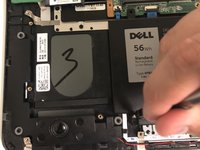
    2. Dell Inspiron 15-7548 Fan Replacement: step 4, image 1 of 2 Dell Inspiron 15-7548 Fan Replacement: step 4, image 2 of 2
      • Remove the four 2.5x6mm screws using a Phillips #1 screwdriver.

      Ask FixBot

      Add Comment

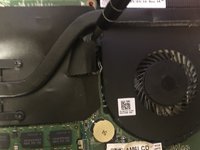
    1. Dell Inspiron 15-7548 Fan Replacement, Fan: step 5, image 1 of 1
      • The two fans are located at the top of the computer.

      • The fan on the left is for the GPU (Graphics processing unit) and the right fan is for the CPU (Central processing unit).

      Ask FixBot

      Add Comment

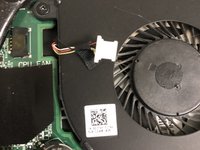
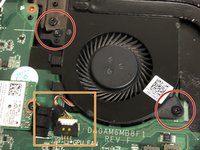
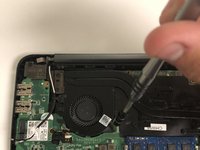
    2. Dell Inspiron 15-7548 Fan Replacement: step 6, image 1 of 3 Dell Inspiron 15-7548 Fan Replacement: step 6, image 2 of 3 Dell Inspiron 15-7548 Fan Replacement: step 6, image 3 of 3
      • To unplug the CPU fan lift the black plastic cutout next to the fan.

      • The connection can be removed by hand or with the plastic spudger.

      Ask FixBot

      Add Comment

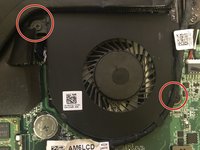
    3. Dell Inspiron 15-7548 Fan Replacement: step 7, image 1 of 2 Dell Inspiron 15-7548 Fan Replacement: step 7, image 2 of 2
      • Remove the two 2x3mm screws from the fan using the Phillips #1 screwdriver.

      • The unit may now be removed from the board.

      • The black cord running alongside the fan is for the display. Push it aside if it stops you from removing the fan.

      Ask FixBot

      Add Comment

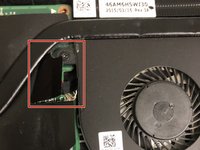
    4. Dell Inspiron 15-7548 Fan Replacement: step 8, image 1 of 3 Dell Inspiron 15-7548 Fan Replacement: step 8, image 2 of 3 Dell Inspiron 15-7548 Fan Replacement: step 8, image 3 of 3
      • Remove the two 2x3mm screws from the fan using the Phillips #1 screwdriver.

      • Disconnect the unit from the motherboard.

      • It may be easier to disconnect with the spudger tool but it can also be done by hand.

      Ask FixBot

      Add Comment

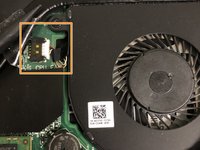
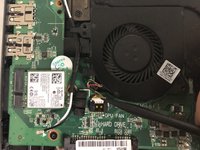
    5. Dell Inspiron 15-7548 Fan Replacement: step 9, image 1 of 2 Dell Inspiron 15-7548 Fan Replacement: step 9, image 2 of 2
      Tool used on this step:
      Tweezers
      $4.99
      Buy
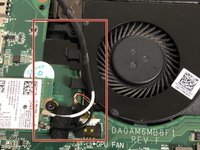
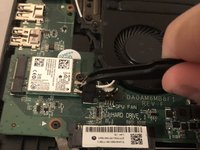
      • The black and white wires need to be unplugged and removed from the tabs on the fan.

      • Use a pair of tweezers to unplug the wires.

      • When reconnecting the wires connect the white to the top plug and the black to the bottom.

      • The unit may now be removed from the board.

      Ask FixBot

      Add Comment

Conclusion

To reassemble your device, follow these instructions in reverse order.

Cancel: I did not complete this guide.

2 other people completed this guide.

0 Guide Comments

Add Comment

View Statistics:

Past 24 Hours: 1

Past 7 Days: 12

Past 30 Days: 48

All Time: 3,317