Free Shipping on Domestic Orders $75+

Dell Inspiron 15-3543 Touchpad Replacement

What you need

    1. Dell Inspiron 15-3543 Touchpad Replacement, Touchpad: step 1, image 1 of 2 Dell Inspiron 15-3543 Touchpad Replacement, Touchpad: step 1, image 2 of 2
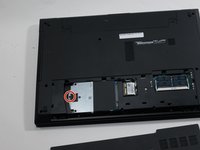
      • Flip the device over so the bottom is facing up.

      • Using a #0 Phillips screwdriver, remove the 4.0mm screw to the right of the disk drive.

      Ask FixBot

      Add Comment

    2. Dell Inspiron 15-3543 Touchpad Replacement: step 2, image 1 of 2 Dell Inspiron 15-3543 Touchpad Replacement: step 2, image 2 of 2
      • Pull the disk drive out and sit it to the side.

      Ask FixBot

      Add Comment

    3. Dell Inspiron 15-3543 Touchpad Replacement: step 3, image 1 of 2 Dell Inspiron 15-3543 Touchpad Replacement: step 3, image 2 of 2
      • Using a #0 Phillips screwdriver, remove the 2.0mm screw from the back of the device beside the vents.

      Ask FixBot

      Add Comment

    4. Dell Inspiron 15-3543 Touchpad Replacement: step 4, image 1 of 3 Dell Inspiron 15-3543 Touchpad Replacement: step 4, image 2 of 3 Dell Inspiron 15-3543 Touchpad Replacement: step 4, image 3 of 3
      • Slide the panel off by placing your hands on top and, while using a little force, sliding your hands down.

      Ask FixBot

      Add Comment

    5. Dell Inspiron 15-3543 Touchpad Replacement: step 5, image 1 of 2 Dell Inspiron 15-3543 Touchpad Replacement: step 5, image 2 of 2
      • Using a #0 Phillips screwdriver, remove the 2.0mm screw beside the black pull tab on the hard drive to the bottom left of the device.

      Ask FixBot

      Add Comment

    6. Dell Inspiron 15-3543 Touchpad Replacement: step 6, image 1 of 2 Dell Inspiron 15-3543 Touchpad Replacement: step 6, image 2 of 2
      • Pull the black tab up and to the left to completely remove the hard drive.

      • Sit the hard drive to the side once it is out.

      Ask FixBot

      Add Comment

    7. Dell Inspiron 15-3543 Touchpad Replacement: step 7, image 1 of 2 Dell Inspiron 15-3543 Touchpad Replacement: step 7, image 2 of 2
      • Turn the device over and open it.

      • You will see 5 notches at the top of the keyboard.

      • Stick the end of the metal spudger between each of these notches to pry the keyboard up. Once you hear a pop sound, stop and move onto the next notch.

      Ask FixBot

      Add Comment

    8. Dell Inspiron 15-3543 Touchpad Replacement: step 8, image 1 of 2 Dell Inspiron 15-3543 Touchpad Replacement: step 8, image 2 of 2
      • Once all five notches at the top of the keyboard are loosened, begin pulling it up from the top.

      • Pull the keyboard up slowly so you don't tear the ribbon cable out or damage it.

      Ask FixBot

      Add Comment

    9. Dell Inspiron 15-3543 Touchpad Replacement: step 9, image 1 of 2 Dell Inspiron 15-3543 Touchpad Replacement: step 9, image 2 of 2
      • To remove the ribbon cable, use the metal spudger tool to pop the ribbon cable lock up.

      • After popping up the ribbon cable lock, you can pull the ribbon cable out and sit the keyboard to the side.

      Ask FixBot

      Add Comment

    10. Dell Inspiron 15-3543 Touchpad Replacement: step 10, image 1 of 2 Dell Inspiron 15-3543 Touchpad Replacement: step 10, image 2 of 2
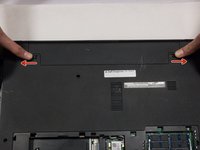
      • Flip the device over so the bottom is facing up.

      • Push the two battery locks outwards.

      Ask FixBot

      Add Comment

    11. Dell Inspiron 15-3543 Touchpad Replacement: step 11, image 1 of 2 Dell Inspiron 15-3543 Touchpad Replacement: step 11, image 2 of 2
      • Pull the top of the battery up and out.

      • Sit the bettery to the side once it is out.

      Ask FixBot

      Add Comment

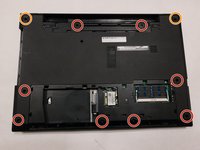
    12. Dell Inspiron 15-3543 Touchpad Replacement: step 12, image 1 of 2 Dell Inspiron 15-3543 Touchpad Replacement: step 12, image 2 of 2
      • Remove the following ten screws with a #0 Phillips screwdriver:

      • Two 8.0mm screws.

      • Eight 4.0mm screws.

      Ask FixBot

      Add Comment

    13. Dell Inspiron 15-3543 Touchpad Replacement: step 13, image 1 of 2 Dell Inspiron 15-3543 Touchpad Replacement: step 13, image 2 of 2
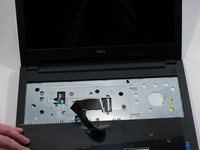
      • Turn the device over and open it.

      • Using a #0 Phillips screwdriver, remove the three 4.0mm screws on the front where the keyboard used to be.

      Ask FixBot

      Add Comment

    14. Dell Inspiron 15-3543 Touchpad Replacement: step 14, image 1 of 2 Dell Inspiron 15-3543 Touchpad Replacement: step 14, image 2 of 2
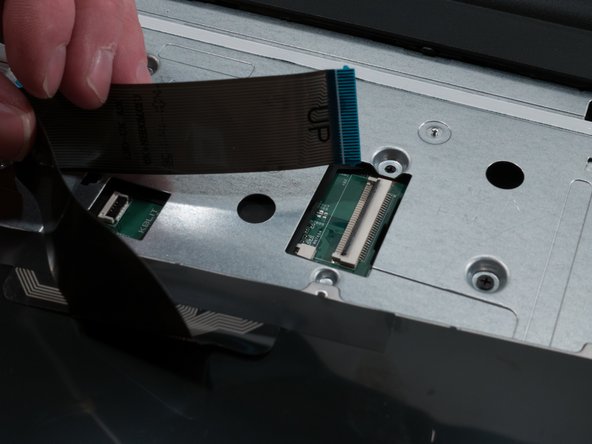
      • On the front of the device, there will be two ribbon cables. Remove them using the following directions:

      • Pull the black cable ribbon lock up and pull the blue ribbon out using the tab.

      • Pull the white cable ribbon lock up and pull the blue ribbon out using the tab .

      Ask FixBot

      Add Comment

    15. Dell Inspiron 15-3543 Touchpad Replacement: step 15, image 1 of 3 Dell Inspiron 15-3543 Touchpad Replacement: step 15, image 2 of 3 Dell Inspiron 15-3543 Touchpad Replacement: step 15, image 3 of 3
      • Using the one or two opening tools, pry the bottom of the top plate off starting underneath the headphone jack.

      Ask FixBot

      Add Comment

    16. Dell Inspiron 15-3543 Touchpad Replacement: step 16, image 1 of 2 Dell Inspiron 15-3543 Touchpad Replacement: step 16, image 2 of 2
      • Continue going around the device and prying it open until the top panel is off.

      Ask FixBot

      Add Comment

    17. Dell Inspiron 15-3543 Touchpad Replacement: step 17, image 1 of 2 Dell Inspiron 15-3543 Touchpad Replacement: step 17, image 2 of 2
      • On the inside of the top panel, pull the black ribbon cable lock up and pull the ribbon cable out using the tab.

      Ask FixBot

      Add Comment

    18. Dell Inspiron 15-3543 Touchpad Replacement: step 18, image 1 of 2 Dell Inspiron 15-3543 Touchpad Replacement: step 18, image 2 of 2
      • Using a #0 Phillips screwdriver, remove the three 1.0mm screws.

      Ask FixBot

      Add Comment

    19. Dell Inspiron 15-3543 Touchpad Replacement: step 19, image 1 of 2 Dell Inspiron 15-3543 Touchpad Replacement: step 19, image 2 of 2
      • Pull the metal plate up and out from the top.

      Ask FixBot

      Add Comment

Conclusion

To reassemble your device, follow these instructions in reverse order.

Cancel: I did not complete this guide.

2 other people completed this guide.

0 Guide Comments

Add Comment

View Statistics:

Past 24 Hours: 0

Past 7 Days: 3

Past 30 Days: 38

All Time: 1,767