Free Shipping on Domestic Orders $75+

Dell Inspiron 14z-5423 Battery Replacement

What you need

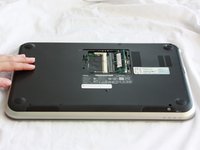
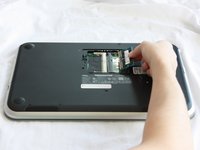
    1. Dell Inspiron 14z-5423 Battery Replacement, RAM: step 1, image 1 of 2 Dell Inspiron 14z-5423 Battery Replacement, RAM: step 1, image 2 of 2
      • Close the display and turn over the computer.

      • Make sure your device is powered down and unplugged before beginning the replacement.

      Ask FixBot

      Add Comment

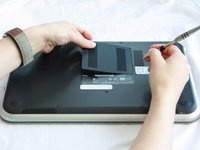
    2. Dell Inspiron 14z-5423 Battery Replacement: step 2, image 1 of 1
      • Use a J0 bit tipped screwdriver to unscrew the one 6 mm Phillips screw on the RAM cover.

      Ask FixBot

      Add Comment

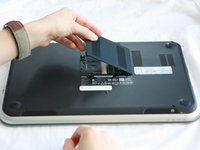
    3. Dell Inspiron 14z-5423 Battery Replacement: step 3, image 1 of 2 Dell Inspiron 14z-5423 Battery Replacement: step 3, image 2 of 2
      • Lightly lift the RAM cover up and at an angle, away from the computer.

      Ask FixBot
      Add Comment

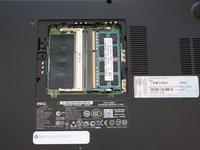
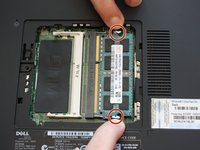
    4. Dell Inspiron 14z-5423 Battery Replacement: step 4, image 1 of 2 Dell Inspiron 14z-5423 Battery Replacement: step 4, image 2 of 2
      • Use your fingers to carefully pull the securing clips on the RAM away from each other.

      • The RAM should pop up when the clips are released.

      Ask FixBot
      Add Comment

    5. Dell Inspiron 14z-5423 Battery Replacement: step 5, image 1 of 2 Dell Inspiron 14z-5423 Battery Replacement: step 5, image 2 of 2
      • Remove the popped up RAM by pulling it away from the connection.

      • If it does not pop up pry it out in a steady and straight direction.

      Ask FixBot

      Add Comment

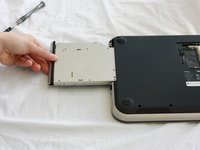
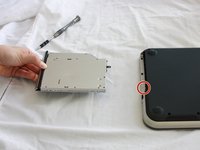
    1. Dell Inspiron 14z-5423 Battery Replacement, Optical Drive: step 6, image 1 of 2 Dell Inspiron 14z-5423 Battery Replacement, Optical Drive: step 6, image 2 of 2
      • Slide the CD/DVD drive on the side of the laptop out using your fingers.

      • Using a J0 bit screwdriver, unscrew the one 2 mm Phillips screw.

      • You only need to unscrew this screw if you are using this as a prerequisite guide.

      Ask FixBot

      Add Comment

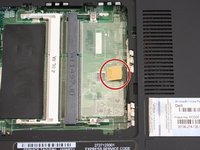
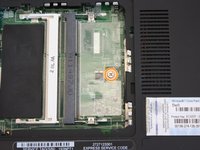
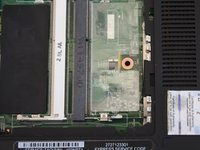
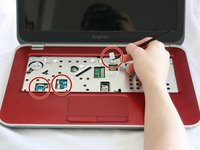
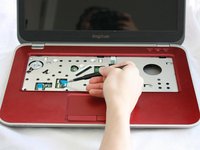
    1. Dell Inspiron 14z-5423 Battery Replacement, Keyboard: step 7, image 1 of 3 Dell Inspiron 14z-5423 Battery Replacement, Keyboard: step 7, image 2 of 3 Dell Inspiron 14z-5423 Battery Replacement, Keyboard: step 7, image 3 of 3
      • Lift the plastic yellow flap on the system board.

      • Use the J0 Bit screwdriver to remove the one 6 mm Phillips screw in center of the system board that is connected to the keyboard.

      Ask FixBot

      Add Comment

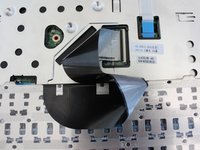
    2. Dell Inspiron 14z-5423 Battery Replacement: step 8, image 1 of 1
      • Flip over the computer and open the display.

      Ask FixBot
      Add Comment

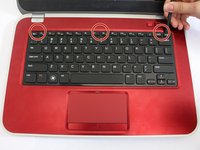
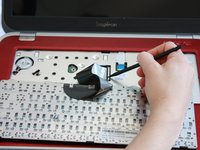
    3. Dell Inspiron 14z-5423 Battery Replacement: step 9, image 1 of 2 Dell Inspiron 14z-5423 Battery Replacement: step 9, image 2 of 2
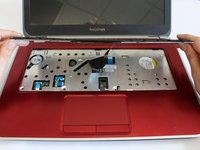
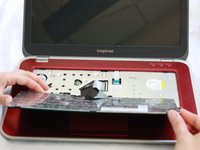
      • Insert a spudger next to the plastic indents located at the top of the keyboard and gently pry to release the securing clips.

      • Lift the keyboard off of the computer.

      • Be careful not to tear the ribbon that attaches the back of the keyboard to the computer when lifting it.

      Ask FixBot
      Add Comment

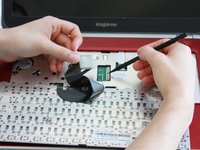
    4. Dell Inspiron 14z-5423 Battery Replacement: step 10, image 1 of 2 Dell Inspiron 14z-5423 Battery Replacement: step 10, image 2 of 2
      • Flip the keyboard over onto the palm-rest assembly.

      Ask FixBot
      Add Comment

    5. Dell Inspiron 14z-5423 Battery Replacement: step 11, image 1 of 3 Dell Inspiron 14z-5423 Battery Replacement: step 11, image 2 of 3 Dell Inspiron 14z-5423 Battery Replacement: step 11, image 3 of 3
      • Flip the little black securing bar near the base of the ribbon with a spudger to release the ribbon from the computer.

      Ask FixBot

      Add Comment

    1. Dell Inspiron 14z-5423 Battery Replacement, Palm Rest Assembly: step 12, image 1 of 1
      • Close the display and turn over the computer.

      Ask FixBot

      Add Comment

    2. Dell Inspiron 14z-5423 Battery Replacement: step 13, image 1 of 3 Dell Inspiron 14z-5423 Battery Replacement: step 13, image 2 of 3 Dell Inspiron 14z-5423 Battery Replacement: step 13, image 3 of 3
      Tool used on this step:
      Tweezers
      $4.99
      Buy
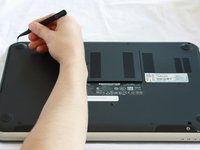
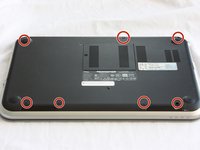
      • Remove all 7 rubber screw caps with tweezers.

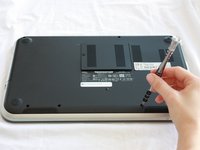
      • Use a J0 Bit tipped screwdriver unscrew the seven 6 mm Phillips screws on the back casing of the laptop.

      Ask FixBot

      Add Comment

    3. Dell Inspiron 14z-5423 Battery Replacement: step 14, image 1 of 2 Dell Inspiron 14z-5423 Battery Replacement: step 14, image 2 of 2
      • Flip the computer over and open the display.

      • Pull on the blue tabs to disconnect the palm rest assembly from the computer.

      Ask FixBot

      Add Comment

    4. Dell Inspiron 14z-5423 Battery Replacement: step 15, image 1 of 1
      • Use J0 Bit screwdriver to remove all four 6 mm Phillips screws.

      Ask FixBot

      Add Comment

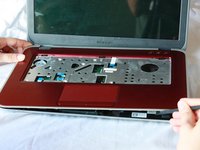
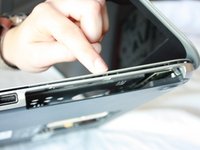
    5. Dell Inspiron 14z-5423 Battery Replacement: step 16, image 1 of 3 Dell Inspiron 14z-5423 Battery Replacement: step 16, image 2 of 3 Dell Inspiron 14z-5423 Battery Replacement: step 16, image 3 of 3
      • Gently wedge the nylon spudger underneath the palm-rest assembly to release the latches.

      • Continue this process on all sides of the computer edges until the assembly pulls off.

      • Remove the palm rest assembly.

      • If you have difficulty lifting up the assembly, you might not have taken out all 7 screws on the bottom of the computer.

      Ask FixBot

      Add Comment

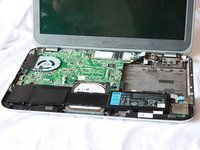
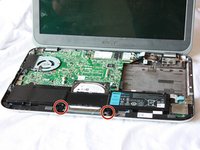
    1. Dell Inspiron 14z-5423 Battery Replacement, Battery: step 17, image 1 of 2 Dell Inspiron 14z-5423 Battery Replacement, Battery: step 17, image 2 of 2
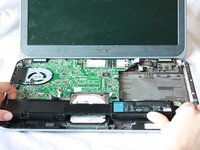
      • Use a J0 Bit screwdriver to remove the two 6 mm Phillips screws securing the battery located near the bottom of the laptop.

      Ask FixBot

      Add Comment

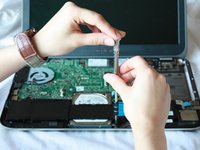
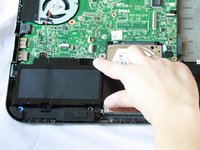
    2. Dell Inspiron 14z-5423 Battery Replacement: step 18, image 1 of 3 Dell Inspiron 14z-5423 Battery Replacement: step 18, image 2 of 3 Dell Inspiron 14z-5423 Battery Replacement: step 18, image 3 of 3
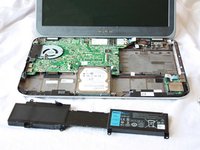
      • Lift the tiny black tab and pull the battery out at a slight angle.

      Ask FixBot

      Add Comment

Conclusion

To reassemble your device, follow these instructions in reverse order.

Cancel: I did not complete this guide.

6 other people completed this guide.

Brittany

Member since: 09/12/16

938 Reputation

4 Guides authored

Team

CSU Fullerton, Team 2-2, Bruce Fall 2016 Member of CSU Fullerton, Team 2-2, Bruce Fall 2016

CSUF-BRUCE-F16S2G2

5 Members

132 Guides authored

1 Guide Comment

Thanks! These instructions worked very well for me, and I performed my battery and disk upgrades successfully!

ericfogleman - Reply Share

Add Comment

View Statistics:

Past 24 Hours: 2

Past 7 Days: 10

Past 30 Days: 47

All Time: 6,208