Introduction
This is a guide on how to remove the IO Board on a Dell Chromebook 3100.
Please note that the battery removal is not required for this guide, but it is strongly recommended.
What you need
-
-
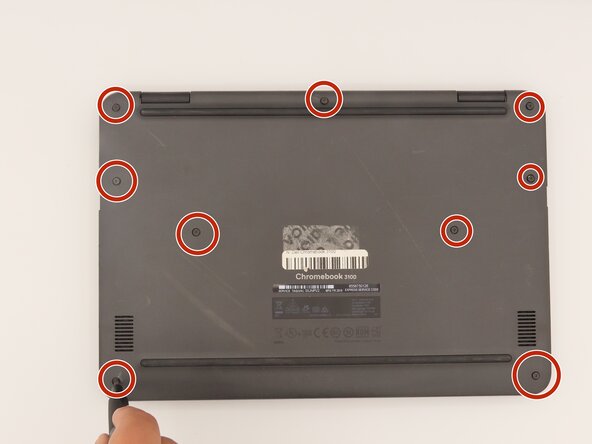
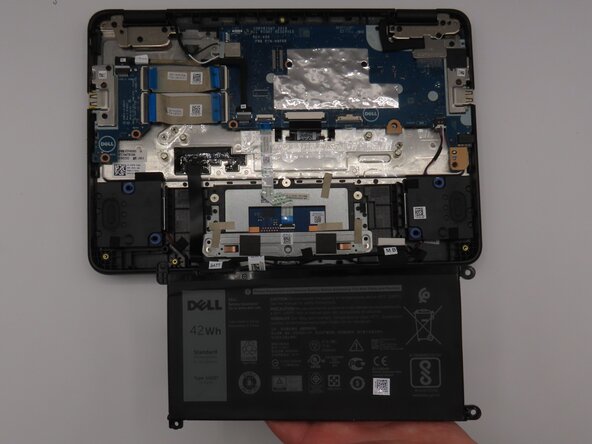
Flip the laptop so the bottom is facing upwards.
-
Loosen the nine screws from the back panel using a Phillips #0 screwdriver.
 Ask FixBot
-
-
-
Pry the back panel away from the rest of the laptop using an iFixit opening tool.
-
-
-
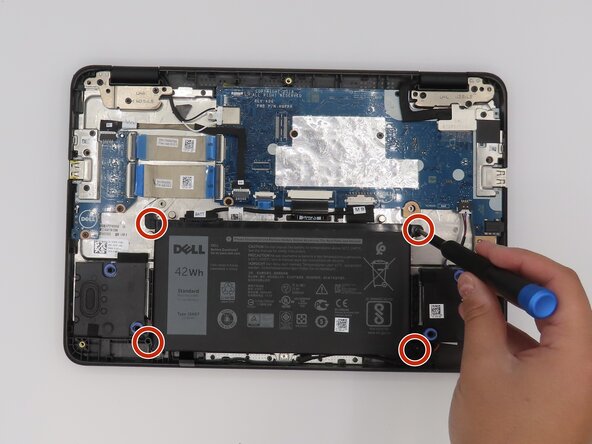
Remove the screws attached to the battery using a Phillips #0 screwdriver.
-
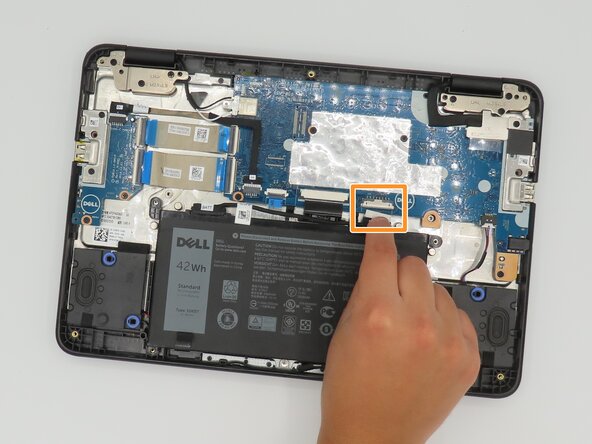
Disconnect the battery from the motherboard by gently pulling on the connector cable at the top of the battery.
-
-
-
-
Remove the screws from the IO Board using a Phillips #0 screwdriver.
-
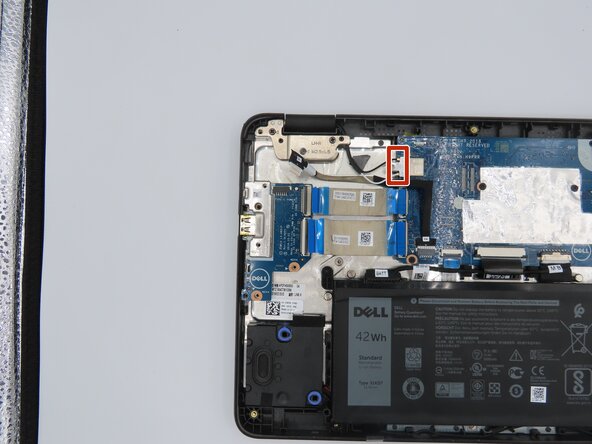
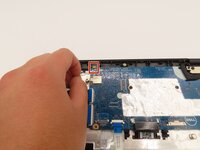
Carefully disconnect the IO power cable labeled with "IO" and "MB."
-
-
-
Carefully disconnect the IO connector cables by applying light pressure and popping them off of the motherboard.
-
-
-
Remove the motherboard ribbon cables from the IO board and set the IO board to the side.
-


To reassemble your device, follow these instructions in reverse order with the new IO Board.
Team

University of Kentucky, Team 1-2, Frey Spring 2025 Member of University of Kentucky, Team 1-2, Frey Spring 2025
UKY-FREY-S25S1G2
5 Members
4 Guides authored