Introduction
If your Dell Chromebook 3100 has lost its ability to hold a charge, you most likely have a dead battery, which requires replacement.
A functional battery provides power to your device. If you notice that your charged battery is draining more quickly than usual, consider calibrating your battery to determine an accurate charging capacity. If you continue to notice significant drops in battery percentage over a short period of time after charging, you should replace your battery.
A punctured battery can cause a dangerous fire. If your battery is swollen, take appropriate precautions.
Make sure to power down your device before you begin.
What you need
-
-
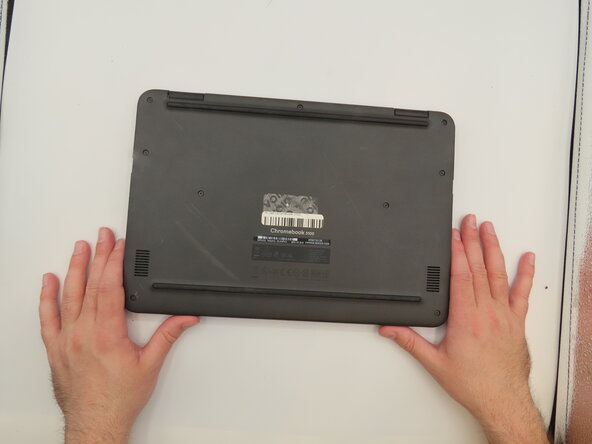
Flip the laptop so the bottom is facing upwards.
-
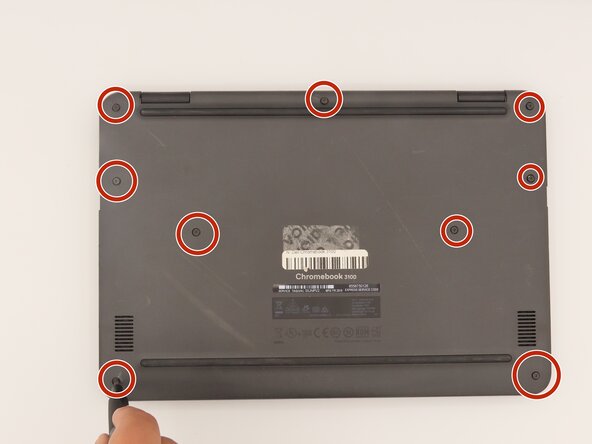
Loosen the nine screws from the back panel using a Phillips #0 screwdriver.
 Ask FixBot
-
-
-
Pry the back panel away from the rest of the laptop using an iFixit opening tool.
-
-
-
-
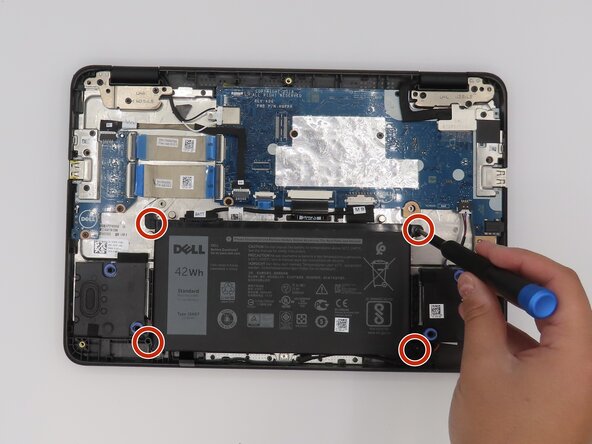
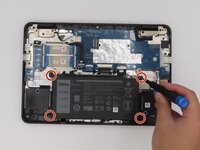
Remove the screws attached to the battery using a Phillips #0 screwdriver.
-
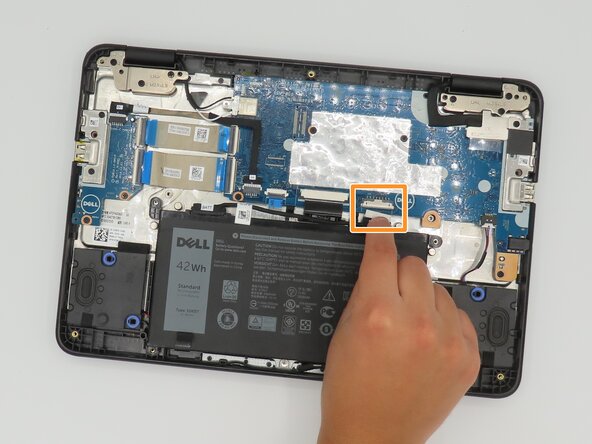
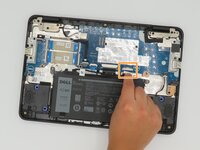
Disconnect the battery from the motherboard by gently pulling on the connector cable at the top of the battery.
-



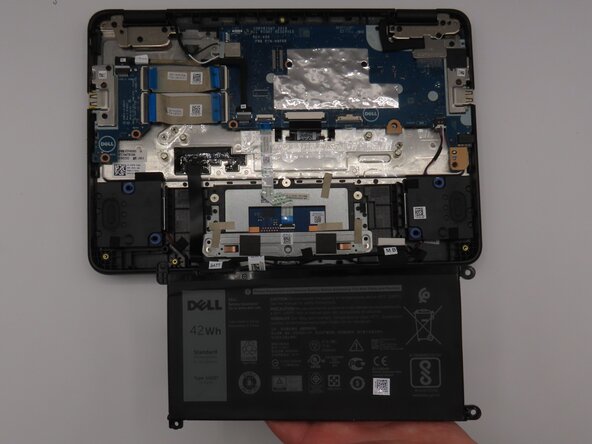
To reassemble your device, follow these instructions in reverse order. For optimal performance, calibrate your newly installed battery after completing this guide.
Take your e-waste to an R2 or e-Stewards certified recycler.

Team

University of Kentucky, Team 1-2, Frey Spring 2025 Member of University of Kentucky, Team 1-2, Frey Spring 2025
UKY-FREY-S25S1G2
5 Members
4 Guides authored
1 Guide Comment
a bit of a note the screws are captive soo no need to worry about the screws falling out of the back case but do yourself a favor with the battery screws and use a old pill bottle to store them for easy orgenization
