Free Shipping on Domestic Orders $75+

Dell Chromebook 13-7310 Keyboard Replacement

What you need

  1. Dell Chromebook 13-7310 Keyboard Replacement, Back Cover: step 1, image 1 of 2 Dell Chromebook 13-7310 Keyboard Replacement, Back Cover: step 1, image 2 of 2
    • Remove the eleven 3mm Phillips #1 screws.

    Ask FixBot
    Add Comment

  2. Dell Chromebook 13-7310 Keyboard Replacement: step 2, image 1 of 1
    • Use a plastic opening tool to gently remove the back panel.

    • It can be easier to pry open near a corner.

    Ask FixBot
    Add Comment

  3. Dell Chromebook 13-7310 Keyboard Replacement, Battery: step 3, image 1 of 1
    • Use your fingers to remove the connecting cable to the battery unit. Firmly grab the cord closest to the motherboard connection and pull straight back.

    Ask FixBot

    Add Comment

  4. Dell Chromebook 13-7310 Keyboard Replacement: step 4, image 1 of 1
    • Remove the four 2mm screws on the sides of the battery.

    Ask FixBot

    Add Comment

  5. Dell Chromebook 13-7310 Keyboard Replacement: step 5, image 1 of 1
    • To remove the battery, lift up on one side to get your fingers underneath and lift away.

    Ask FixBot

    Add Comment

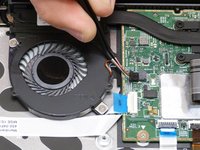
  6. Dell Chromebook 13-7310 Keyboard Replacement, Motherboard: step 6, image 1 of 1
    • Gently pull to unplug fan connector.

    Ask FixBot
    Add Comment

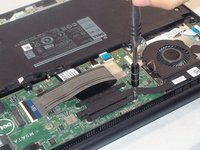
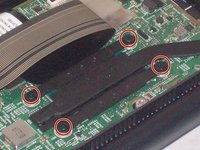
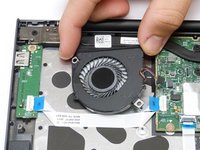
  7. Dell Chromebook 13-7310 Keyboard Replacement: step 7, image 1 of 2 Dell Chromebook 13-7310 Keyboard Replacement: step 7, image 2 of 2
    • Remove 4 screws securing heat sink.

    Ask FixBot
    Add Comment

  8. Dell Chromebook 13-7310 Keyboard Replacement: step 8, image 1 of 1
    • Lift away heat sink.

    Ask FixBot

    Add Comment

  9. Dell Chromebook 13-7310 Keyboard Replacement: step 9, image 1 of 1
    • Remove the eight 2mm screws securing the motherboard in place.

    Ask FixBot

    Add Comment

  10. Dell Chromebook 13-7310 Keyboard Replacement: step 10, image 1 of 1
    • Release cable for the LED charging indicator by pulling up on connector.

    Ask FixBot

    Add Comment

  11. Dell Chromebook 13-7310 Keyboard Replacement: step 11, image 1 of 1
    • Gently remove the cable.

    Ask FixBot

    Add Comment

  12. Dell Chromebook 13-7310 Keyboard Replacement: step 12, image 1 of 1
    • Pull up on connector tab to release IO board cable.

    Ask FixBot

    Add Comment

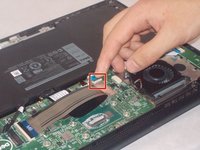
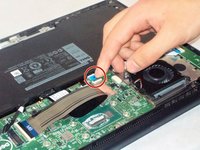
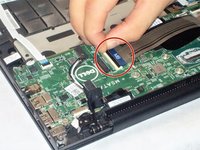
  13. Dell Chromebook 13-7310 Keyboard Replacement: step 13, image 1 of 2 Dell Chromebook 13-7310 Keyboard Replacement: step 13, image 2 of 2
    • Pull up on connector tab to release touchpad cable.

    Ask FixBot

    Add Comment

  14. Dell Chromebook 13-7310 Keyboard Replacement: step 14, image 1 of 1
    • Release the keyboard backlight cable.

    Ask FixBot

    Add Comment

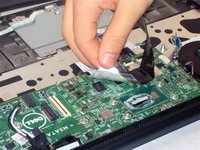
  15. Dell Chromebook 13-7310 Keyboard Replacement: step 15, image 1 of 2 Dell Chromebook 13-7310 Keyboard Replacement: step 15, image 2 of 2
    • Release the keyboard cable.

    • If taped to the motherboard, gently peel it off.

    Ask FixBot

    Add Comment

  16. Dell Chromebook 13-7310 Keyboard Replacement: step 16, image 1 of 1
    • Release eDP cable.

    Ask FixBot

    Add Comment

  17. Dell Chromebook 13-7310 Keyboard Replacement: step 17, image 1 of 1
    • Release dc-in cable.

    Ask FixBot

    Add Comment

  18. Dell Chromebook 13-7310 Keyboard Replacement: step 18, image 1 of 1
    • Gently lift up the motherboard to remove it.

    Ask FixBot

    Add Comment

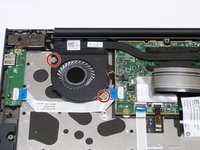
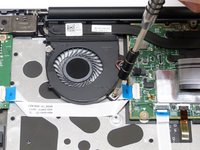
  19. Dell Chromebook 13-7310 Keyboard Replacement, Cooling Fan: step 19, image 1 of 2 Dell Chromebook 13-7310 Keyboard Replacement, Cooling Fan: step 19, image 2 of 2
    • Using the #1 Philips screwdriver, remove the two, 2mm screws securing the fan assembly.

    Ask FixBot

    Add Comment

  20. Dell Chromebook 13-7310 Keyboard Replacement: step 20, image 1 of 2 Dell Chromebook 13-7310 Keyboard Replacement: step 20, image 2 of 2
    Tool used on this step:
    Tweezers
    $4.99
    Buy
    • Using your fingernails, pull the cooling fan cables loose from the motherboard.

    • We have the tweezers pictured to allow for a clear view of components. DO NOT use the tweezers to remove the cables, they could be damaged in the process.

    • Finally, lift the fan assembly away from the computer.

    Ask FixBot

    Add Comment

  21. Dell Chromebook 13-7310 Keyboard Replacement, IO Board: step 21, image 1 of 1
    • Remove the single 2mm screw securing the IO board to the laptop.

    Ask FixBot

    Add Comment

  22. Dell Chromebook 13-7310 Keyboard Replacement: step 22, image 1 of 1
    • Pull up on the connector to release the IO board cable from the motherboard.

    • It may be easier to pull from the blue tab.

    Ask FixBot

    Add Comment

  23. Dell Chromebook 13-7310 Keyboard Replacement: step 23, image 1 of 1
    • Remove the IO board.

    Ask FixBot

    Add Comment

  24. Dell Chromebook 13-7310 Keyboard Replacement, Keyboard: step 24, image 1 of 1
    • Remove all screws.

    • All screws for the keyboard will have a "K" next to them.

    Ask FixBot

    Add Comment

  25. Dell Chromebook 13-7310 Keyboard Replacement: step 25, image 1 of 1
    • Gently lift up the keyboard and remove.

    • This step does not require much force. If you have to use a lot of force to lift the keyboard, check to make sure you didn't miss a screw.

    Ask FixBot

    Add Comment

Conclusion

To reassemble your device, follow these instructions in reverse order.

Cancel: I did not complete this guide.

3 other people completed this guide.

Damon

Member since: 11/01/18

181 Reputation

2 Guides authored

Team

1 Guide Comment

I’ve never pulled apart a computer before, and this guide was perfect! thanks

Owen Thomas - Reply Share

Add Comment

View Statistics:

Past 24 Hours: 1

Past 7 Days: 2

Past 30 Days: 31

All Time: 1,044