
DeWalt DW997 Motor Replacement

Kevin and 2 other contributors
Last updated on Dec 15, 2016
Views: 3K
View statistics:
- Past 24 Hours:
- 2
- Past 7 Days:
- 24
- Past 30 Days:
- 99
- All Time:
- 3,043
Comments: 1
1 comment on steps.
Completed: 1 2
1 person has marked this guide "completed." Will you be next?
2 people have marked this guide "completed." Including you — great job!
Favorites: 0 1
No one has favorited (and subscribed to) this guide. Will you be the first?
1 person has favorited (and subscribed to) this guide — and that's you!
Introduction
Go to step 1 ↓If the drill is on but not spinning, then the motor should be replaced.
What you need
Tools
-
-
T15 Torx Screwdriver$7.99


-
-
-
Remove seven 21 mm Torx T15 screws.
-
Remove one 18 mm Torx T10 screw.
-
After removing all screws, lift up the top yellow cover.
 Ask FixBot
-
-
-
Lift the components out of the casing. These include: motor, gear assembly, trigger assembly and chuck.
-
-
Tool used on this step:Tweezers$4.99
-
Using the tweezers, grab the metal leg on either side of the switch and lift it outwards from the case.
-
-
-
-
-
-
Use a Torx T10 screw bit to remove the four 11mm screws around the motor.
-
-


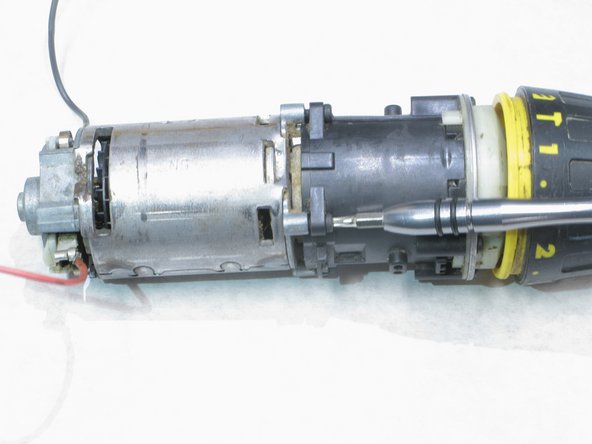


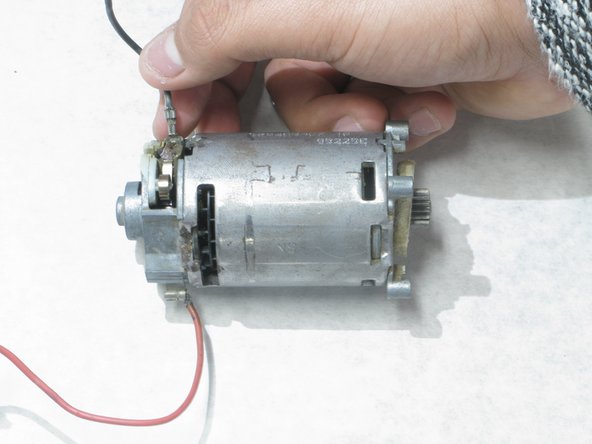


To reassemble your device, follow these instructions in reverse order.
Cancel: I did not complete this guide.
One other person completed this guide.
Team

Western Carolina University, Team 1-2, Virtue Fall 2016 Member of Western Carolina University, Team 1-2, Virtue Fall 2016
WCU-VIRTUE-F16S1G2
4 Members
60 Guides authored
