
DeWalt DW997 Forward/Reverse Switch Replacement

Juan Endara and 2 other contributors
Last updated on Dec 15, 2016
Views: 5K
View statistics:
- Past 24 Hours:
- 3
- Past 7 Days:
- 39
- Past 30 Days:
- 158
- All Time:
- 5,004
Comments: 1
1 comment on steps.
Completed: 1 2
1 person has marked this guide "completed." Will you be next?
2 people have marked this guide "completed." Including you — great job!
Favorites: 0 1
No one has favorited (and subscribed to) this guide. Will you be the first?
1 person has favorited (and subscribed to) this guide — and that's you!
Introduction
Go to step 1 ↓If the drill does not switch rotational direction, this guide will help you disassemble and replace the switch.
What you need

-
-
-
There should be 7 screws that are 21 mm long, remove them with a TorxT15 bit.
-
There should be 1 screw that is 18 mm long, remove it with a Torx T10 bit.
 Ask FixBot
-
-
-
Once all screws are removed, remove the plastic siding by slowly prying open the two sides all the way around.
-
-
-
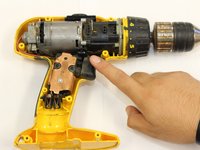
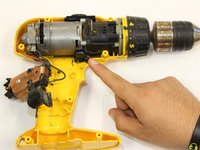
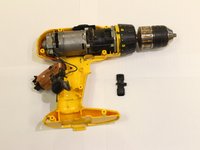
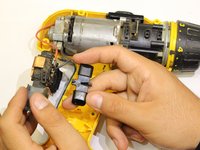
Locate the forward/reverse switch above the trigger. Lift up the copper colored trigger assembly and lift up the switch with two fingers.
-
-
-
-
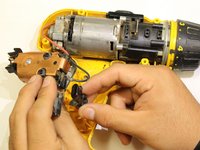
Take the replacement switch and place it in the trigger assembly that the faulty switch was removed from. The new switch has two legs on one side, the bigger triangular shaped leg should be towards the front of the drill.
-
-




To reassemble your device, follow these instructions in reverse order.
Cancel: I did not complete this guide.
One other person completed this guide.

Team

Western Carolina University, Team 1-2, Virtue Fall 2016 Member of Western Carolina University, Team 1-2, Virtue Fall 2016
WCU-VIRTUE-F16S1G2
4 Members
60 Guides authored
