Introduction
If you need to replace a part within the drill, then you need to remove the outer shell of the drill. By following this guide you will know how to take apart the drill assembly to get inside of it.
What you need
-
-
Compress the buttons on either side of the battery and lift the drill away from battery.
 Ask FixBot
-
-


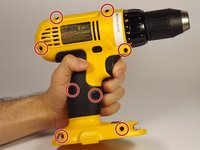
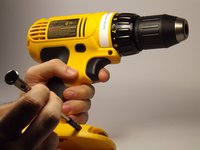

To reassemble your device, follow these instructions in reverse order.
Cancel: I did not complete this guide.
One other person completed this guide.

Team

UMass Dartmouth, Team 4-2, Catania Spring 2016 Member of UMass Dartmouth, Team 4-2, Catania Spring 2016
UMASSD-CATANIA-S16S4G2
3 Members
13 Guides authored
3 Guide Comments
It's actually a torx #10 and obviously, you dont really need a torque wrench, I got mine apart with my pro kit with no problems.
where is the guide?
no mention of the speed selector or any other internal parts
Where can I get the 16 mm torx security #15 screws
