DeLonghi ECAM Series left side panel

VauWeh and 2 other contributors
Last updated on May 5, 2026
Views: 5.5K
View statistics:
- Past 24 Hours:
- 11
- Past 7 Days:
- 101
- Past 30 Days:
- 353
- All Time:
- 5,455
Comments: 6
5 comments on steps, 1 guide comment.
Go to guide commentsCompleted: 0 1
No one has marked this guide "completed." Will you be the first?
1 person has marked this guide "completed." It's you — great job!
Favorites: 0 1
No one has favorited (and subscribed to) this guide. Will you be the first?
1 person has favorited (and subscribed to) this guide — and that's you!
Community-Contributed Guide
An awesome member of our community made this guide. It was not created by iFixit staff.
Introduction
Go to step 1 ↓For most repairs, also the left side panel has to be removed. This guide shows how to do that.
What you need
Tools

-
-
-
Remove all attachments such as water tank, pulp drawer, brew group.
-
Turn the machine with the back facing you.
-
Remove five Torx T20 security screws.
 Ask FixBot
-
-
-
-
Lift out the back.
-
The following components are immediately visible:
-
grinder
-
pump
-
flowmeter
-
-
-
-
-
Push the side panel back about 1.5 cm.
-
Lift off the panel.
-
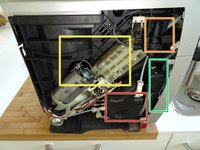
The following compononents are exposed:
-
Heater
-
Expansion chamber
-
Gear drive
-
Steam valve
-
-


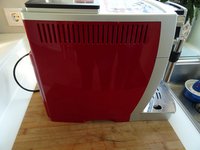
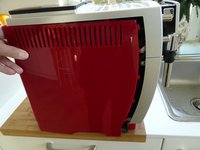
To reassemble your device, follow the above steps in reverse order.
Special thanks to these translators:
100%
VauWeh is helping us fix the world! Want to contribute?
Start translating ›