Free Shipping on Domestic Orders $75+

DJI Phantom 4 Advanced Motor Replacement

What you need

    1. DJI Phantom 4 Advanced Motor Replacement, Propeller: step 1, image 1 of 2 DJI Phantom 4 Advanced Motor Replacement, Propeller: step 1, image 2 of 2
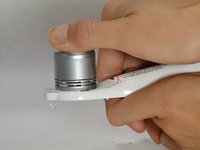
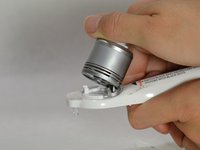
      • Use your finger tips to pinch the damaged propeller.

      • Twist the propeller counterclockwise and pull up to remove.

      Ask FixBot

      Add Comment

    1. DJI Phantom 4 Advanced Motor Replacement, Shell: step 2, image 1 of 2 DJI Phantom 4 Advanced Motor Replacement, Shell: step 2, image 2 of 2
      • Remove the eight 7 mm hex screws by turning counterclockwise with a 2 mm hex bit.

      Ask FixBot

      Add Comment

    2. DJI Phantom 4 Advanced Motor Replacement: step 3, image 1 of 1
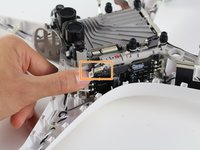
      • Pry the LED motor covers off with a metal spudger.

      • The prying location is marked by an indent that points outward from the arm.

      Ask FixBot

      Add Comment

    3. DJI Phantom 4 Advanced Motor Replacement: step 4, image 1 of 1
      • Pry the paper covering off the four corners with a metal spudger.

      Ask FixBot

      Add Comment

    4. DJI Phantom 4 Advanced Motor Replacement: step 5, image 1 of 1
      • Remove the twelve 8.7 mm hex screws with a 2 mm hex bit from the motor bases.

      Ask FixBot

      Add Comment

    5. DJI Phantom 4 Advanced Motor Replacement: step 6, image 1 of 2 DJI Phantom 4 Advanced Motor Replacement: step 6, image 2 of 2
      • Flip the drone on its back

      • Remove the eight 4.5 mm hex screws by turning them counterclockwise with a 1.5 mm hex bit.

      • Separate the mesh from the drone by pulling up gently and rocking left to right.

      • The cable connects from the camera to the drone. Pulling up could rip the connection. Tilt the mesh 90 degrees towards the cable.

      Ask FixBot

      Add Comment

    6. DJI Phantom 4 Advanced Motor Replacement: step 7, image 1 of 1
      • Remove two 1.2mm screws using the JIS #000 bit from the camera cable retaining bracket.

      Ask FixBot

      Add Comment

    7. DJI Phantom 4 Advanced Motor Replacement: step 8, image 1 of 1
      • Lift the camera connector at one end with your hand and remove the mesh.

      Ask FixBot

      Add Comment

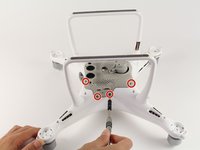
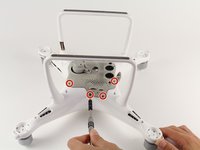
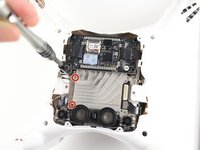
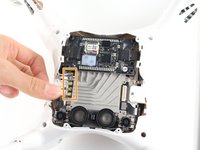
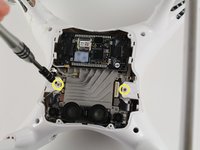
    8. DJI Phantom 4 Advanced Motor Replacement: step 9, image 1 of 3 DJI Phantom 4 Advanced Motor Replacement: step 9, image 2 of 3 DJI Phantom 4 Advanced Motor Replacement: step 9, image 3 of 3
      • Remove the two 1.2 mm screws using a JIS #000 bit from the antenna retaining bracket.

      • Pull the four U.FL antennae up.

      • The U.FL antenna connectors are fragile.

      • Remove the two 4 mm screws using a JIS #000 bit.

      Ask FixBot

      Add Comment

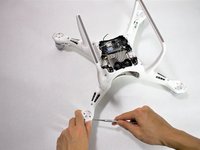
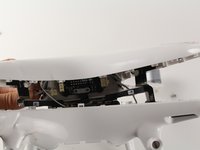
    9. DJI Phantom 4 Advanced Motor Replacement: step 10, image 1 of 2 DJI Phantom 4 Advanced Motor Replacement: step 10, image 2 of 2
      • Pry apart the clamshell at the motor end.

      • Separate the clamshell.

      • Two wires connect from the lower frame to the upper frame at the front of the drone. Pulling the clamshell apart hard may damage the connectors and wires.

      Ask FixBot

      Add Comment

    10. DJI Phantom 4 Advanced Motor Replacement: step 11, image 1 of 1
      • Press the connector tabs with a spudger and pull on the wire simultaneously.

      • Remove the shell from the rest of the drone.

      Ask FixBot

      Add Comment

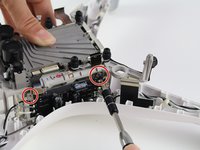
    1. DJI Phantom 4 Advanced Motor Replacement, Electronic Speed Controller: step 12, image 1 of 2 DJI Phantom 4 Advanced Motor Replacement, Electronic Speed Controller: step 12, image 2 of 2
      • Remove the two 4 mm screws using the JIS #000 bit.

      • Flip the metal bracket to the right and slide up.

      • Take care when handling the metal bracket because it can easily break off.

      Ask FixBot

      Add Comment

    2. DJI Phantom 4 Advanced Motor Replacement: step 13, image 1 of 1
      • Unlodge the glue from the board using a metal spudger.

      Ask FixBot

      Add Comment

    3. DJI Phantom 4 Advanced Motor Replacement: step 14, image 1 of 1
      • Jiggle the electronic speed controller board up and away from the drone.

      Ask FixBot

      Add Comment

    4. DJI Phantom 4 Advanced Motor Replacement: step 15, image 1 of 1
      • Desolder the motor and LED wires on both sides of the board. For general soldering information, visit this Soldering Technique Guide.

      Ask FixBot

      Add Comment

    1. DJI Phantom 4 Advanced Motor Replacement, Motor: step 16, image 1 of 2 DJI Phantom 4 Advanced Motor Replacement, Motor: step 16, image 2 of 2
      • Pry the motor away from the arm.

      • Pull the motor and the motor wires out of the body.

      Ask FixBot

      Add Comment

Conclusion

To reassemble your device, follow these instructions in reverse order.

Cancel: I did not complete this guide.

3 other people completed this guide.

David Albarran-Martinez

Member since: 10/08/18

284 Reputation

2 Guides authored

Team

Cal Poly, Team S15-G6, White Fall 2018 Member of Cal Poly, Team S15-G6, White Fall 2018

CPSU-WHITE-F18S15G6

4 Members

72 Guides authored

0 Guide Comments

Add Comment

View Statistics:

Past 24 Hours: 2

Past 7 Days: 6

Past 30 Days: 31

All Time: 3,128