Introduction
This guide will show you how to remove and replace the DJI Phantom 3 Standard outer shell/cover. The Phantom 3 Standard uses a plastic shell that protects the drone’s internal components, provides structural support, and houses the landing gear and motor arms.
You may need to replace the shell if it is cracked, warped, or damaged from a crash, or if you need to access internal components such as the flight controller, wiring, or gimbal mount.
The shell is secured with multiple screws and requires careful disassembly to avoid stripping screw heads or damaging internal wiring. Always disconnect and remove the battery before beginning this guide to prevent electrical hazards. Handle the drone gently during disassembly, as exposed components such as the GPS module and wiring harnesses are sensitive to static discharge and physical stress.
Replacing the shell restores the drone’s protective housing and ensures proper alignment of the motors and landing gear.
What you need
-
-
Pinch the battery's clamps on the top and bottom.
-
Pull out the battery.
 Ask FixBot
-
-
-
Flip the drone upside down.
-
Remove the four 7mm screws from the drone's arms using a TR6 Torx screwdriver.
-
-
-
-
Remove the four 10 mm screws near the corners of the landing gear using a T8 Torx screwdriver.
-
-
-
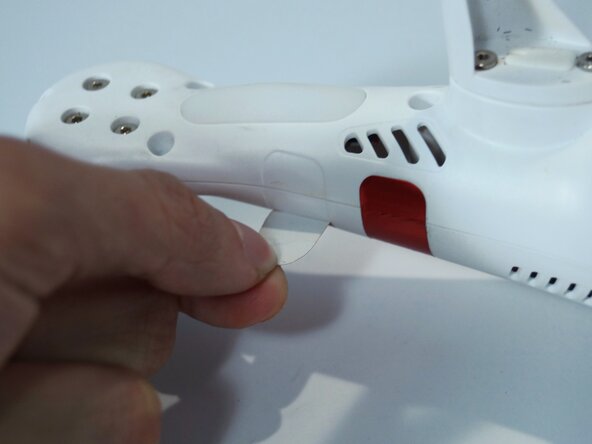
Carefully peel off all of the red stickers until the seam for the cover is no longer covered.
-
-
-
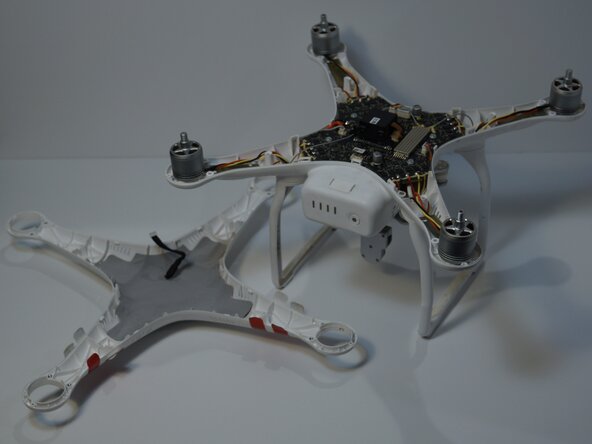
Remove the plastic shell by going around the entire seam with the plastic opening tool.
-


To reassemble your device, follow these instructions in reverse order.

Team

Purdue University Northwest, Team 3-6, Dieterle Fall 2025 Member of Purdue University Northwest, Team 3-6, Dieterle Fall 2025
PNW-DIETERLE-F25S3G6
3 Members
5 Guides authored