Free Shipping on Domestic Orders $75+

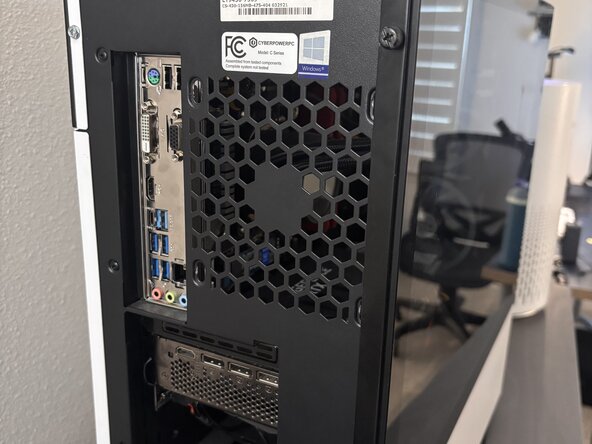
CyberPower ET9430-7569 CMOS Battery Replacement

What you need

  1. CyberPower ET9430-7569 CMOS Battery Replacement, CMOS Battery: step 1, image 1 of 1
    • Power off the computer.

    • Disconnect all cables from the system.

    Ask FixBot

    Add Comment

  2. CyberPower ET9430-7569 CMOS Battery Replacement: step 2, image 1 of 1
    • Loosen and remove the two screws securing the left side of the glass panel by hand.

    • Optional: Use a Phillips screwdriver if the screws cannot be loosened by hand.

    Ask FixBot

    Add Comment

  3. CyberPower ET9430-7569 CMOS Battery Replacement: step 3, image 1 of 1
    • Loosen the side panel.

    • Lift the panel slightly to disengage it from the case.

    Ask FixBot

    Add Comment

  4. CyberPower ET9430-7569 CMOS Battery Replacement: step 4, image 1 of 1
    • Slide the panel to the left, slowly remove it from the case.

    Ask FixBot

    Add Comment

  5. CyberPower ET9430-7569 CMOS Battery Replacement: step 5, image 1 of 1
    • Press down on the plastic locking tab on top of the connector to unlock the cable.

    • Remove the power cables slowly to avoid damaging the connectors.

    Ask FixBot

    Add Comment

  6. CyberPower ET9430-7569 CMOS Battery Replacement: step 6, image 1 of 1
    • Remove the 3-4 screws on the left side of the GPU using a Phillips screwdriver.

    Ask FixBot

    Add Comment

  7. CyberPower ET9430-7569 CMOS Battery Replacement: step 7, image 1 of 1
    • Press the PCle retention clip down toward the motherboard to unlock the GPU. While holding the clip down, carefully pull the GPU straight out of the slot.

    • Do not tilt the GPU during removal to prevent damage.

    Ask FixBot

    Add Comment

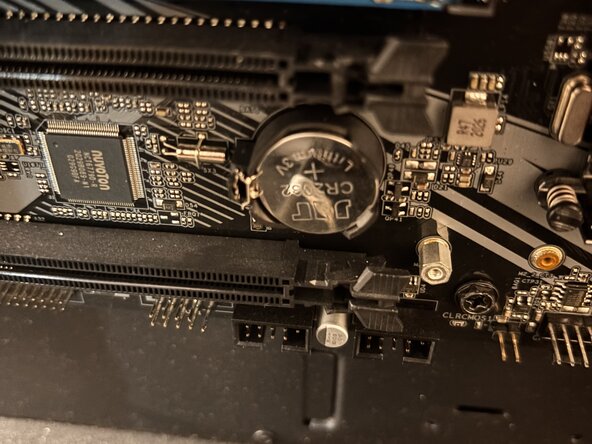
  8. CyberPower ET9430-7569 CMOS Battery Replacement: step 8, image 1 of 2 CyberPower ET9430-7569 CMOS Battery Replacement: step 8, image 2 of 2
    • Gently push the retaining clip away from the CMOS battery to release it.

    • The battery will pop up slightly—remove it carefully by hand.

    • Avoid using metal tools directly on the motherboard to prevent damage. Use a small tip plastic tool instead.

    • Insert the new battery with the positive (+) side facing up until it clicks into place.

    Ask FixBot

    Add Comment

  9. CyberPower ET9430-7569 CMOS Battery Replacement: step 9, image 1 of 1
    • When you're all done, make sure that the PCIe retention clip holding the GPU in place is still pushed back before inserting your GPU back in.

    Ask FixBot

    Add Comment

  10. CyberPower ET9430-7569 CMOS Battery Replacement: step 10, image 1 of 1
    • Reinstall the screws that hold the GPU.

    Ask FixBot

    Add Comment

  11. CyberPower ET9430-7569 CMOS Battery Replacement: step 11, image 1 of 1
    • Plug the power cables back in.

    • There's only one way to insert them, so no need to worry about putting them in the wrong way.

    Ask FixBot

    Add Comment

Finish Line

Cancel: I did not complete this guide.

Francis Warner

Member since: 03/10/26

193 Reputation

1 Guide authored

0 Guide Comments

Add Comment

View Statistics:

Past 24 Hours: 2

Past 7 Days: 8

Past 30 Days: 43

All Time: 80