Introduction
This guide will show you how to disassemble a Cuisinart PowerPrep Plus DLC-2014CHB. Potential hazards may include the heavy weight of the food processor; do the disassembly on a flat, wide surface to avoid any risk of dropping and to ensure that the device is properly supported. This repair may be needed because of a misaligned/faulty weight sensor, burnt out LEDs, faulty motor, etc.
What you need
-
-
Remove four 17 mm screws from the bottom panel of the processor with a Phillips #2 screwdriver.
-
Remove the bottom panel from the main food processor chassis.
 Ask FixBot
-
-
-
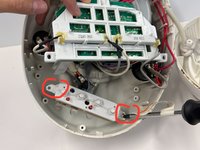
Remove three 15 mm screws to free the control panel from the chassis bracket using a Phillips #2 screwdriver.
-
-
-
-
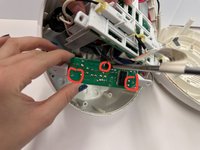
Remove two 10 mm screws to free the button circuit board from the bracket using a Phillips #2 screwdriver.
-
Remove three 10 mm screws attached to the circuit board to detach from the bracket panel using a Phillips #2 screwdriver.
-
-
-
Remove two 10 mm screws connecting the weight sensor to the front panel using a Phillips #2 screwdriver.
-
-
-
This device operates by first detecting the cup through a weight sensor. Then, by pressing pulse, on, or dough, the motor rotates a rod which the blade attachment fits onto.
-
There is an on/off button which turns the various components on, and the lights indicate which modes are active. The motor does not heat up enough for a need for temp regulation.
-


To reassemble your device, follow these instructions in reverse order.
Team

Tufts University School of Engineering, Team 1-3, Carlson Fall 2024 Member of Tufts University School of Engineering, Team 1-3, Carlson Fall 2024
TUFTS-CARLSON-F24S1G3
2 Members
1 Guide authored