
Cricut Explore 3 (CXPL203) disassembly

FricklerYeen and one other contributor
Last updated on Sep 14, 2026
Views: 249
View statistics:
- Past 24 Hours:
- 5
- Past 7 Days:
- 25
- Past 30 Days:
- 154
- All Time:
- 249
Comments: 0
No one has left comments on this guide. Will you be first?
Go to guide commentsCompleted: 1 2
1 person has marked this guide "completed." Will you be next?
2 people have marked this guide "completed." Including you — great job!
Favorites: 1 2
1 person has favorited (and subscribed to) this guide. Will you be next?
2 people have favorited (and subscribed to) this guide — including you!
Community-Contributed Guide
An awesome member of our community made this guide. It was not created by iFixit staff.
Grammar Police
Embrace your inner English teacher and help improve this guide's grammar!
Introduction
Go to step 1 ↓destruction free opening of the CXPL203.
Repaired at Repair Cafe Markgröningen on August 8th 2026
What you need
Tools
-
-
Spudger4.9
-


-
-
-
Remove rubber pads, there are screws underneath
-
Remove the 11 screws on the bottom. Picture shows the different lengths to their corresponding holes.
 Ask FixBot
-
-
-
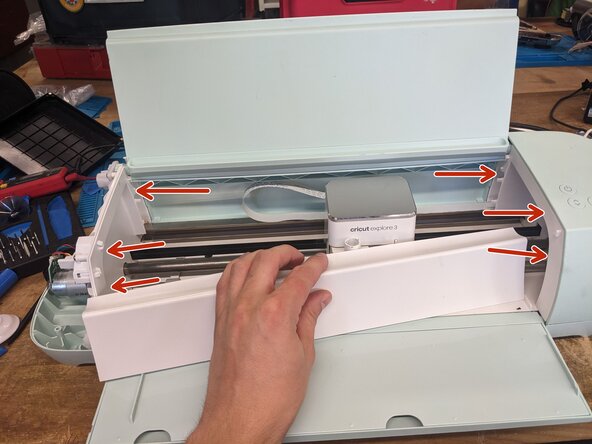
push tool sled into the right housing side. One of the tools needs to be lifted in order to push it over the limiter
-
Lift cable cover on the left and pull it out. This step requires some force.
-
Remove cover from device by pulling it towards you on the left, carefully pull the right side from behind the sled
-
-
-
Unscrew the 6 marked Philips screws. Two of them are hidden behind the flat flex cable cover.
-
Side covers can now be removed. The right one has a cable that needs to be unplugged from the main board
-
-
-
Remove connectors and tapes from the wire harness. Repeat on the opposite side.
-
Undo the screws holding the mechanical unit to the bottom. Repeat on the opposite side.
-
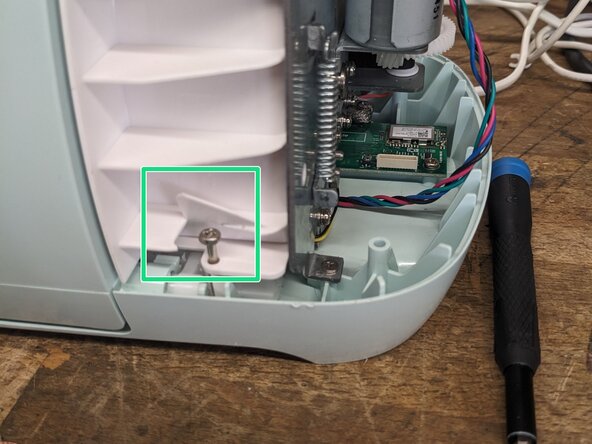
Marked screw holds the grounding wire, don't forget during reassembly
-
Undo screw on the right side. Apart from the Philips drive, it also has a hex head and can be undone with a small spanner without needing to cut through the plastic.
-
-
-
-
Lift mechanical unit about a centimeter with a plastic object
-
Unlock ZIF socket, remove flat flex cable
-
Lift mechanical unit up further
-
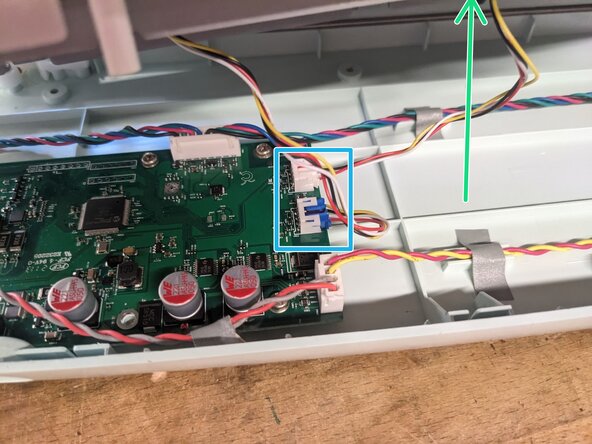
Remove connectors for the sheet sensors, pay attention to connector colors during reassembly
-
-
-
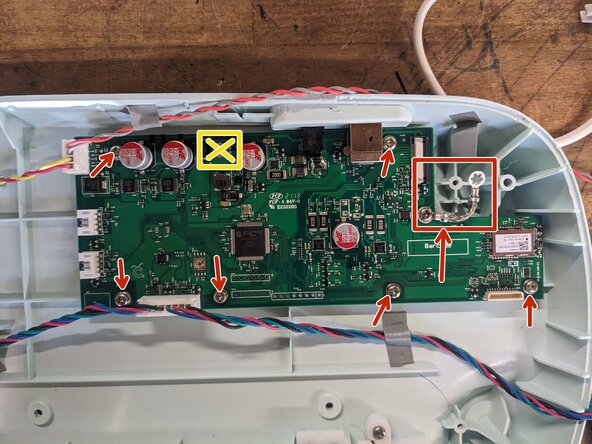
Mainboard can now be removed by undoing the marked screws. Don't forget grounding harness during reassembly
-
The marked hole holds no screw
-
-








Redo above steps in reverse.
Cancel: I did not complete this guide.
One other person completed this guide.
Special thanks to these translators:
100%
FricklerYeen is helping us fix the world! Want to contribute?
Start translating ›

