Free Shipping on Domestic Orders $75+

Creality Ender 3 S1 Pro Hotend Replacement

What you need

    1. Creality Ender 3 S1 Pro Hotend Replacement, Hotend: step 1, image 1 of 3 Creality Ender 3 S1 Pro Hotend Replacement, Hotend: step 1, image 2 of 3 Creality Ender 3 S1 Pro Hotend Replacement, Hotend: step 1, image 3 of 3
      • Move the toolhead all the way to the left by homing the printer (indicated by the red arrow).

      • Place the printer on its left side.

      • Be sure to place it on its left side to avoid laying the printer on its control screen. (Indicated by orange arrow)

      • The third photo contains the parts that will be replaced in this guide. The red square is the heat shoe. The yellow square is the two M1.5x1.6 socket-head screws. The red circle is the set screw. The green arrow is the plug for the ceramic heater, while the pink arrow is for the thermistor.

      Ask FixBot

      Add Comment

    2. Creality Ender 3 S1 Pro Hotend Replacement: step 2, image 1 of 2 Creality Ender 3 S1 Pro Hotend Replacement: step 2, image 2 of 2
      • Before beginning the disassembly, ensure the heating elements have returned to room temperature.

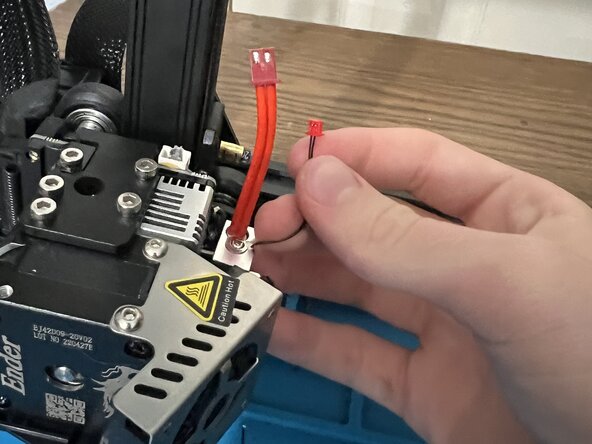
      • Having a pair of tweezers (Optional) may make the removal of the two connectors easier.

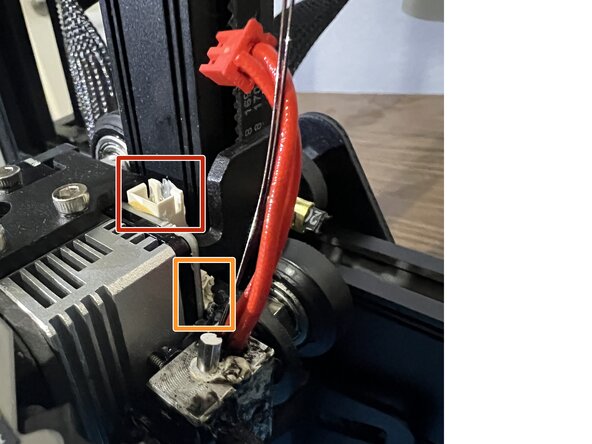
      • Disconnect the ceramic heater connector from the port.

      • Unplug the thermistor from the port.

      • The ceramic heater connector is the bigger of the two cables.

      • This unit is damaged, and the thermistor port is slightly melted. Yours should look different.

      Ask FixBot

      Add Comment

    3. Creality Ender 3 S1 Pro Hotend Replacement: step 3, image 1 of 3 Creality Ender 3 S1 Pro Hotend Replacement: step 3, image 2 of 3 Creality Ender 3 S1 Pro Hotend Replacement: step 3, image 3 of 3
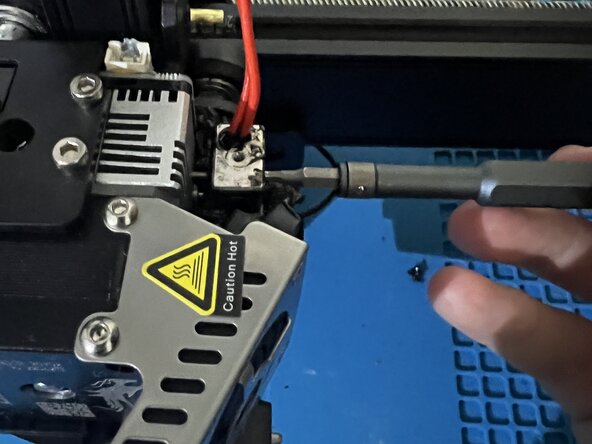
      • Use a 1.5mm Hex screwdriver to remove the two 1.6 mm socket-head bolts.

      • Gently pull the hotend out of the assembly.

      Ask FixBot

      Add Comment

    4. Creality Ender 3 S1 Pro Hotend Replacement: step 4, image 1 of 2 Creality Ender 3 S1 Pro Hotend Replacement: step 4, image 2 of 2
      • Gently pull the broken hotend out to remove it.

      • Insert the new hotend.

      • Secure the two 1.5mm hex socket-head bolts.

      • If the black set screw (see step 3) was not installed on the new hotend unit, do that now. Using an H1.5 bit, tighten it in its hole below the nozzle.

      Ask FixBot

      Add Comment

    5. Creality Ender 3 S1 Pro Hotend Replacement: step 5, image 1 of 2 Creality Ender 3 S1 Pro Hotend Replacement: step 5, image 2 of 2
      • Plug your heater and thermistor wires back in their respective connectors.

      • The rubber heat shoe included in the packaging can also be installed after this step. It is up to the discretion of the user. If you do want to install it, align the hole with the nozzle and press-fit it to the hotend.

      Ask FixBot

      Add Comment

Conclusion

After completing these steps, place the printer upright and plug it back into an outlet. Now it is ready to resume printing.

Cancel: I did not complete this guide.

Mack Moore

Member since: 06/07/26

121 Reputation

1 Guide authored

0 Guide Comments

Add Comment

View Statistics:

Past 24 Hours: 3

Past 7 Days: 29

Past 30 Days: 125

All Time: 159