
Cosori Pro II Shell Replacement

Matthewmm and 2 other contributors
Last updated on Jan 3, 2025
Views: 1.1K
View statistics:
- Past 24 Hours:
- 5
- Past 7 Days:
- 28
- Past 30 Days:
- 145
- All Time:
- 1,095
Comments: 0
No one has left comments on this guide. Will you be first?
Go to guide commentsCompleted: 0 1
No one has marked this guide "completed." Will you be the first?
1 person has marked this guide "completed." It's you — great job!
Favorites: 0 1
No one has favorited (and subscribed to) this guide. Will you be the first?
1 person has favorited (and subscribed to) this guide — and that's you!
Needs More Images
A few more images would make this guide's procedures crystal clear.
Introduction
Go to step 1 ↓If your Cosori Pro II shell is cracked or broken and you want to replace it with a new shell, If so here is a guide to take apart your Cosori Pro II for easy shell replacement. For this guide, you will need a plastic opening tool and a Phillips #0 screwdriver head
What you need
Tools


-
-
-
Use an opening tool to push on the retaining hooks to disengage them while prying slightly.
-
Remove the panel.
-
-
-
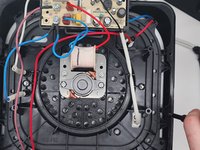
Use a Phillips #1 screwdriver to remove all four screws.
-
Lift off the bracket.
-
-
-
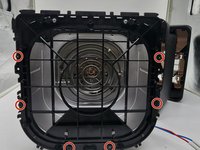
Use a Phillips #0 screwdriver to remove all the screws connecting to the shell.
-
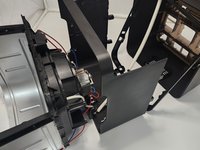
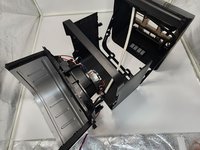
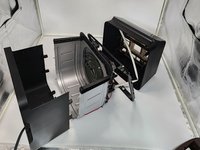
Dissemble the shell going up to separate the basket holder.
-
-
-
-
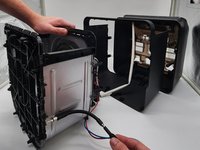
Use a Phillips #0 screwdriver and the 150 mm Flex Extension to unscrew the bottom plastic connecting to the basket holder.
-
-
-
Pull the bottom shell down pulling at the sides to get them over screw holes.
-

 Ask FixBot






To reassemble your device, follow these instructions in reverse order.

Team

University of North Texas, Team 7-1, Kilpatrick Fall 2024 Member of University of North Texas, Team 7-1, Kilpatrick Fall 2024
UNT-KILPATRICK-F24S7G1
3 Members
60 Guides authored
