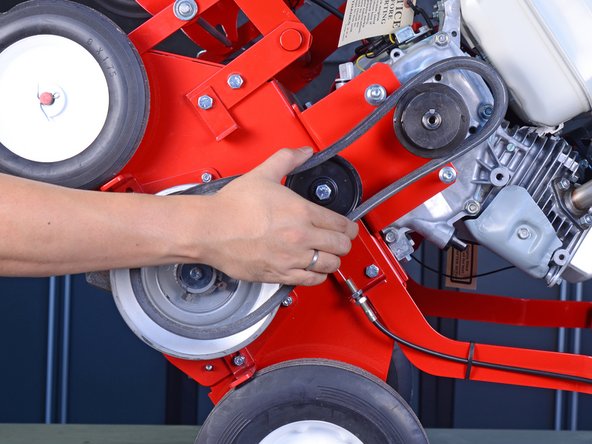
Free Shipping on Domestic Orders $75+

Classen Over Seeder TS20HD 2012 Drive Pulley Replacement

What you need

  1. Classen Over Seeder TS20HD 2012 Drive Pulley Replacement, Safety precautions: step 1, image 1 of 2 Classen Over Seeder TS20HD 2012 Drive Pulley Replacement, Safety precautions: step 1, image 2 of 2
    • Before you begin, ensure that the machine is powered down and cool to the touch.

    • Disconnect the spark plug to prevent the engine from accidentally starting up during service:

    • Grab the plastic housing at the end of the spark plug wire.

    • Pull firmly to disconnect the wire from the spark plug.

    Ask FixBot

    Add Comment

  2. Classen Over Seeder TS20HD 2012 Drive Pulley Replacement: step 2, image 1 of 1
    • To prevent the over seeder from rolling during service, place wheel chocks behind a rear wheel.

    Ask FixBot

    Add Comment

  3. Classen Over Seeder TS20HD 2012 Drive Pulley Replacement, Tilt the over seeder: step 3, image 1 of 2 Classen Over Seeder TS20HD 2012 Drive Pulley Replacement, Tilt the over seeder: step 3, image 2 of 2
    • Push down on the main handle to tilt the over seeder back on its rear wheels.

    • Place some weights on the handle, or tie the handle down, to prevent the machine from falling forward.

    Ask FixBot

    Add Comment

  4. Classen Over Seeder TS20HD 2012 Drive Pulley Replacement: step 4, image 1 of 1
    • Place a wheel chock in front of a rear tire to keep the machine in place.

    Ask FixBot

    Add Comment

  5. Classen Over Seeder TS20HD 2012 Drive Pulley Replacement, Unscrew the belt guard: step 5, image 1 of 3 Classen Over Seeder TS20HD 2012 Drive Pulley Replacement, Unscrew the belt guard: step 5, image 2 of 3 Classen Over Seeder TS20HD 2012 Drive Pulley Replacement, Unscrew the belt guard: step 5, image 3 of 3
    • Remove the four lock nuts securing the belt guard:

    • Two 1/2" lock nuts

    • Two 7/16" lock nuts

    • These lock nuts are recessed and require a socket extension to access.

    • Use box wrenches to hold the corresponding bolts in place as you loosen and remove the nuts.

    Ask FixBot

    Add Comment

  6. Classen Over Seeder TS20HD 2012 Drive Pulley Replacement, Remove the belt guard: step 6, image 1 of 3 Classen Over Seeder TS20HD 2012 Drive Pulley Replacement, Remove the belt guard: step 6, image 2 of 3 Classen Over Seeder TS20HD 2012 Drive Pulley Replacement, Remove the belt guard: step 6, image 3 of 3
    • Remove the belt guard.

    Ask FixBot

    Add Comment

  7. Classen Over Seeder TS20HD 2012 Drive Pulley Replacement, Rake Belt: step 7, image 1 of 2 Classen Over Seeder TS20HD 2012 Drive Pulley Replacement, Rake Belt: step 7, image 2 of 2
    • Use your fingers to pry the belt off the drive pulley.

    • If you are having trouble, make sure that the machine is not resting on the bail bar up by the handlebars, which tightens the idler pulley.

    Ask FixBot

    Add Comment

  8. Classen Over Seeder TS20HD 2012 Drive Pulley Replacement: step 8, image 1 of 3 Classen Over Seeder TS20HD 2012 Drive Pulley Replacement: step 8, image 2 of 3 Classen Over Seeder TS20HD 2012 Drive Pulley Replacement: step 8, image 3 of 3
    • Squeeze the belt and unhook it from the engine pulley.

    • Remove the rake belt.

    Ask FixBot

    Add Comment

  9. Classen Over Seeder TS20HD 2012 Drive Pulley Replacement, Drive Pulley: step 9, image 1 of 1
    • Place a block of wood to jam the blades so they don't rotate forward, allowing you to unscrew the pulley bolt.

    Ask FixBot

    Add Comment

  10. Classen Over Seeder TS20HD 2012 Drive Pulley Replacement: step 10, image 1 of 2 Classen Over Seeder TS20HD 2012 Drive Pulley Replacement: step 10, image 2 of 2
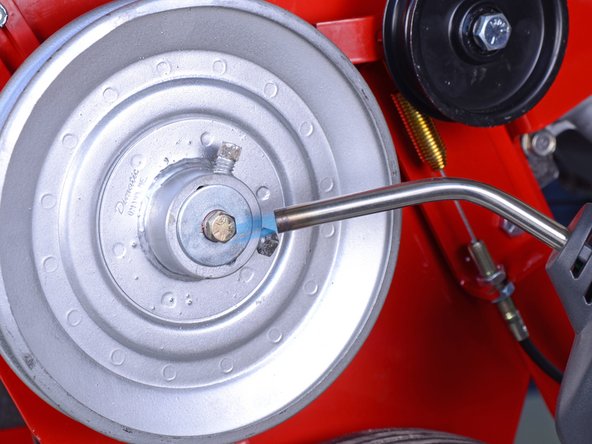
    • Use a 7/16" socket and socket wrench to remove the center pulley bolt.

    • The bolt can be heavily thread-locked in place, and the bolt head can shear off easily. To prevent breakage, use a torch and heat the bolt for two minutes to weaken the thread-lock.

    Ask FixBot

    Add Comment

  11. Classen Over Seeder TS20HD 2012 Drive Pulley Replacement: step 11, image 1 of 1
    • Remove the bolt, along with the pulley retainer washer and crush washer.

    • Re-assembly tip: Replace the crush washer with a new one and apply red thread-locker to the bolt threads.

    Ask FixBot

    Add Comment

  12. Classen Over Seeder TS20HD 2012 Drive Pulley Replacement: step 12, image 1 of 2 Classen Over Seeder TS20HD 2012 Drive Pulley Replacement: step 12, image 2 of 2
    • Use a 5/16" box wrench to loosen the two set screws.

    • You don't need to remove the set screws completely—two full turns sufficiently loosens each set screw.

    Ask FixBot

    Add Comment

  13. Classen Over Seeder TS20HD 2012 Drive Pulley Replacement: step 13, image 1 of 3 Classen Over Seeder TS20HD 2012 Drive Pulley Replacement: step 13, image 2 of 3 Classen Over Seeder TS20HD 2012 Drive Pulley Replacement: step 13, image 3 of 3
    • Your pulley may be loose enough to remove by hand. If not, follow this step to use the gear puller to remove the pulley.

    • Attach a gear puller to the pulley.

    • If your gear puller's center pin is too thick for the pulley, use a 1/2" socket as a buffer.

    • Crank on the gear puller with a wrench to remove the pulley.

    Ask FixBot

    Add Comment

  14. Classen Over Seeder TS20HD 2012 Drive Pulley Replacement: step 14, image 1 of 2 Classen Over Seeder TS20HD 2012 Drive Pulley Replacement: step 14, image 2 of 2
    • Remove the drive pulley.

    • Remove the square axle key.

    Ask FixBot

    Add Comment

  15. Classen Over Seeder TS20HD 2012 Drive Pulley Replacement: step 15, image 1 of 2 Classen Over Seeder TS20HD 2012 Drive Pulley Replacement: step 15, image 2 of 2
    • Re-assembly tips:

    • Lubricate the axle and key with machine oil.

    • Set the square key in the pulley first, then align the pulley onto the axle. This makes it slightly easier to hammer the pulley in place.

    • Hammer the pulley in place with a rubber mallet.

    • Before you tighten the set screws, make sure that the drive pulley's belt path aligns with the idler pulley.

    Ask FixBot

    Add Comment

Conclusion

To reassemble your device, follow these instructions in reverse order.

Cancel: I did not complete this guide.

Arthur Shi

Member since: 01/03/18

343,544 Reputation

915 Guides authored

Team

iFixit Member of iFixit

Staff

123 Members

27,603 Guides authored

0 Guide Comments

Add Comment

View Statistics:

Past 24 Hours: 0

Past 7 Days: 3

Past 30 Days: 28

All Time: 886