
Chef'sChoice M677 Control Switch Replacement

Randy Fromm and 6 other contributors
Last updated on Jul 7, 2025
Views: 8.5K
View statistics:
- Past 24 Hours:
- 3
- Past 7 Days:
- 35
- Past 30 Days:
- 150
- All Time:
- 8,545
Comments: 3
1 comment on steps, 2 guide comments.
Go to guide commentsCompleted: 12 13
12 people have marked this guide "completed." Will you be next?
13 people have marked this guide "completed." Including you — great job!
Favorites: 1 2
1 person has favorited (and subscribed to) this guide. Will you be next?
2 people have favorited (and subscribed to) this guide — including you!
Confusing Text
Some of this guide's text is confusing, duplicated, or off-topic. Clarify it by editing!
Markup Mishap
This guide needs better markups. Help out by correcting or making some markup annotations.
Better Introduction
Improve this guide by completing or revising its introduction.
Missing Details
Some of this guide's details are missing. Help users by adding tools, difficulty, or time.
Introduction
Go to step 1 ↓This guide demonstrates how to replace the control switch in your Chef'sChoice M677 tea kettle.
What you need


-
-
-
Remove the five 3/8" screws from the base of the kettle using a Phillips #1 screwdriver.
 Ask FixBot
-
-
-
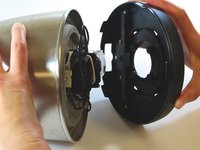
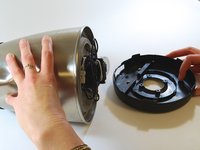
Using your hands, pry the base off the kettle.
-
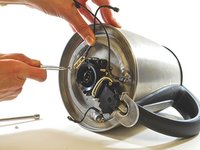
Open the kettle like a clamshell; the ON/OFF switch will be the hinge point.
-
-
-
A: The power supply.
-
B: The two boil-dry protection switches, one on either side of the central black ring.
-
C: The power coupling. This fits into the baseplate when you place the kettle on it.
-
D: The thermostat. This is a little metal ring, half hidden by the switch cover.
-
E: The manual ON/OFF switch.
-
F: The indicator light.
-
G: The steam chamber. This heats the thermostat, which turns off the kettle automatically.
-
-
-
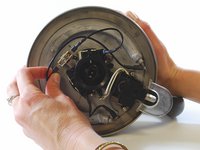
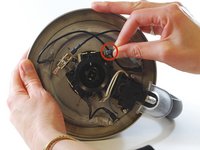
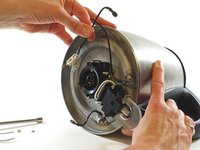
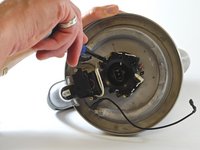
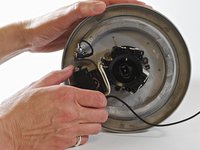
Remove the connectors (spaded lugs) from the circuit components as shown in the second image.
-
You should be able to remove each connector easily by hand. Pinch the lug between your fingers and pull in the direction of the attached wire.
-
If necessary, use needle-nose pliers to grasp the lug shank firmly. Gently pull the lug in the direction of the attached wire.
-
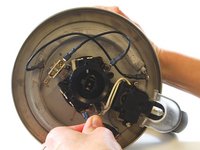
Gently bend the disconnected wires back and out of the work area.
-
-
Tool used on this step:Tweezers$4.99
-
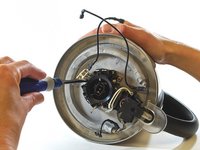
Using a 7/32" nut driver, remove the hex nut that secures the power supply to the base of the kettle.
-
Using a pair of tweezers, remove the split-ring lock washer located under the nut. (It may be hard to see in low light.)
-
-
-
Using your hands, grasp the wire that is still connected to the power supply. Carefully lift the power supply off the threaded stud to which it was coupled.
-
Five (5) screws.
-
The kettle base.
-
One (1) 7/32'' hex nut.
-
One (1) 7/32" split-ring lock washer.
-
One (1) power supply unit.
-
-
-
-
-
Tool used on this step:Tweezers$4.99
-
Remove the power supply. Align the kettle as shown, with the handle to your right. Use the 7/32" nut driver to remove the 7/32" nut from the stud that is located clockwise from where the power supply was attached.
-
Use tweezers to remove the split-ring lock washer located under the nut.
-
SECOND IMAGE: Roll the kettle over so the handle is now on your left. Use the 7/32" nut driver to remove the 7/32" nut from the final stud, which is now located counter-clockwise from where the power supply was attached.
-
Use tweezers to remove the split-ring lock washer located under the nut.
-
-
-
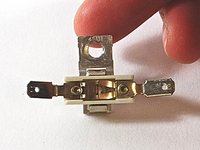
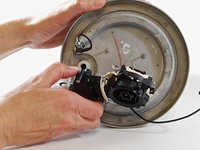
Grasp the control switch with one hand and the kettle with the other.
-
Gently rock the control switch while simultaneously pulling it away from the bottom of the kettle.
-
Pull the switch completely off the kettle.
-
-
-
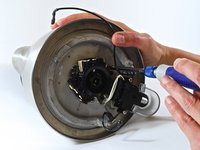
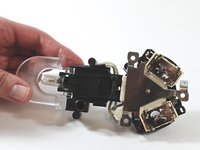
The yellow arrows show how the studs align with the switch brackets.
-
The blue arrow shows how the steam tube aligns with the steam chamber on the switch thermostat.
-
-


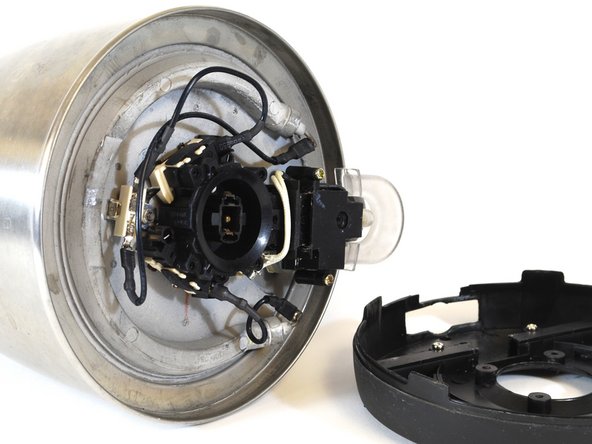
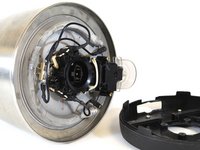











To reassemble your device, follow these instructions in reverse order. Take your e-waste to an R2 or e-Stewards certified recycler.
Cancel: I did not complete this guide.
12 other people completed this guide.

Team

New Mexico State, Team 1-1, Sheppard Spring 2014 Member of New Mexico State, Team 1-1, Sheppard Spring 2014
NMSU-SHEPPARD-S14S1G1
4 Members
36 Guides authored
2 Guide Comments
OK, now I can look from the bottom. But why the switch does not keep down when I press it down I can not see or repair.
Robert
Kkkk Explicação para desmontar e comprar ferramentas.
