
Casio fx-82MS Button Replacement

Rebecca Dowling and 4 other contributors
Last updated on Nov 21, 2020
Views: 4.7K
View statistics:
- Past 24 Hours:
- 4
- Past 7 Days:
- 34
- Past 30 Days:
- 130
- All Time:
- 4,660
Comments: 0
No one has left comments on this guide. Will you be first?
Go to guide commentsCompleted: 2 3
2 people have marked this guide "completed." Will you be next?
3 people have marked this guide "completed." Including you — great job!
Favorites: 0 1
No one has favorited (and subscribed to) this guide. Will you be the first?
1 person has favorited (and subscribed to) this guide — and that's you!
Introduction
Go to step 1 ↓The Casio fx-82MS is a commonly used simple calculator in many schools. It has a very long lifetime. But sometimes a button stops working, which can be very annoying. In this guide we will guide you through the steps to fix this problem.
What you need
Tools
-
-
Spudger4.9
-


-
-
-
This is the calculator in question.
-
The tools you will need are: a Phillips screwdriver, a spudger and a soldering iron.
 Ask FixBot
-
-
-
Flip over the calculator.
-
Locate the 6 screws on the backside.
-
Remove all six screws.
-
-
-
Once all six screws have been removed, take the back part off of the calculator.
-
-
-
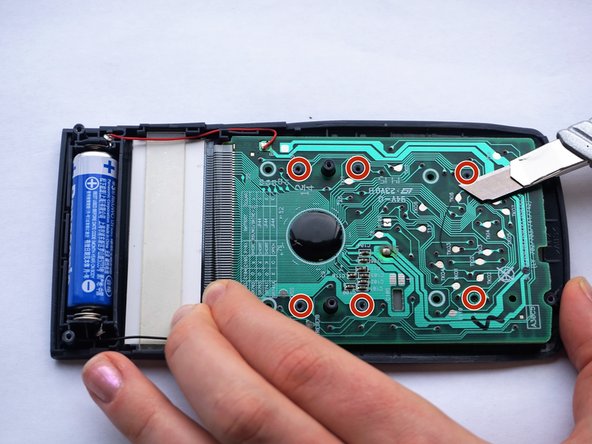
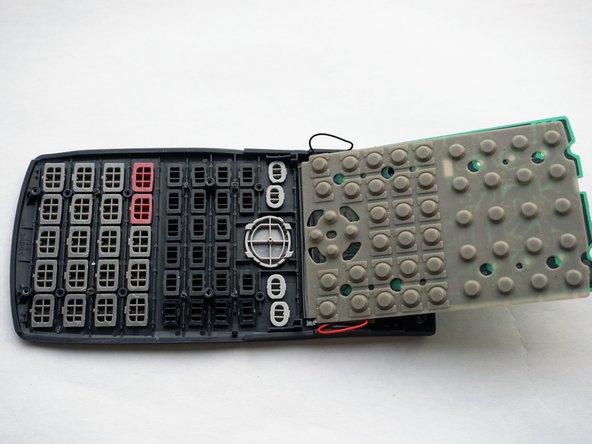
Locate the rubber contact points.
-
Solder the rubber contact points, while using the spudger to pry the PCB loose.
-
Start with the lower plugs (left on the photo). Gently pry the PCB loose at the same time.
-
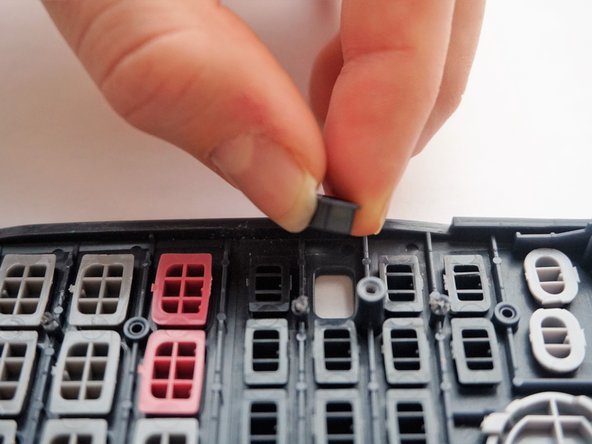
If you don't have accessibility to a solder iron, use a utility knife to remove the plugs.
-
-
-
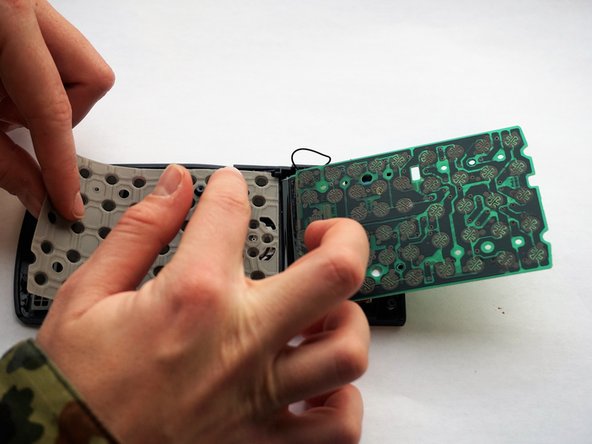
Put the rubber mat back in its place.
-
Make sure you push the six slightly damaged plugs through the rubber mat.
-
-
-










Cancel: I did not complete this guide.
2 other people completed this guide.

Team

Delft University of Technology, Team 1-6, Flipsen Fall 2016 Member of Delft University of Technology, Team 1-6, Flipsen Fall 2016
TUD-FLIPSEN-F16S1G6
3 Members
12 Guides authored
