Free Shipping on Domestic Orders $75+

Casio Cassiopeia E-125 Key Pad Replacement

What you need

    1. Casio Cassiopeia E-125 Key Pad Replacement, Battery: step 1, image 1 of 1
      • Flip the device over to the back side.

      Ask FixBot

      Add Comment

    2. Casio Cassiopeia E-125 Key Pad Replacement: step 2, image 1 of 1
      • Slide the small switch on the back to "MAIN".

      Ask FixBot

      Add Comment

    3. Casio Cassiopeia E-125 Key Pad Replacement: step 3, image 1 of 1
      • Slide the battery cover downwards.

      • Pull off the battery cover.

      Ask FixBot

      Add Comment

    4. Casio Cassiopeia E-125 Key Pad Replacement: step 4, image 1 of 1
      • Pull the black tab to remove the battery.

      Ask FixBot

      Add Comment

    1. Casio Cassiopeia E-125 Key Pad Replacement, Touch Screen: step 5, image 1 of 1
      • Use the Phillips #00 screwdriver to remove the two screws near the top of the device.

      Ask FixBot

      Add Comment

    2. Casio Cassiopeia E-125 Key Pad Replacement: step 6, image 1 of 1
      • Use the Phillips #00 screwdriver to remove the two screws located inside the battery compartment.

      Ask FixBot

      Add Comment

    3. Casio Cassiopeia E-125 Key Pad Replacement: step 7, image 1 of 1
      • Use a spudger or opening tool to separate the two halves of the case.

      Ask FixBot

      Add Comment

    4. Casio Cassiopeia E-125 Key Pad Replacement: step 8, image 1 of 1
      • Pry the two halves of the case apart with the opening tool.

      Ask FixBot

      Add Comment

    5. Casio Cassiopeia E-125 Key Pad Replacement: step 9, image 1 of 1
      • Potential for device damage. Do not pull apart the wires connecting the outer case.

      • Lay the two halves of the outer case next to the central components as shown.

      Ask FixBot

      Add Comment

    6. Casio Cassiopeia E-125 Key Pad Replacement: step 10, image 1 of 1
      • Use the Philips #00 screwdriver to remove the three screws in the corners of the screen.

      Ask FixBot

      Add Comment

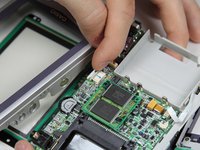
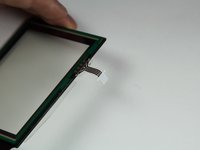
    7. Casio Cassiopeia E-125 Key Pad Replacement: step 11, image 1 of 2 Casio Cassiopeia E-125 Key Pad Replacement: step 11, image 2 of 2
      • Lift the tab on the motherboard and pull out the ribbon cable.

      • After the ribbon cable is detached from the motherboard, the touch screen is completely separated from the device.

      Ask FixBot

      Add Comment

    1. Casio Cassiopeia E-125 Key Pad Replacement, Key Pad: step 12, image 1 of 1
      • Use the Phillips #00 screwdriver and remove the five screws from the daughterboard.

      Ask FixBot

      Add Comment

    2. Casio Cassiopeia E-125 Key Pad Replacement: step 13, image 1 of 1
      • Pull the ribbon cable out of its port on the back of the keypad.

      Ask FixBot

      Add Comment

    3. Casio Cassiopeia E-125 Key Pad Replacement: step 14, image 1 of 1
      • Now, lift the keypad off the front case.

      Ask FixBot

      Add Comment

Conclusion

To reassemble your device, follow these instructions in reverse order.

Cancel: I did not complete this guide.

Ryan Fernandez

Member since: 04/03/12

47 Reputation

5 Guides authored

Team

Cal Poly, Team 5-4, Forte Spring 2012 Member of Cal Poly, Team 5-4, Forte Spring 2012

CPSU-FORTE-S12S5G4

6 Members

40 Guides authored

0 Guide Comments

Add Comment

View Statistics:

Past 24 Hours: 3

Past 7 Days: 5

Past 30 Days: 34

All Time: 1,102