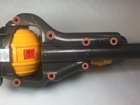
Casdon Dyson Ball Disassembly

Seldon Price and one other contributor
Last updated on Jan 3, 2018
Views: 17K
View statistics:
- Past 24 Hours:
- 10
- Past 7 Days:
- 52
- Past 30 Days:
- 196
- All Time:
- 16,904
Comments: 8
2 comments on steps, 6 guide comments.
Go to guide commentsCompleted: 2 3
2 people have marked this guide "completed." Will you be next?
3 people have marked this guide "completed." Including you — great job!
Favorites: 0 1
No one has favorited (and subscribed to) this guide. Will you be the first?
1 person has favorited (and subscribed to) this guide — and that's you!
Introduction
Go to step 1 ↓Using a PH00 screwdriver, this guide will demonstrate how to disassemble the Casdon Dyson Ball. This disassembly will show how to separate the battery compartment from the vacuum ball.
What you need
Tools

-
-
-
Remove one 9.2mm (0.36 in) screw using the PH00 screwdriver.
-
Remove the battery cover by pulling it away from the vacuum once the 9.2mm (0.36 in) screw is removed.
 Ask FixBot
-
-
-
Remove batteries from the vacuum by pulling them out and away from the vacuum.
-
-
-
-
-
Remove all seven 9.2mm (0.32 in) screws on the back of the vacuum.
-
-
-
Separate the battery compartment from the ball and bead cylinder by sliding the vacuum ball away from the battery compartment.
-
-
-
-
Separate the bead cylinder and the fan compartment by pulling the bead cylinder away from the fan compartment.
-
-


To reassemble your device, follow these instructions in reverse order.
Cancel: I did not complete this guide.
2 other people completed this guide.

Team

IUPUI, Team S3-G5, Harley Fall 2017 Member of IUPUI, Team S3-G5, Harley Fall 2017
IUPUI-HARLEY-F17S3G5
3 Members
60 Guides authored
6 Guide Comments
How do I get the handle out once assembled?
Den Griff bekommt man nach dem Einstecken offensichtlich nicht mehr entfernt.
Das Batteriefach bietet keinen Zugang um die Befestigungsraste zu lösen.
Fraglich ob man an die Befestigungsraste kommt, wenn man das Gerät quasi komplett auseinanderschraubt.
Bei eBay wird ein gebrauchtes Gerät angeboten, bei dem der Griff nicht mehr hält, der Besitzer hat vermutlich versucht den Griff mit Gewallt herauszuziehen und dabei die Befestigungsraste abgebrochen.
Das Gerät lässt sich mit dem nicht mehr entfernbaren Griff nicht mehr im Originalkarton verpacken und versenden.
In meinen Augen eine mangelhafte Konstruktion.
"Wie bekomme ich den Griff nach der Montage heraus?"
How does the handle come out in English what language was that? There is no videos on how to remove the handle or even get the little pellets to spin again
The fan to make the beads jump around no longer works….is there. Separate battery for that?
Nein, der "Ventilator" für die Perlen wird mit den Batterien betrieben.
Ich würde davon ausgehen, dass der Ventilator bei Ihnen defekt ist, sofern er nicht unwahrscheinlicher Weise durch eingeklemmte Perlen blockiert ist.
