Introduction
This guide will provide you with the necessary direction to disassemble the flash on a Canon Powershot SD880. Before you start, know that the flash device has a few delicate connections and should be handled with care.
What you need
-
-
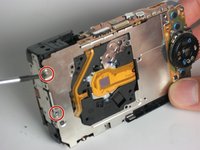
Remove the two 2.4 mm screws on the side of the camera that are next to the LCD screen using a Phillips #00 screwdriver.
-
Remove the two 4.1 mm screws on the other side using a Phillips #00 screwdriver.
-
Remove the single 2.6 mm screw from the bottom of the camera using a Phillips #00 screwdriver.
-
Slowly pull the back cover off of the camera.
 Ask FixBot
-
-
-
Remove the 2.6 mm screw from the bottom of the camera using a Phillips #00 screwdriver.
-
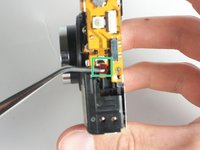
Remove the 4.1 mm screw from the menu button side of the camera using a Phillips #00 screwdriver.
-
-
-
-
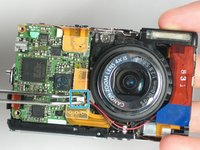
Unplug the green and white plugs that connect the top panel to the top of the logic board.
-
Dislodge the tab above the lens.
-
Dislodge the tab at the back.
-
-
-
Remove the two 2.9 mm screws at the top-right corner and bottom-left corner of the LCD screen using a Phillips #0 screwdriver.
-
Disconnect the ribbons that connect the screen to the camera.
-
Lift the screen off.
-
-
-
Remove two 1.8 mm screws from the back using a Phillips #0 screwdriver to disconnect the metal guard.
-
To unplug the ribbon at the top of the camera, gently pull it from the plug-in point.
-
Disconnect the white plug from the red and black wires.
-


To reassemble your device, follow these instructions in reverse order.

Team

Cal Poly, Team 13-3, Forte Winter 2011 Member of Cal Poly, Team 13-3, Forte Winter 2011
CPSU-FORTE-W11S13G3
5 Members
8 Guides authored
