Free Shipping on Domestic Orders $75+

Canon Powershot S200 Screen Replacement

What you need

  1. Canon Powershot S200 Screen Replacement, Battery: step 1, image 1 of 2 Canon Powershot S200 Screen Replacement, Battery: step 1, image 2 of 2
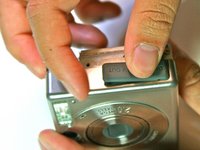
    • Slide the grey latch to open the battery compartment.

    Ask FixBot

    Add Comment

  2. Canon Powershot S200 Screen Replacement: step 2, image 1 of 2 Canon Powershot S200 Screen Replacement: step 2, image 2 of 2
    • Push and slide the orange retaining clip to the right to remove the battery.

    Ask FixBot

    Add Comment

  3. Canon Powershot S200 Screen Replacement: step 3, image 1 of 1
    • Remove battery from the camera.

    Ask FixBot

    Add Comment

  4. Canon Powershot S200 Screen Replacement, Motherboard: step 4, image 1 of 1
    • Remove the lanyard.

    Ask FixBot

    Add Comment

  5. Canon Powershot S200 Screen Replacement: step 5, image 1 of 1
    • Position the camera so that the bottom is facing up.

    • Remove the two 2.3mm screws beneath the name plate.

    • Remove the two 2.8 mm screws surrounding the threaded tripod mount.

    Ask FixBot

    Add Comment

  6. Canon Powershot S200 Screen Replacement: step 6, image 1 of 1
    • Remove the 3.8mm screw from the back face of the camera.

    Ask FixBot

    Add Comment

  7. Canon Powershot S200 Screen Replacement: step 7, image 1 of 1
    • Remove the two 2.3mm screws from the right face of the camera.

    Ask FixBot

    Add Comment

  8. Canon Powershot S200 Screen Replacement: step 8, image 1 of 1
    • Remove the two outer 3.2mm screws from the left side of the camera

    • Remove the two inner 3.7mm screws from the left side of the camera.

    Ask FixBot

    Add Comment

  9. Canon Powershot S200 Screen Replacement: step 9, image 1 of 1
    • Pull the back face panel away from the front end of the body. This may take some wiggling and force.

    Ask FixBot

    Add Comment

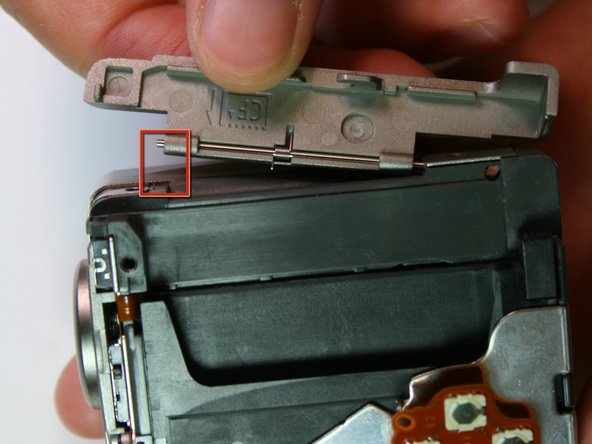
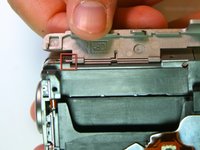
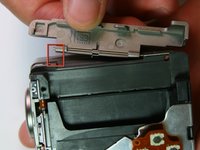
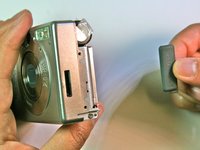
  10. Canon Powershot S200 Screen Replacement: step 10, image 1 of 2 Canon Powershot S200 Screen Replacement: step 10, image 2 of 2
    • Remove the CF card door from the left side of the camera body.

    Ask FixBot

    Add Comment

  11. Canon Powershot S200 Screen Replacement: step 11, image 1 of 2 Canon Powershot S200 Screen Replacement: step 11, image 2 of 2
    • Slide the rubber digital a/v cap out of place on the front plate.

    Ask FixBot

    Add Comment

  12. Canon Powershot S200 Screen Replacement: step 12, image 1 of 1
    • Remove the front face by sliding it off.

    Ask FixBot

    Add Comment

  13. Canon Powershot S200 Screen Replacement: step 13, image 1 of 1
    • Remove the rubber seal that covers the right side of the viewfinder.

    Ask FixBot

    Add Comment

  14. Canon Powershot S200 Screen Replacement: step 14, image 1 of 1
    • Remove the two 3.9mm screws that hold the laminated copper sheet.

    Ask FixBot

    Add Comment

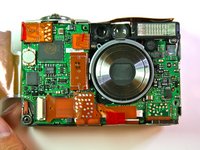
  15. Canon Powershot S200 Screen Replacement: step 15, image 1 of 2 Canon Powershot S200 Screen Replacement: step 15, image 2 of 2
    • Remove the wire connections that connect along the bottom of the motherboard.

    Ask FixBot

    Add Comment

  16. Canon Powershot S200 Screen Replacement: step 16, image 1 of 1
    • Remove the single 3.8mm screw that is on the motherboard.

    Ask FixBot

    Add Comment

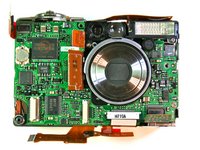
  17. Canon Powershot S200 Screen Replacement: step 17, image 1 of 1
    • Remove the motherboard from the main frame of the camera body.

    Ask FixBot

    Add Comment

  18. Canon Powershot S200 Screen Replacement, Screen: step 18, image 1 of 1
    • After completing the removal of the motherboard, remove the tripod mounting screws (3.4mm) on the left side

    Ask FixBot

    Add Comment

  19. Canon Powershot S200 Screen Replacement: step 19, image 1 of 1
    • Carefully pry the left side of the housing plate from the bottom of the tripod mounting plate, releasing it from the two alignment pegs next to the screws

    Ask FixBot

    Add Comment

  20. Canon Powershot S200 Screen Replacement: step 20, image 1 of 1
    • Lift the left side of the tripod mounting plate towards you, lift free the mounting plate from the rest of the assembly

    • Be careful because there are still wire connections attached to the mounting plate which you don't want to remove

    Ask FixBot

    Add Comment

  21. Canon Powershot S200 Screen Replacement: step 21, image 1 of 1
    • Remove the 2.1mm screws from the bottom and top of the screen connecting it to the housing plate

    Ask FixBot

    Add Comment

  22. Canon Powershot S200 Screen Replacement: step 22, image 1 of 1
    • Unsolder the four points at the top of the screen with a soldering iron

    Ask FixBot

    Add Comment

Conclusion

To reassemble your device, follow these instructions in reverse order.

Cancel: I did not complete this guide.

One other person completed this guide.

Anh

Member since: 04/13/11

148 Reputation

1 Guide authored

Team

Cal Poly, Team 20-70, Walters Spring 2011 Member of Cal Poly, Team 20-70, Walters Spring 2011

CPSU-WALTERS-S11S20G70

5 Members

4 Guides authored

0 Guide Comments

Add Comment

View Statistics:

Past 24 Hours: 2

Past 7 Days: 6

Past 30 Days: 28

All Time: 1,947