Free Shipping on Domestic Orders $75+

Canon PowerShot SX600 HS Main Board Processor Replacement

What you need

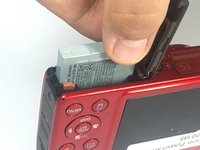
  1. Canon PowerShot SX600 HS Main Board Processor Replacement, Battery: step 1, image 1 of 1
    • To remove the battery, locate the battery cover on the bottom of the camera.

    • Using your thumb, press down on the cover and slide it outwards.

    Ask FixBot
  2. Canon PowerShot SX600 HS Main Board Processor Replacement: step 2, image 1 of 1
    • Depress the orange lever holding the battery in place to unlock it.

    Ask FixBot
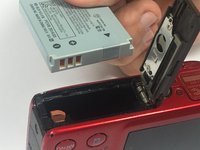
  3. Canon PowerShot SX600 HS Main Board Processor Replacement: step 3, image 1 of 2 Canon PowerShot SX600 HS Main Board Processor Replacement: step 3, image 2 of 2
    • Use your fingers to remove the battery.

    • Be sure to remember the alignment of the nodes for reassembly.

    Ask FixBot
  4. Canon PowerShot SX600 HS Main Board Processor Replacement, Power and Shutter Buttons: step 4, image 1 of 1
    • Use a #000 Phillips screwdriver to unscrew the four 4mm screws located on the sides of the camera (2 for each side).

    Ask FixBot
  5. Canon PowerShot SX600 HS Main Board Processor Replacement: step 5, image 1 of 1
    • Unscrew the four 2mm located on the bottom of the camera using a Phillips #000 screwdriver.

    Ask FixBot
  6. Canon PowerShot SX600 HS Main Board Processor Replacement: step 6, image 1 of 1
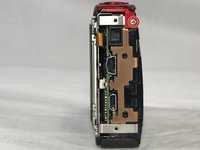
    • Use a plastic opening tool to loosen and remove both the front and back plates of the camera, as well as the two side pieces.

    Ask FixBot
  7. Canon PowerShot SX600 HS Main Board Processor Replacement: step 7, image 1 of 2 Canon PowerShot SX600 HS Main Board Processor Replacement: step 7, image 2 of 2
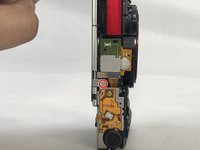
    • Unscrew the three 2mm screws attaching the piece to the camera frame with a #000 Phillips screwdriver.

    Ask FixBot
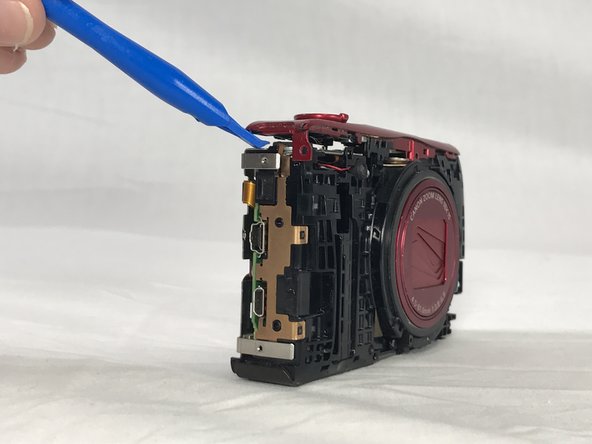
  8. Canon PowerShot SX600 HS Main Board Processor Replacement: step 8, image 1 of 1
    • Use an opening tool to gently remove the power and shutter button assembly from the frame.

    Ask FixBot
  9. Canon PowerShot SX600 HS Main Board Processor Replacement, Display Screen: step 9, image 1 of 2 Canon PowerShot SX600 HS Main Board Processor Replacement, Display Screen: step 9, image 2 of 2
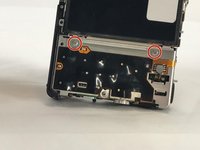
    • Unscrew the 2mm screw connections of the main board protector from the camera frame using a #000 Phillips head screwdriver (2 on front, 1 on top)

    Ask FixBot
  10. Canon PowerShot SX600 HS Main Board Processor Replacement: step 10, image 1 of 1
    • Use a Phillips #000 screwdriver to unscrew the 4mm screw.

    Ask FixBot
  11. Canon PowerShot SX600 HS Main Board Processor Replacement: step 11, image 1 of 1
    Tool used on this step:
    Tweezers
    $4.99
    Buy
    • Use a pair of tweezers to remove the no-fuss connector from its holder.

    Ask FixBot
  12. Canon PowerShot SX600 HS Main Board Processor Replacement: step 12, image 1 of 1
    • Gently lift the protector from the frame.

    Ask FixBot
  13. Canon PowerShot SX600 HS Main Board Processor Replacement: step 13, image 1 of 1
    • Lift the LCD screen ZIF connector tab and remove the ribbon cable.

    • Detach the no-fuss connector.

    • Lift the screen from its holder.

    Ask FixBot
  14. Canon PowerShot SX600 HS Main Board Processor Replacement, Flash Assembly: step 14, image 1 of 1
    • Unplug the assembly from the main no-fuss connector.

    Ask FixBot
  15. Canon PowerShot SX600 HS Main Board Processor Replacement: step 15, image 1 of 1
    • Unplug the assembly from its flat-top connection.

    Ask FixBot
  16. Canon PowerShot SX600 HS Main Board Processor Replacement: step 16, image 1 of 1
    • Use a #000 Phillips screwdriver to remove the three 4mm screws that hold the assembly to the frame.

    Ask FixBot
  17. Canon PowerShot SX600 HS Main Board Processor Replacement: step 17, image 1 of 1
    • Gently lift the assembly out of its place.

    Ask FixBot
  18. Canon PowerShot SX600 HS Main Board Processor Replacement, Lens Piece: step 18, image 1 of 1
    • Remove the 4 remaining 4mm screws in the frame with a Phillips #000 screwdriver.

    Ask FixBot
  19. Canon PowerShot SX600 HS Main Board Processor Replacement: step 19, image 1 of 2 Canon PowerShot SX600 HS Main Board Processor Replacement: step 19, image 2 of 2
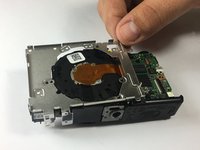
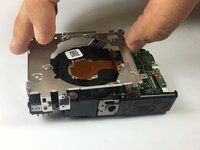
    • Gently remove the frame. (Make sure to have a firm hold on the rest of the camera at this point)

    • The camera will be loose after this point. Be sure to have a firm hold on it.

    Ask FixBot
  20. Canon PowerShot SX600 HS Main Board Processor Replacement: step 20, image 1 of 1
    • Unplug the ZIF connection between the lens to the main processor.

    Ask FixBot
  21. Canon PowerShot SX600 HS Main Board Processor Replacement: step 21, image 1 of 1
    • Detach the flat-top connection.

    Ask FixBot
  22. Canon PowerShot SX600 HS Main Board Processor Replacement, Main Board Processor: step 22, image 1 of 1
    • Unplug the ZIF connection on the processor.

    Ask FixBot
  23. Canon PowerShot SX600 HS Main Board Processor Replacement: step 23, image 1 of 1
    • Use a Phillips #000 screwdriver to unscrew the 2mm screw from the processor.

    Ask FixBot
  24. Canon PowerShot SX600 HS Main Board Processor Replacement: step 24, image 1 of 1
    • Use a plastic opening tool to gently lift the processor out of the holder.

    Ask FixBot
Conclusion

To reassemble your device, follow these instructions in reverse order.

Scott Childress

Member since: 02/15/17

752 Reputation

3 Guides authored

Team

USF Tampa, Team S6-G4, Lacy Spring 2017 Member of USF Tampa, Team S6-G4, Lacy Spring 2017

USFT-LACY-S17S6G4

3 Members

9 Guides authored

1 Guide Comment

Note re Step 13: the cable has a 'click' type lock (you can see it as a narrow brown plastic strip on Step 12 and 13 pics). This lock can just about be disengaged with care before extracting the cable, I didn't, I just released it with tweezers as shown, and it didn't cause a problem. However, reversing Step 11 is very very difficult and you MUST have the click lock thing open before you begin (it's easy to see and understand when the switch plate is off , look at Step 12). You can then (just about!) re-insert the cable, and through a hole in the metal frame, just kind of below where the shutter button lies, flip the lock back down to hold the cable (use a tiny screwdriver or similar). It took me an hour to get the cable back in...so good luck with this part!

Tony J - Reply Share

Add Comment

View Statistics:

Past 24 Hours: 0

Past 7 Days: 3

Past 30 Days: 41

All Time: 937