Introduction
When your lens isn't working, your camera isn't working. Follow this guide to fix your troubles and get back to taking photographs.
What you need
-
-
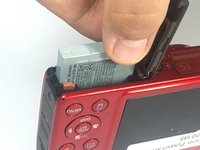
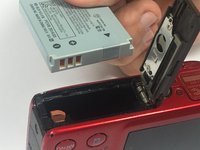
To remove the battery, locate the battery cover on the bottom of the camera.
-
Using your thumb, press down on the cover and slide it outwards.
 Ask FixBot
-
-
-
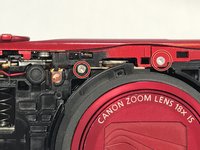
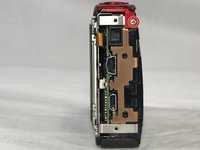
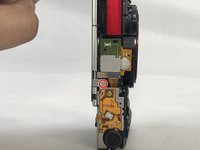
Use a #000 Phillips screwdriver to unscrew the four 4mm screws located on the sides of the camera (2 for each side).
-
-
-
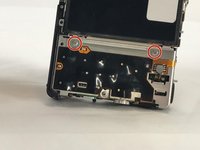
Unscrew the four 2mm located on the bottom of the camera using a Phillips #000 screwdriver.
-
-
-
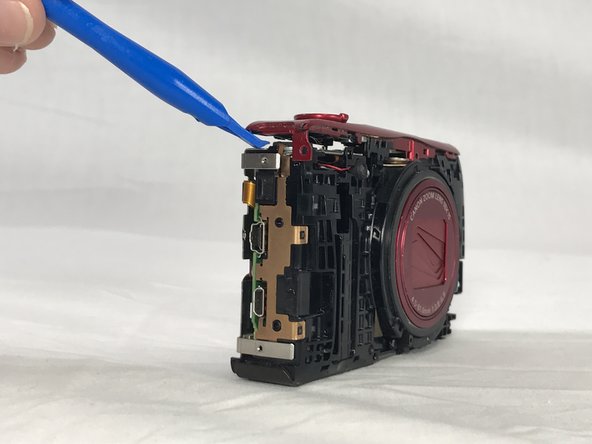
Use a plastic opening tool to loosen and remove both the front and back plates of the camera, as well as the two side pieces.
-
-
-
Unscrew the three 2mm screws attaching the piece to the camera frame with a #000 Phillips screwdriver.
-
-
-
-
Use an opening tool to gently remove the power and shutter button assembly from the frame.
-
-
-
Unscrew the 2mm screw connections of the main board protector from the camera frame using a #000 Phillips head screwdriver (2 on front, 1 on top)
-
-
Tool used on this step:Tweezers$4.99
-
Use a pair of tweezers to remove the no-fuss connector from its holder.
-
-
-
Lift the LCD screen ZIF connector tab and remove the ribbon cable.
-
Detach the no-fuss connector.
-
Lift the screen from its holder.
-
-
-
Use a #000 Phillips screwdriver to remove the three 4mm screws that hold the assembly to the frame.
-
-
-
Remove the 4 remaining 4mm screws in the frame with a Phillips #000 screwdriver.
-
-
-
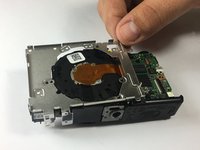
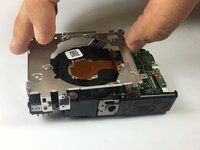
Gently remove the frame. (Make sure to have a firm hold on the rest of the camera at this point)
-










To reassemble your device, follow these instructions in reverse order.
Cancel: I did not complete this guide.
10 other people completed this guide.

Team

USF Tampa, Team S6-G4, Lacy Spring 2017 Member of USF Tampa, Team S6-G4, Lacy Spring 2017
USFT-LACY-S17S6G4
3 Members
9 Guides authored
6 Guide Comments
Does anyone know where can I get the internal connections for the focus motor? I mistakenly tore a cable.
I completed the disassembly. I did not replace zoom lens assembly however. I could not find a new zoom lens except some offers for old cameras that I could disassemble. In the meantime I was checking the Canon SX600 HS manual and I think I missed some procedures to try as to why camera was not taking pictures. So I decided to re-assemble my camera. BUT AT STEPS 11 AND 12 I GOT STUCK. I have not been able to re-connect the ribbon. At one point I had it re-connected but could not put the frame piece back without dis-connecting the ribbon again. So I dis-connected ribbon. But now I cannot get the ribbon back into connector no matter how hard I try. Is there anyone available with the necessary skills and microscopic tools to see what micro-damage I did to the connector? I live in San Diego. HELP!!
To continue: I got up in the middle of the night to give the ribbon another try. I forced it and sure enough—I tore the ribbon. Ribbon problem now behind me. Now on to Plan B. I need another frame/ribbon combo. The tiny frame is the one on the back of the camera next to the screen, which is underneath all the buttons. It registers all the fingering. Next time, I am going to cut a bigger notch on the side of the frame so I can get more length of ribbon to reach the connector underneath—if I have to. I notice up above that Misham Faith. S also tore a ribbon. Did you ever resolve that problem, Misham?
i also have the same problem with ribbon. step 11 on re-assembling is impossible to do
To put that back together, you have to take the piece of circuitry that the buttons are on off of the metal piece. The metal frame has about 4 tiny tabs sticking up that make it easy to pop the button assembly off. After you get that apart, plug the ribbon in, and then screw the metal frame in place. After that flip the button assembly un over the metal frame and pop it in place.
