Free Shipping on Domestic Orders $75+

Canon PowerShot SX520 HS Lens Replacement

What you need

    1. Canon PowerShot SX520 HS Lens Replacement, Battery: step 1, image 1 of 1
      • Using your fingers, slide the battery compartment door to the right until it unlocks.

      Ask FixBot

      Add Comment

    2. Canon PowerShot SX520 HS Lens Replacement: step 2, image 1 of 1
      • Rotate the door along hinges to open.

      • Take out the battery with your fingers.

      Ask FixBot

      Add Comment

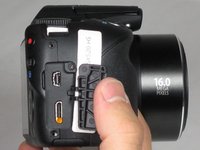
    1. Canon PowerShot SX520 HS Lens Replacement, Back Face: step 3, image 1 of 3 Canon PowerShot SX520 HS Lens Replacement, Back Face: step 3, image 2 of 3 Canon PowerShot SX520 HS Lens Replacement, Back Face: step 3, image 3 of 3
      • Remove 2-3.4 mm screws that secure the back panel using a Phillips #000 screwdriver.

      • Remove 4-4 mm screws on the left and right sides of the camera using a Phillips #000 screwdriver.

      Ask FixBot

      Add Comment

    2. Canon PowerShot SX520 HS Lens Replacement: step 4, image 1 of 1
      • Remove 2-4 mm screws that secure the bottom of the camera using a Phillips #000 screwdriver.

      Ask FixBot

      Add Comment

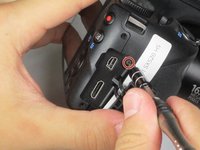
    3. Canon PowerShot SX520 HS Lens Replacement: step 5, image 1 of 2 Canon PowerShot SX520 HS Lens Replacement: step 5, image 2 of 2
      • Pull back the rubber facing to access the A/V and HDMI output compartment.

      • Remove 1-3.4mm screw inside the compartment using a Phillips #000 screwdriver.

      Ask FixBot

      Add Comment

    4. Canon PowerShot SX520 HS Lens Replacement: step 6, image 1 of 1
      • Once all screws are removed, pull the back facing off with your fingers.

      Ask FixBot

      Add Comment

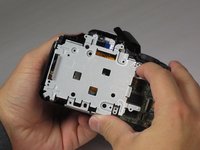
    1. Canon PowerShot SX520 HS Lens Replacement, LCD Screen: step 7, image 1 of 1
      • Remove 3-4.4 mm screws that secure the small metal plate using a Phillips #000 screwdriver.

      Ask FixBot

      Add Comment

    2. Canon PowerShot SX520 HS Lens Replacement: step 8, image 1 of 1
      • Carefully pop out the LCD screen with your fingers.

      Ask FixBot

      Add Comment

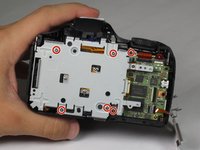
    1. Canon PowerShot SX520 HS Lens Replacement, Metal Plate: step 9, image 1 of 3 Canon PowerShot SX520 HS Lens Replacement, Metal Plate: step 9, image 2 of 3 Canon PowerShot SX520 HS Lens Replacement, Metal Plate: step 9, image 3 of 3
      • Remove 6-4.4 mm screws that secure the metal cover using a Phillips #000 screwdriver.

      • Remove 2-2.5 mm screws that secure the back panel using a Phillips #000 screwdriver.

      • After all 8 screws are removed, pull the metal plate out with your fingers.

      Ask FixBot

      Add Comment

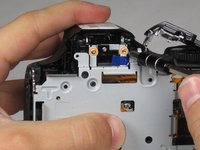
    1. Canon PowerShot SX520 HS Lens Replacement, Lens: step 10, image 1 of 1
      • Unlcip the large cable by pulling up on the metal part with your finger.

      • Slide out the 2 smaller cables with your fingers.

      Ask FixBot

      Add Comment

    2. Canon PowerShot SX520 HS Lens Replacement: step 11, image 1 of 1
      • Lift up the lens by grabbing the sides with your fingers.

      Ask FixBot

      Add Comment

Conclusion

To reassemble your device, follow these instructions in reverse order.

Cancel: I did not complete this guide.

6 other people completed this guide.

Lisa Choe

Member since: 09/22/15

460 Reputation

3 Guides authored

Team

Baylor, Team 4-4, Williams Fall 2015 Member of Baylor, Team 4-4, Williams Fall 2015

BU-WILLIAMS-F15S4G4

4 Members

72 Guides authored

1 Guide Comment

guide is unfinished; dropping to the point of lens group extraction without going on further. I found it, useless.

SimoneGallina - Reply Share

Add Comment

View Statistics:

Past 24 Hours: 2

Past 7 Days: 12

Past 30 Days: 40

All Time: 3,833