Free Shipping on Domestic Orders $75+

Canon PowerShot SX170 IS Disassembly

What you need

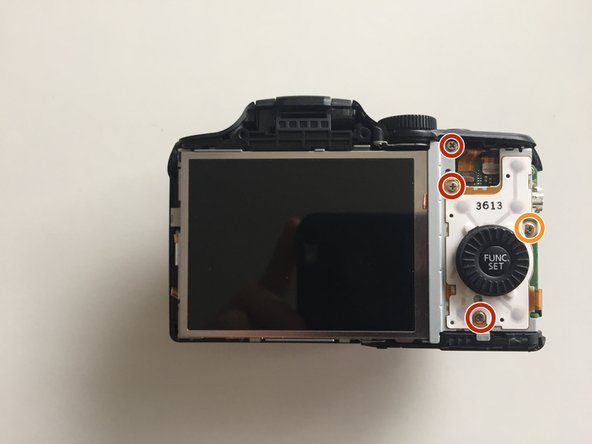
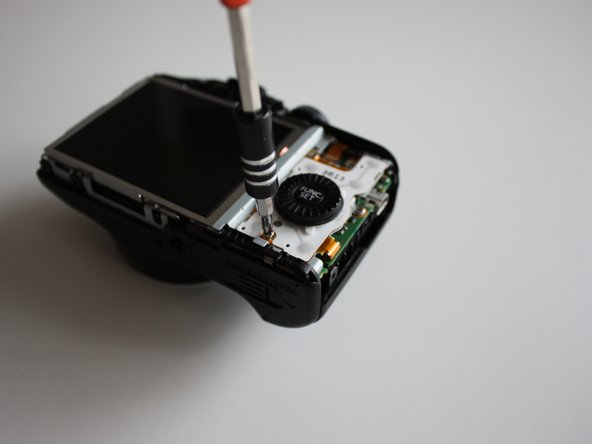
    1. Canon PowerShot SX170 IS Disassembly, Case: step 1, image 1 of 3 Canon PowerShot SX170 IS Disassembly, Case: step 1, image 2 of 3 Canon PowerShot SX170 IS Disassembly, Case: step 1, image 3 of 3
      • Remove the screws that secure the back panel using a Phillips screwdriver.

      • Remove screws on the bottom, left and right sides of the camera using a Phillips screwdriver.

      • Pull back the rubber facing to access the screw.

      Ask FixBot

      Add Comment

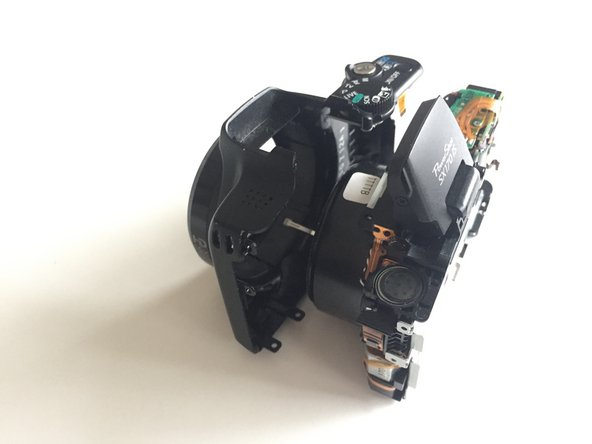
    2. Canon PowerShot SX170 IS Disassembly, Case: step 2, image 1 of 2 Canon PowerShot SX170 IS Disassembly, Case: step 2, image 2 of 2
      • Once all screws are removed, open up the back case with a plastic opener from the left side.

      Ask FixBot

      Add Comment

    3. Canon PowerShot SX170 IS Disassembly, Function Wheel: step 3, image 1 of 3 Canon PowerShot SX170 IS Disassembly, Function Wheel: step 3, image 2 of 3 Canon PowerShot SX170 IS Disassembly, Function Wheel: step 3, image 3 of 3
      • Remove the screws that secure the small metal plate using a Phillips screwdriver.

      • Gently flip up the flex ribbon lock and remove the flex ribbon.

      Ask FixBot

      Add Comment

    4. Canon PowerShot SX170 IS Disassembly, Screen: step 4, image 1 of 3 Canon PowerShot SX170 IS Disassembly, Screen: step 4, image 2 of 3 Canon PowerShot SX170 IS Disassembly, Screen: step 4, image 3 of 3
      • Gently flip up the flex ribbon lock and remove the flex ribbon.

      • Lift the screen to the left.

      Ask FixBot

      Add Comment

    5. Canon PowerShot SX170 IS Disassembly, Front Case: step 5, image 1 of 2 Canon PowerShot SX170 IS Disassembly, Front Case: step 5, image 2 of 2
      • Gently flip up the flex ribbon lock and remove the flex ribbon.

      Ask FixBot

      Add Comment

    6. Canon PowerShot SX170 IS Disassembly, Front Case: step 6, image 1 of 3 Canon PowerShot SX170 IS Disassembly, Front Case: step 6, image 2 of 3 Canon PowerShot SX170 IS Disassembly, Front Case: step 6, image 3 of 3
      • Remove the screws below the flash and on the left sides of the camera using a Phillips screwdriver.

      • Leave the flash unfolded.

      • Pull the front case forward.

      Ask FixBot

      Add Comment

    7. Canon PowerShot SX170 IS Disassembly, Metal Frame: step 7, image 1 of 3 Canon PowerShot SX170 IS Disassembly, Metal Frame: step 7, image 2 of 3 Canon PowerShot SX170 IS Disassembly, Metal Frame: step 7, image 3 of 3
      • Remove all marked screws using a Phillips screwdriver.

      • Remove the small metal part.

      Ask FixBot

      Add Comment

    8. Canon PowerShot SX170 IS Disassembly, Cable: step 8, image 1 of 3 Canon PowerShot SX170 IS Disassembly, Cable: step 8, image 2 of 3 Canon PowerShot SX170 IS Disassembly, Cable: step 8, image 3 of 3
      • Remove the microphone.

      • Remove the flex ribbon.

      • Remove the flash switch.

      Ask FixBot

      Add Comment

    9. Canon PowerShot SX170 IS Disassembly, Metal Frame: step 9, image 1 of 3 Canon PowerShot SX170 IS Disassembly, Metal Frame: step 9, image 2 of 3 Canon PowerShot SX170 IS Disassembly, Metal Frame: step 9, image 3 of 3
      • Remove the screw using a Phillips screwdriver.

      • Lift the flash a little to remove the metal frame.

      Ask FixBot

      Add Comment

    10. Canon PowerShot SX170 IS Disassembly, Lens Cable: step 10, image 1 of 3 Canon PowerShot SX170 IS Disassembly, Lens Cable: step 10, image 2 of 3 Canon PowerShot SX170 IS Disassembly, Lens Cable: step 10, image 3 of 3
      • Gently flip up the flex ribbon lock and remove the flex ribbon.

      Ask FixBot

      Add Comment

    11. Canon PowerShot SX170 IS Disassembly, Lens Cable: step 11, image 1 of 2 Canon PowerShot SX170 IS Disassembly, Lens Cable: step 11, image 2 of 2
      • Remove flex ribbon and light sensor.

      Ask FixBot

      Add Comment

    12. Canon PowerShot SX170 IS Disassembly, Lens Screws: step 12, image 1 of 3 Canon PowerShot SX170 IS Disassembly, Lens Screws: step 12, image 2 of 3 Canon PowerShot SX170 IS Disassembly, Lens Screws: step 12, image 3 of 3
      • Remove the screws using a Phillips screwdriver.

      • Lift up the back case.

      Ask FixBot

      Add Comment

    13. Canon PowerShot SX170 IS Disassembly, Lens and Sensor: step 13, image 1 of 2 Canon PowerShot SX170 IS Disassembly, Lens and Sensor: step 13, image 2 of 2
      • Now you can clean the lens.

      Ask FixBot

      Add Comment

Conclusion

To reassemble your device, follow these instructions in reverse order.

Cancel: I did not complete this guide.

JockiToru

Member since: 12/30/20

217 Reputation

1 Guide authored

3 Guide Comments

Hello JockiToru! Thanks for the guide.

I took the liberty to correct 'lense' to 'lens'... You can have many lenses, but only one lens!

Also 'bellow' is an air pumping device. I suspect you meant 'lower', so the word is 'below'.

Again, thanks and I will be testing you disassembly, as there seems to be an annoying small insect in my camera.

Jon - Reply Share

Hello Jon,

thank you very much for your feedback. I hope you were able to remove that insect.

JockiToru - Reply Share

Thank you for the guide! my SX170 is taking shots properly again, had to clean the lens after it was kept for a long time, it saved me the cost to bring it to a shop to have it cleaned.

Benedick Brian Cartera - Reply Share

Add Comment

View Statistics:

Past 24 Hours: 5

Past 7 Days: 22

Past 30 Days: 87

All Time: 1,773