Free Shipping on Domestic Orders $75+

Canon PowerShot SD500 Digital ELPH Button Contact Panel Replacement

What you need

  1. Canon PowerShot SD500 Digital ELPH Button Contact Panel Replacement, Battery: step 1, image 1 of 1
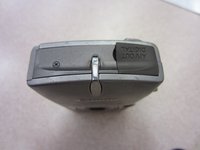
    • Slide open the battery cover.

    • Push the small orange tab to the side so the battery can be removed.

    Ask FixBot

    Add Comment

  2. Canon PowerShot SD500 Digital ELPH Button Contact Panel Replacement: step 2, image 1 of 2 Canon PowerShot SD500 Digital ELPH Button Contact Panel Replacement: step 2, image 2 of 2
    • Slide the battery out of the battery compartment.

    Ask FixBot

    Add Comment

  3. Canon PowerShot SD500 Digital ELPH Button Contact Panel Replacement, Front and Rear Casing: step 3, image 1 of 2 Canon PowerShot SD500 Digital ELPH Button Contact Panel Replacement, Front and Rear Casing: step 3, image 2 of 2
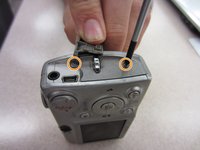
    • Two Phillips screws need to be removed using a #00 Phillips screwdriver. The upper screw is under the USB port cover, which can simply be pulled away gently from the casing. the lower screw is visible on the panel.

    • The screws are different sizes. The .125 inch screw is located under the USB port cover. The 0.85 inch screw goes in the lower hole on the panel.

    • When looking at the back of the camera, these two screws are on the right panel of the camera.

    Ask FixBot

    Add Comment

  4. Canon PowerShot SD500 Digital ELPH Button Contact Panel Replacement: step 4, image 1 of 1
    • Remove the right side cover from the camera casing.

    Ask FixBot

    Add Comment

  5. Canon PowerShot SD500 Digital ELPH Button Contact Panel Replacement: step 5, image 1 of 1
    • Remove a .07 inch Phillips screw using a #00 Phillips screwdriver.

    Ask FixBot

    Add Comment

  6. Canon PowerShot SD500 Digital ELPH Button Contact Panel Replacement: step 6, image 1 of 1
    • Remove two .085 inch Phillips screws from the left side of the camera using a #00 Philips screwdriver.

    Ask FixBot

    Add Comment

  7. Canon PowerShot SD500 Digital ELPH Button Contact Panel Replacement: step 7, image 1 of 1
    • Remove the left side cover from the camera.

    Ask FixBot

    Add Comment

  8. Canon PowerShot SD500 Digital ELPH Button Contact Panel Replacement: step 8, image 1 of 1
    • Remove three .15 inch Phillips screws from the bottom of the camera using a #00 Phillips screwdriver.

    Ask FixBot

    Add Comment

  9. Canon PowerShot SD500 Digital ELPH Button Contact Panel Replacement: step 9, image 1 of 2 Canon PowerShot SD500 Digital ELPH Button Contact Panel Replacement: step 9, image 2 of 2
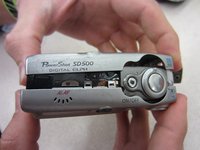
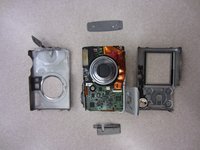
    • Once the casing is unscrewed, hold the camera with one side facing down, and lift the opposite face of the casing to open it.

    • Remove the internal camera components and layout out all pieces on a clean surface.

    • The front and back cover may require gentle rocking to remove.

    Ask FixBot

    Add Comment

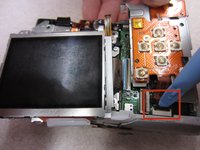
  10. Canon PowerShot SD500 Digital ELPH Button Contact Panel Replacement, Button Contact Panel: step 10, image 1 of 1
    • Carefully wedge the pry tool under the ribbon in the ribbon gate.

    • Gently remove the ribbon from the ribbon gate by pulling it away from the gate with the pry tool.

    • Be careful not to damage the ribbon.

    Ask FixBot

    Add Comment

  11. Canon PowerShot SD500 Digital ELPH Button Contact Panel Replacement: step 11, image 1 of 1
    • Gently press the ribbon back to get access to a Phillips screw behind it.

    • Be careful not to damage the ribbon.

    • Unscrew two .125 inch long Phillips screws using a #00 Philips screwdriver.

    Ask FixBot

    Add Comment

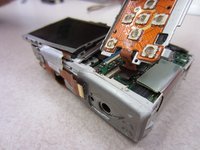
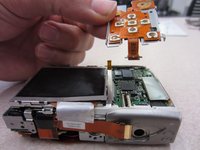
  12. Canon PowerShot SD500 Digital ELPH Button Contact Panel Replacement: step 12, image 1 of 3 Canon PowerShot SD500 Digital ELPH Button Contact Panel Replacement: step 12, image 2 of 3 Canon PowerShot SD500 Digital ELPH Button Contact Panel Replacement: step 12, image 3 of 3
    • Remove the ribbon with a pry tool by gently pulling it out of the ribbon gate tab.

    • Be careful not to damage the ribbon.

    • Pull the button board away from the rest of the camera.

    Ask FixBot

    Add Comment

Conclusion

To reassemble your device, follow these instructions in reverse order.

Cancel: I did not complete this guide.

Taylor Shields

Member since: 10/13/14

861 Reputation

8 Guides authored

Team

Clemson, Team 2-1, Benson Fall 2014 Member of Clemson, Team 2-1, Benson Fall 2014

CLEM-BENSON-F14S2G1

4 Members

12 Guides authored

0 Guide Comments

Add Comment

View Statistics:

Past 24 Hours: 1

Past 7 Days: 2

Past 30 Days: 26

All Time: 485