Free Shipping on Domestic Orders $75+

Canon PowerShot SD1100 IS Function Buttons Replacement

What you need

    1. Canon PowerShot SD1100 IS Function Buttons Replacement, Front and Rear Cover: step 1, image 1 of 2 Canon PowerShot SD1100 IS Function Buttons Replacement, Front and Rear Cover: step 1, image 2 of 2
      • Remove wrist strap and battery.

      Ask FixBot

      Add Comment

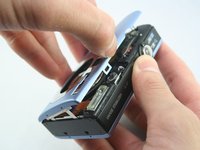
    2. Canon PowerShot SD1100 IS Function Buttons Replacement: step 2, image 1 of 3 Canon PowerShot SD1100 IS Function Buttons Replacement: step 2, image 2 of 3 Canon PowerShot SD1100 IS Function Buttons Replacement: step 2, image 3 of 3
      • Remove 2 screws from each side of the camera (4 total, 0.102 in).

      • Remove 2 screws from the bottom on the camera (0.138 in).

      • Do not mix the 4 side screws with the 2 bottoms ones; they are different sizes.

      Ask FixBot

      Add Comment

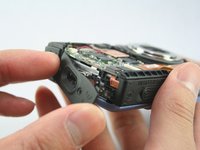
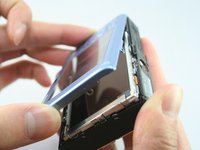
    3. Canon PowerShot SD1100 IS Function Buttons Replacement: step 3, image 1 of 3 Canon PowerShot SD1100 IS Function Buttons Replacement: step 3, image 2 of 3 Canon PowerShot SD1100 IS Function Buttons Replacement: step 3, image 3 of 3
      • Gently pull off the front cover.

      • The plate on the side should come off.

      • Gently pull off the back cover.

      Ask FixBot

      Add Comment

    4. Canon PowerShot SD1100 IS Function Buttons Replacement: step 4, image 1 of 1
      • The cases should now be removed.

      Ask FixBot

      Add Comment

    1. Canon PowerShot SD1100 IS Function Buttons Replacement, Top Button Assembly: step 5, image 1 of 1
      • Use the spudger to disconnect the black tab.

      Ask FixBot

      Add Comment

    2. Canon PowerShot SD1100 IS Function Buttons Replacement: step 6, image 1 of 1
      • Gently pull off the shutter button assembly.

      Ask FixBot

      Add Comment

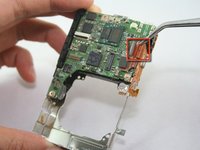
    3. Canon PowerShot SD1100 IS Function Buttons Replacement: step 7, image 1 of 1
      Tool used on this step:
      Tweezers
      $4.99
      Buy
      • Use the tweezers to disconnect the microphone cable.

      Ask FixBot

      Add Comment

    4. Canon PowerShot SD1100 IS Function Buttons Replacement: step 8, image 1 of 1
      • The shutter button assembly should now be removed.

      Ask FixBot

      Add Comment

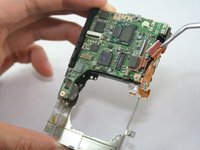
    1. Canon PowerShot SD1100 IS Function Buttons Replacement, Function Buttons: step 9, image 1 of 1
      • With the spudger, flip up the black tab on the main ribbon.

      Ask FixBot

      Add Comment

    2. Canon PowerShot SD1100 IS Function Buttons Replacement: step 10, image 1 of 2 Canon PowerShot SD1100 IS Function Buttons Replacement: step 10, image 2 of 2
      • Gently pull straight out on the ribbon to disconnect it from the logic board.

      Ask FixBot

      Add Comment

    3. Canon PowerShot SD1100 IS Function Buttons Replacement: step 11, image 1 of 1
      • By hand, gently unfold the function button board and lift it off the frame.

      Ask FixBot

      Add Comment

    4. Canon PowerShot SD1100 IS Function Buttons Replacement: step 12, image 1 of 1
      • Congratulations! The function button board can now be replaced.

      Ask FixBot

      Add Comment

Conclusion

To reassemble your device, follow these instructions in reverse order.

Cancel: I did not complete this guide.

Wyatt Chan

Member since: 01/05/11

235 Reputation

2 Guides authored

Team

Cal Poly, Team 3-32, Regan Winter 2011 Member of Cal Poly, Team 3-32, Regan Winter 2011

CPSU-REGAN-W11S3G32

3 Members

96 Guides authored

0 Guide Comments

Add Comment

View Statistics:

Past 24 Hours: 3

Past 7 Days: 4

Past 30 Days: 36

All Time: 2,452